4
X101T/X103T Assembly Guide
Once the cables are connected you can place the IR board back inside the housing
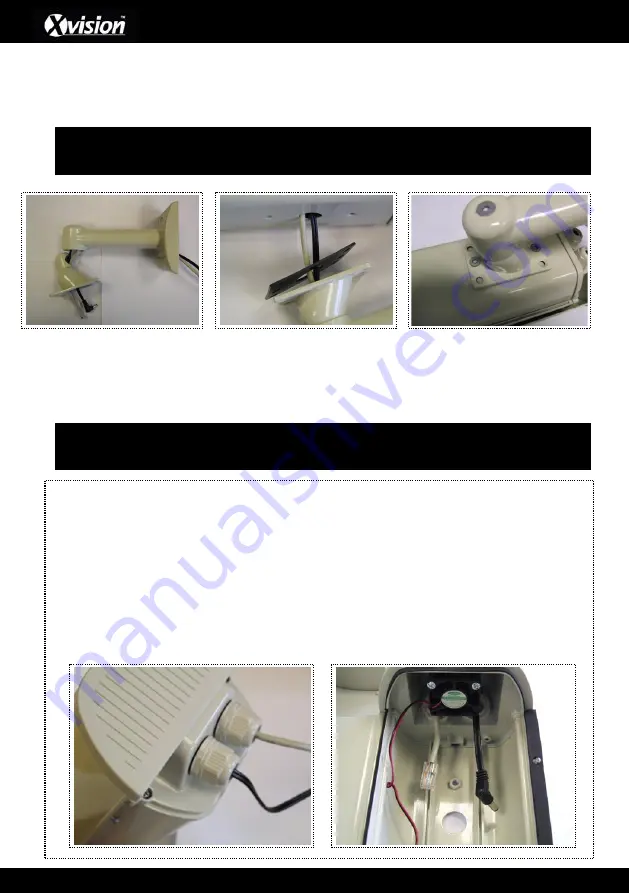
You can now begin to attach the housing bracket; thread the TP123500 power socket and
your network/CAT5 cable through the HCW300B (see images below
Once you have threaded the 2 cables through the bracket, the cables can then also be
threaded through the rubber seal and the hole at the bottom of the HCW300IRA.
You can now secure the HCW300B to the HCW300IRA using the supplier screws with the
HCW300B.
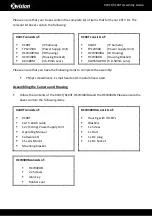
An alternative method of installing the cables can be done via the 2 nozzles at the back of the
HCW300IRA housing:
Remove the cover of one of the two screw-on nozzles at the back of housing (you will
then need to hold the inside of the nozzle whilst unscrewing the back end of the nozzle)
Feed the power supply cable through the nozzle and pierce through the thin black plastic
sheath. Then re-attach the nozzle to the housing as before with the power cable now
running through it. Repeat this process for the other nozzle to install the CAT5/Network
cable. This is detailed in the image below:
Please Note:
Keep the knuckle of the bracket loose before tightening the bracket plate to
the housing, so that you can reach both screws easily
Please Note:
That you can remove the knuckle of the bracket using the supplied Allen key.
This will make it easier to thread you cables through.


