Ice Cube Maker
EN
15
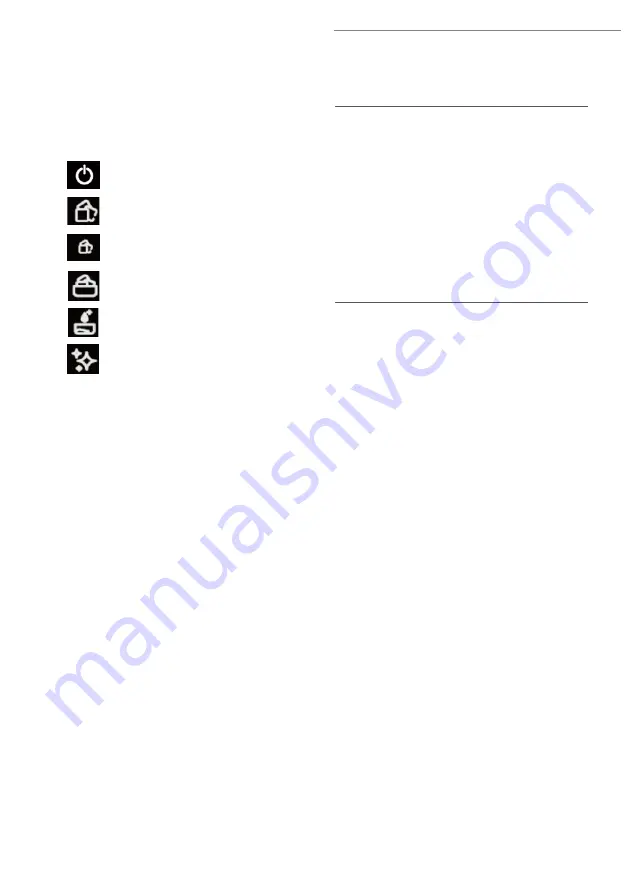
FUNCTIONS
The device can produce ice cubes in two
different sizes and has a cleaning pro-
gramme.
(9)
Lit up: operating
Flashing: on standby
(10)
Large ice cubes
(11)
Small ice cubes
(12)
Ice cube container full
(13)
Fill the water tank
(14)
Cleaning programme
SELECT (15)
Select programme
(ice cubes large / small
– clean device)
ON / OFF (16)
Start / stop
programme
BEFORE INITIAL USE
There may still be some production
residues on the device. To avoid harmful
effects to your health, clean the device
thoroughly before you first use it (see the
"Cleaning and Storage" chapter).
PREPARATION
Please Note!
■
Check that the filter fits securely in the
water tank. If chunks of ice get into
the water system, the device could be
damaged.
■
Never overfill the water tank (note the
MAX
marking)! Water could overflow
and damage the device.
■
Never pour any warm water into the
water tank to prevent damage to the
device.
IMPORTANT!
Once you have transported
and set up the device, the device needs
to rest for approx.
30 minutes
so that the
liquid in the cooling system can settle!
Before you first
use
the device, it should
rest for approx.
2 hours
before it is used.
1. Make sure that the drain plug (
5
) is ful-
ly fitted on the bottom of the device.
2. Always set up the device with a clear
space at the sides (at least 20 cm)
and clear space above it (at least 30
cm) on a flat, solid, heat-resistant and
resilient surface.
3. Open up the lid (
8
) and fill the water
tank (
6
) with water using a measuring
cup or similar vessel. Note the
MAX
marking when you do this!
4. Insert the ice cube container (
7
) into
the device.
5. Flip the lid shut.


