en – Original Instructions
20
Installation, Operation and Maintenance Manual
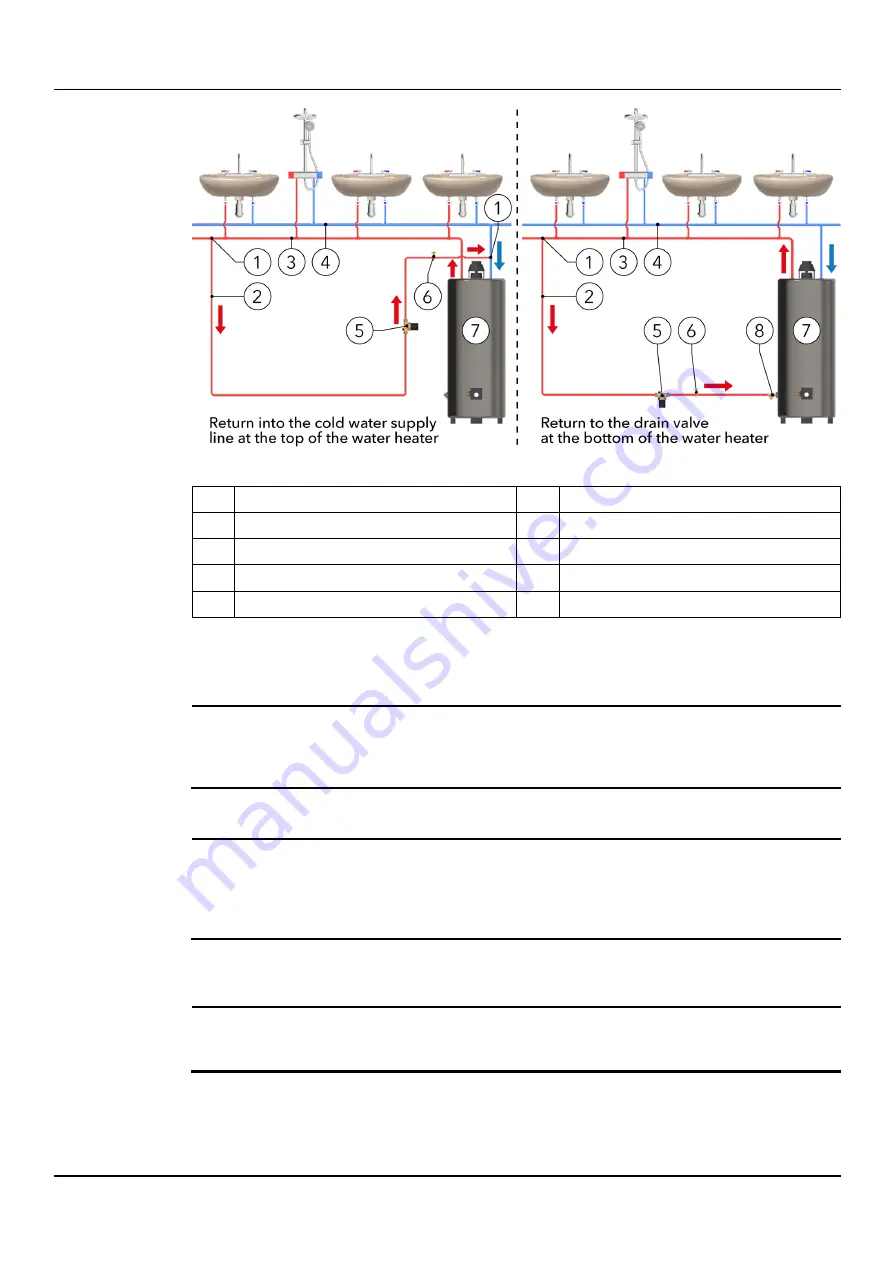
Figure 6
No. Description
No. Description
1 Tee fitting
5 Circulating pump model BU
2 Hot water return (recirculation) line
6 Hose bib
3 Hot water supply line
7 Water heater
4 Cold water supply line
8 “Y” fitting
Autocirc pumps
•
Select the sink under which the Autocirc pump is to be located (the sink where the hot water
takes longest to arrive, which is usually the sink farthest from the water heater).
NOTICE:
At the sink under which the Autocirc pump is installed some "lukewarm" water will appear in the
cold water line due to the transfer of water from the hot side to cold side. This lukewarm water
will, however, disappear in a short time (4-5 seconds) once the cold faucet/taps is opened.
•
Take care that a 115 V / 60 Hz grounded electrical outlet must be available within 6 feet of
the installation site, as the unit is supplied with a 6 feet long, grounded cord.
NOTICE:
The next installation guide applies to most situations where faucets/taps are connected to the
hot and cold water supply lines with braided flexible hose/shut off valve arrangements. If the
under sink arrangement is different (i.e. the risers are hard copper or plastic), then other parts
may be required for the installation.
•
Plan the installation position of the Autocirc pump on the wall under the sink, so that the
existing flexible hoses can be reused and connected to the unit without kinking or straining
(see Figure 7 on page 21). The pump must be installed only in a vertical position as shown.
NOTICE:
Do not fasten the pump to a thin wood panel wall as this might create a vibration noise when the
pump is operating.
•
Measure the distance between the connections of the pump outlets and the faucets/taps and
purchase two stainless steel flexible hoses (1/2" — 9/16”) in the length required. If felt
necessary, replace also the existing flexible hoses with new stainless steel braided flexible
hoses in the lengths required.


