13
3.2 Titration Unit TitroLine 96
Ü
Press the <FILL/F1> key for five seconds, and keep it depressed until the display shows <<dosing unit
change>>.
!
Caution, place a receptable under the burette tip!
!
While the piston moves up, titration solution will be ejected out of the burette tip.
Ü
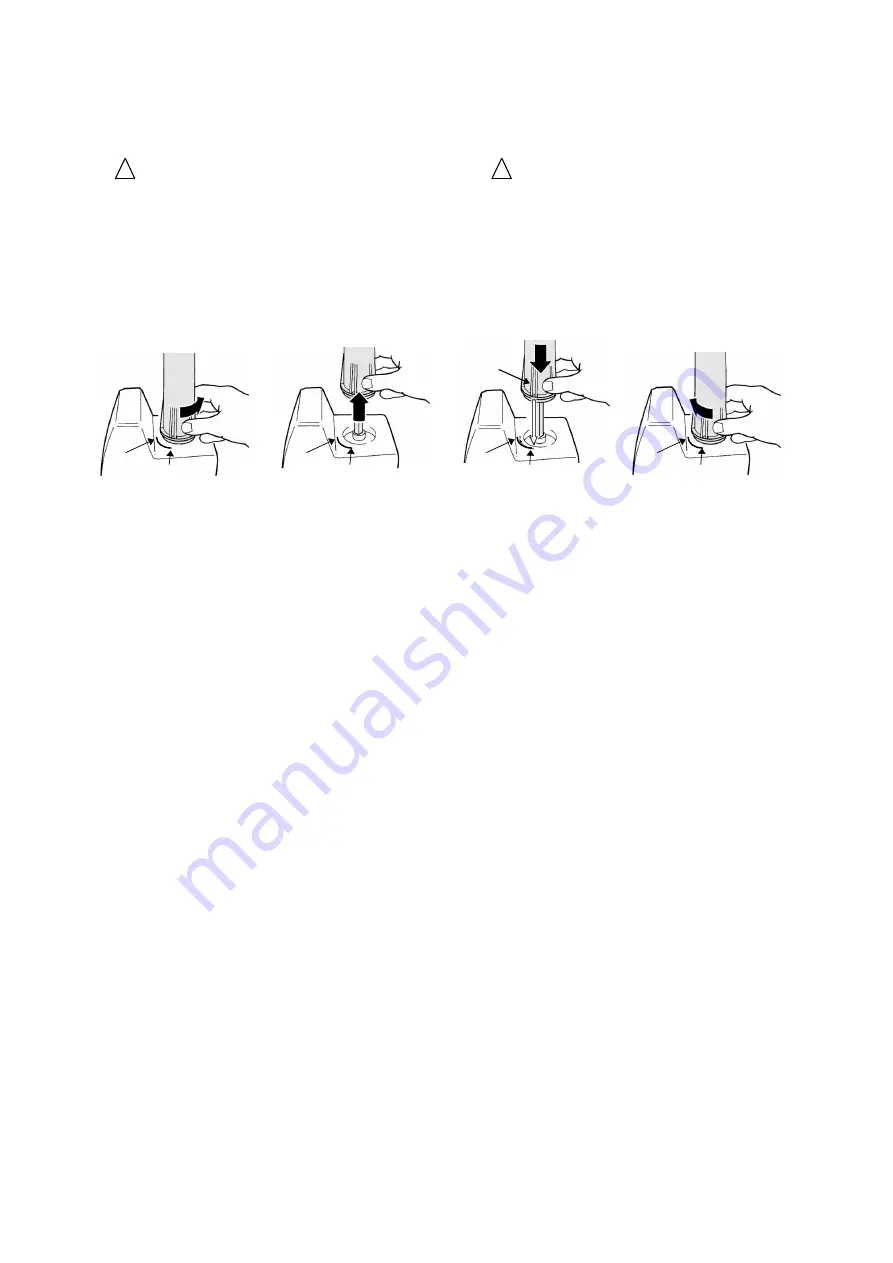
If <<unlock unit!!>> is displayed, the dosing unit has to be unlocked by rotating it to the left (anticlock-
wise,
&
Fig. 7).
Ü
Press <START>. The motor of the titration unit will now automatically move the dosing unit upwards. Af-
ter the display shows <<remove unit / place new unit>> remove the dosing unit (
&
Fig. 8). The process
is completed.
Detaching the dosing unit :
Placement of the dosing unit:
Fig. 7 Unlocking
Fig. 8 Removal
Fig. 9 Placement
Fig. 10 Locking
Pos. 1
Pos. 2
Pos. 1
Pos. 2
Pos. 1
Pos. 2
M
Pos. 1
Pos. 2
Ü
Set on new (inspected, if necessary repaired) dosing unit vertically (
&
Fig. 9) and press the <FILL> key.
The running motor will now pull the dosing unit downwards, while the display requests to align the unit,
„M“ mark to pos. 2. If any noise should become audible at this point, please stop the process immedi-
ately by pressing the <START/STOP> key. The cause of this „rattling noise“ is eliminated by setting the
dosing unit
vertically
on again!
Ü
As soon as the dosing unit moving downwards has reached the edge of the casing, the display requests
you to look the dosing unit manually in the clockwise direction to the right (
&
Fig. 10).
Ü
After locking, start the rinsing and initial-filling process using the <FILL / F1> key.
3.3 Replacing the titration solution
If titration solutions are to be changed, since differing analysis methods are used, one should first consider
whether the time required for frequent changes is not more expensive than the acquisition of another dosing
unit.
As a principle and in the case of all piston burette systems, a substitution of the titration solution by
another one involves mixing and carry-over processes. The reason for this is the dead volume above the
piston in the cylinder and in the hoses. The disturbances to be anticipated are the greater, the more the new
solution differs from the previous type and concentration. In the case of highly different solutions, the first
substitution liquid (rinsing) should be distilled water, and the new titration solution should be filled in only
subsequently.
The possible disturbances are very much different in the individual cases and cannot be predicted without
knowledge of the specific case. Therefore the replacement of titration solutions must always be performed
under the supervision of experts who ensure the correctness of the future analyses.
If the decision to change the titration solution has been made, the first thing to do is to remove the dosing
unit as it is described in chapters 3.1 or 3.2, respectively. If possible, the residue of the titration solution
should be removed by hand by carefully pushing the projecting piston rod towards the hoses. When doing
so, more liquid will leak out of the burette tip, and the residual volume is furthermore reduced. Removing the
old titration solution can be accelerated by moving the piston rod of the dosing unit positioned top down. The
suction hose is then immersed in the new solution or in water as intermediate liquid. By moving the piston
several times in both directions (pumping) the previous liquid is gradually replaced by new
liquid. Subsequently, the dosing unit is set on again according to the description in chapter 3.1 and 3.2.


