Measurement / Operation
NitraVis 70x IQ TS
24
ba75952e03
05/2017
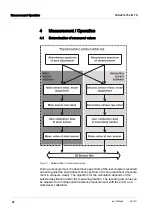
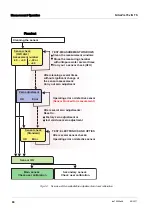
measured value at different points (see section 4.1):
User calibration (see section 4.3.2)
Sensor check/
Zero adjustment
An overview diagram of the calibration procedures can be found on page 4 - 30.
User calibration With a user calibration you compensate for the influence of the test sample. The
user calibration requires a successful
Sensor check (H2O dest.)
and a valid
Zero adjustment
.
We recommend to check the current user calibration against independent
comparison measurements if you suspect a basic change of the characteristics
of the test sample. If the comparison measurements show clear deviations,
these can be compensated by a user calibration.
Recalibration after a
change of the
measuring location
Sensor check (H2O
dest.)
The characteristics of a sensor and thus the measured values provided by it
change in the course of time.
The reasons for this can be the aging of the sensor, or contamination or
mechanical damage of the sensor. Contamination or mechanical damage in the
area of the measuring chamber or on the measurement windows affect the
measured values.
A
Sensor check (H2O dest.)
determines the condition of the sensor. By checking
the sensor with the aid of the
Sensor check (H2O dest.)
you can rapidly see any
changes of the sensor and whether it needs to be cleaned or if any other actions
have to be taken.
A
Sensor check (H2O dest.)
should be carried out twice per year at regular inter
-
vals. An extraordinary
Sensor check (H2O dest.)
should be carried out if you
suspect that the sensor has been damaged such as by mechanical shock, or if
the measured values do not seem plausible.
Each time after the application or measurement location was
changed, we recommend to carry out a
Zero adjustment
(and, if the
Sensor check (H2O dest.)
was not successful, also a
Zero adjust
-
ment
with user calibration if necessary) (With a change of the
Measuring location
setting).
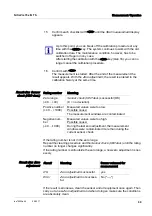
The data of the user calibration are stored in the IQ S
ENSOR
N
ET
con
-
troller and thus assigned to the measuring location (not to the sen
-
sor). The calibration data of the
Zero adjustment
are stored in the
sensor.
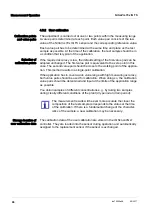
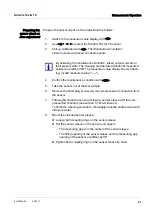
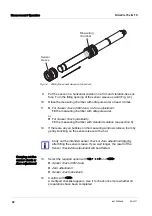
In spectroscopy, even very small contamination that is not visible to
the eye can considerably affect the measured value.
The proper and thorough cleaning of the sensor is the basis for reli
-
able measurement data.
Summary of Contents for WTW NitraVis 700 Series
Page 55: ......

