Installation
System 182-XT-4
3 - 32
ba76027e02
12/2014
General installation
instructions
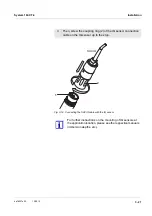
Observe the following points when attaching connecting wires to the
terminal strip
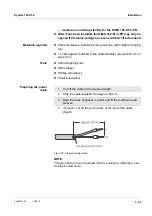
Shorten all wires to be used to the length required for the installation
Always fit all the ends of the wires with wire end sleeves before
connecting them to the terminal strip
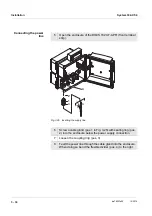
Any wires that are not used and project into the enclosure must be
cut off as closely as possible to the cable gland.
Screw a small cable gland with sealing ring into each remaining free
opening and close it with a blind plug.
WARNING
No free wires must be allowed to project into the enclosure.
Otherwise, there is a danger that areas safe to contact could come
into contact with dangerous voltages. which could result in life
threatening electric shock when working with the DIQ/S 182-XT-4-
PR. Always cut off any wires that are not in use as closely as
possible to the cable gland.
3.8
Connecting the voltage supply
3.8.1
DIQ/S 182-XT-4-PR (line power version)
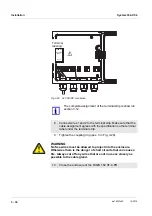
WARNING
If the power supply is incorrectly connected, it may represent a
danger to life from electric shock. Pay attention to the following
points during installation:
The DIQ/S 182-XT-4-PR must only be connected by a qualified
electrician.
The DIQ/S 182-XT-4-PR must only be connected in a voltage-
free condition.
The power supply must fulfill the specifications given on the
nameplate and in chapter 9 T
.
A switch or circuit breaker must be provided in the building
installation as an interrupt facility for the DIQ/S 182-XT-4-PR.
The interrupt facility must be
– installed in the vicinity of the DIQ/S 182-XT-4-PR, easily
accessible by the user and
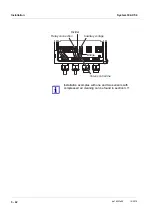
The following two paragraphs describe how to connect both
models of the DIQ/S 182-XT-4-PR to the voltage supply.
How to connect additional power supply modules is
described in the operating manual of the respective power
supply module.
Summary of Contents for YSI 182-XT-4
Page 6: ...Contents System 182 XT 4 0 4 ba76027e02 12 2014...
Page 10: ...Overview System 182 XT 4 1 4 ba76027e02 12 2014...
Page 14: ...Safety System 182 XT 4 2 4 ba76027e02 12 2014...
Page 64: ...Installation System 182 XT 4 3 50 ba76027e02 12 2014...
Page 82: ...Operation System 182 XT 4 4 18 ba76027e02 12 2014...
Page 88: ...The SETTINGS menu System 182 XT 4 5 6 ba76027e02 12 2014...
Page 114: ...Relay outputs System 182 XT 4 6 26 ba76027e02 12 2014...
Page 116: ...Maintenance and cleaning System 182 XT 4 7 2 ba76027e02 12 2014...
Page 122: ...What to do if System 182 XT 4 8 6 ba76027e02 12 2014...
Page 134: ...Technical data System 182 XT 4 9 12 ba76027e02 12 2014...
Page 135: ...System 182 XT 4 1 ba76027e02 12 2014...
Page 138: ...Accessories and options System 182 XT 4 11 2 ba76027e02 12 2014...
Page 142: ...Appendix store separately if required System 182 XT 4 13 2 ba76027e02 12 2014...
Page 143: ......


