Installation
System 182-XT-4
3 - 34
ba76027e02
12/2014
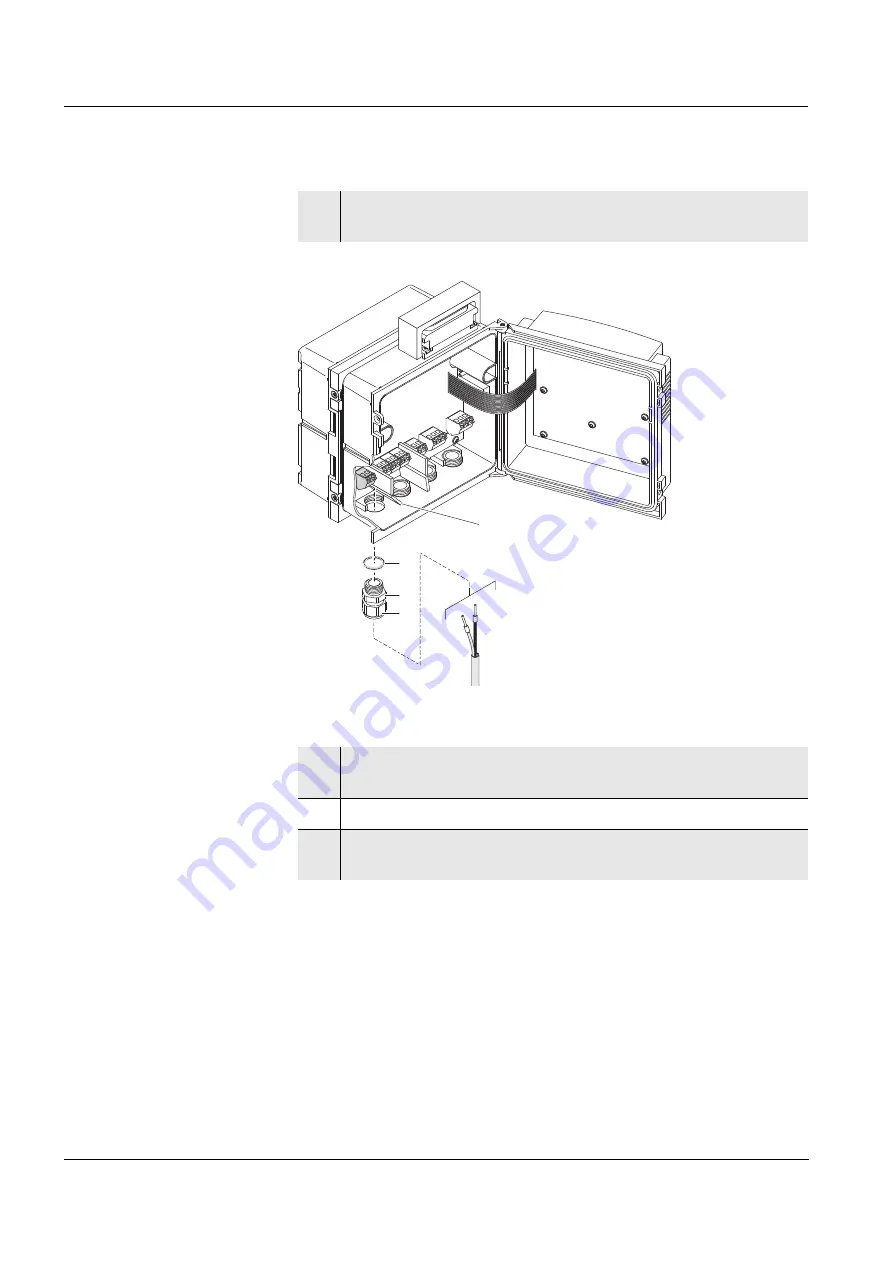
Connecting the power
line
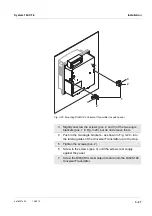
Fig. 3-26 Inserting the supply line.
5
Open the enclosure of the DIQ/S 182 XT-4-PR (front terminal
strip).
6
Screw a cable gland (pos. 1 in Fig. 3-26) with sealing ring (pos.
2) into the enclosure below the power supply connection.
7
Loosen the coupling ring (pos. 3).
8
Feed the power line through the cable gland into the enclosure.
When doing so bend the flexible divider (pos. 4) to the right.
1
3
2
4
L
N
Summary of Contents for YSI DIQ/S 182-XT-4-PR
Page 6: ...Contents System 182 XT 4 0 4 ba76027e02 12 2014...
Page 10: ...Overview System 182 XT 4 1 4 ba76027e02 12 2014...
Page 14: ...Safety System 182 XT 4 2 4 ba76027e02 12 2014...
Page 64: ...Installation System 182 XT 4 3 50 ba76027e02 12 2014...
Page 82: ...Operation System 182 XT 4 4 18 ba76027e02 12 2014...
Page 88: ...The SETTINGS menu System 182 XT 4 5 6 ba76027e02 12 2014...
Page 114: ...Relay outputs System 182 XT 4 6 26 ba76027e02 12 2014...
Page 116: ...Maintenance and cleaning System 182 XT 4 7 2 ba76027e02 12 2014...
Page 122: ...What to do if System 182 XT 4 8 6 ba76027e02 12 2014...
Page 134: ...Technical data System 182 XT 4 9 12 ba76027e02 12 2014...
Page 135: ...System 182 XT 4 1 ba76027e02 12 2014...
Page 138: ...Accessories and options System 182 XT 4 11 2 ba76027e02 12 2014...
Page 142: ...Appendix store separately if required System 182 XT 4 13 2 ba76027e02 12 2014...
Page 143: ......


