19
ORP Display
Press the Probe key, highlight
Display
and press enter. Highlight
ISE (ORP)
and
press enter. You will not be able to Display the sensor unless it is Enabled in the
Sensor Setup menu.
Press enter to enable (checked box) or disable (unchecked box) ORP mV.
Ammonium, Ammonia, Nitrate, and Chloride Display
Press the Probe key, highlight
Display
, press enter. Select the appropriate ISE and
press enter.
Highlight the value you wish to display and press enter to enable (checked box).
Units of
mg/L
and
mV
are available to be displayed for the ammonium, nitrate,
and chloride sensors.
If an ammonium sensor is installed, ammonia (NH3-N) can also be displayed in
mg/L. Ammonia is calculated from the pH, salinity, and temperature readings. If a
pH sensor is not in use, the instrument will assume the sample is neutral (pH 7) for
the calculation. If a conductivity sensor (Salinity) is not in use, the instrument will
use the salinity correction value entered in the Sensor Menu for the calculation.
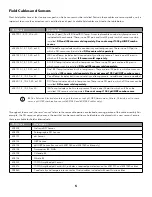
Figure 27
ISE (ORP) Display
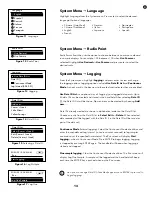
Figure 28
ISE (Chloride) Display
03/03/20 10:34:42 AM
ISE2 Display
100%
ORP mV
03/03/20 10:34:42 AM
ISE2 Display
100%
Cl mg/L
Cl mV
pH Display
Press the Probe key, highlight
Display
and press enter. Highlight
ISE (pH)
and
press enter. You will not be able to Display the sensor unless it is Enabled in the
Sensor Setup menu.
Highlight
pH
and/or
pH mV
, press enter to enable (checked box) or disable
(unchecked box). Both can be shown at the same time.
Salinity
can be displayed in ppt (parts per thousand) or PSU (practical salinity units). The units are equivalent, as both use the
Practical Salinity Scale for calculation.
TDS
can be displayed in mg/L (milligrams per liter), g/L (grams per liter), or kg/L (kilograms per liter).
Resistivity
can be displayed in ohm-cm (ohms per centimeter), kohm-cm (kilo ohms per centimeter), or Mohm-cm (mega ohms per
centimeter).
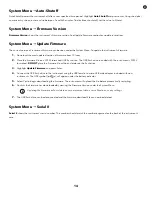
Figure 26
ISE (pH) Display
03/03/20 10:34:42 AM
ISE1 Display
100%
pH
pH mV
Conductivity Display
(continued)
Sensor Setup
g
Auto Stable
Auto Stable indicates when a reading is stable. To enable Auto Stable, press the
Probe key, highlight
Auto Stable
, and press enter. Similar to the Sensor Setup
Menu, there are four channel options –
DO
,
Conductivity
,
ISE1
, and
ISE2
. The
sensor identified under the Sensor Setup Menu for ISE1 and ISE2 can be seen in
parenthesis.
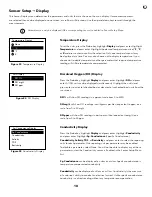
Figure 29
Auto Stable
03/03/20 10:34:42 AM
Auto Stable
100%
DO [On]
Conductivity [Off]
ISE1 [Off]
ISE2 [Off]
Hold All Readings

