

P 4
HD23F1AW0Z3
da Vinci 1.0 Pro
◆ Filament loading is completed
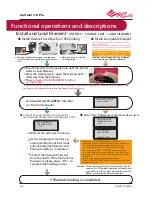
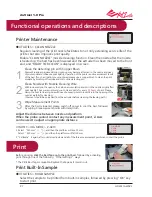
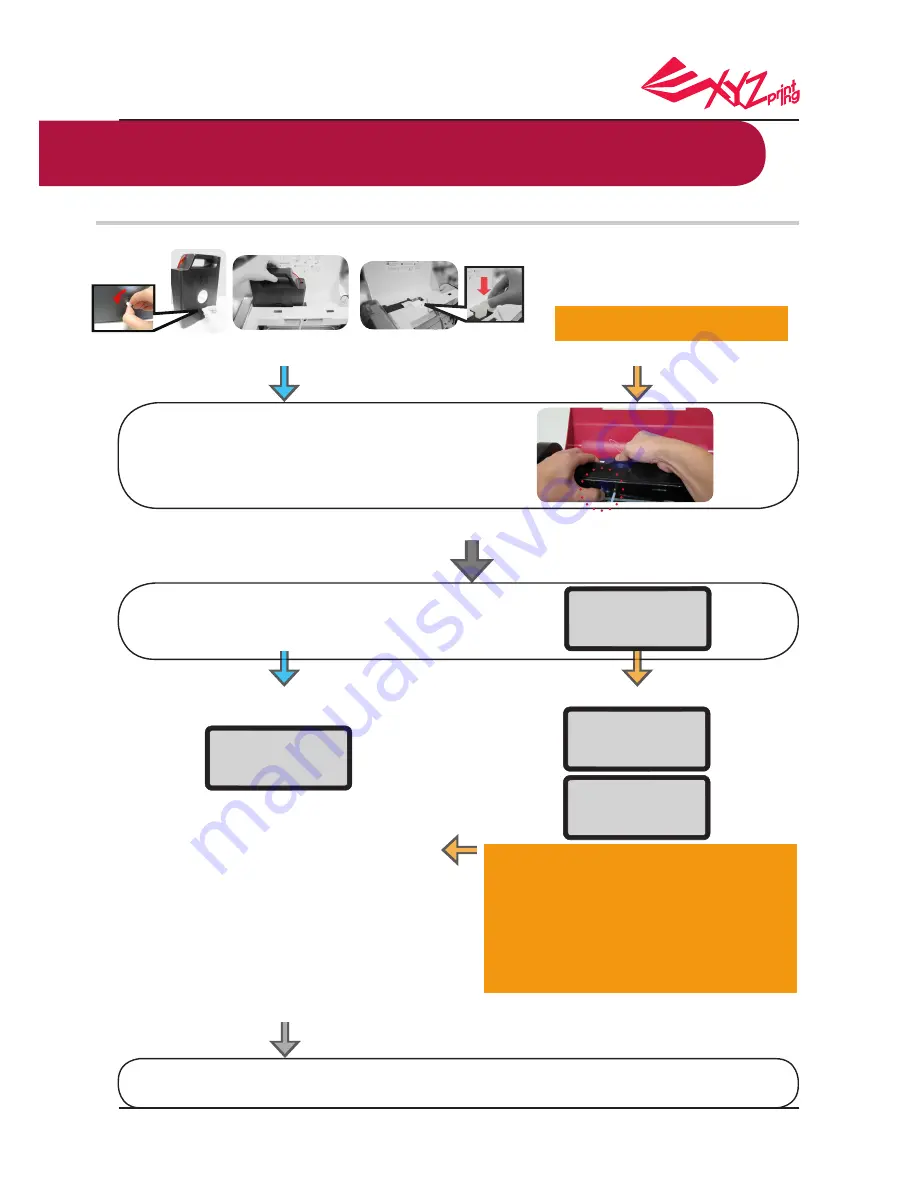
Install and Load Filament
UTILITIES > CHANGE CART > LOAD FILAMENT
Wait for the extruder to heat up
As the temperature reaches op
-
erating setting the printer loads
automatically the filament, and
filament loading is completed
Check if the filament flows out
from the nozzle. If the filament has
flowed out, please press “OK” to
complete the loading process
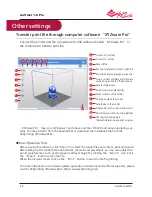
The temperature setting in this procedure is appli-
cable only to 3D Builder application software devel-
oped by Microsoft. For more information about 3D
Builder, please visit the Microsoft website
Remarks:
●
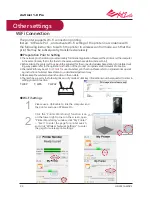
Install Filament Cartridge from XYZprinting
● To use XYZprinting filament and apply the
recommended temperature settings,select "YES"
●
Select "NO" if filaments of other brands are used.
*Recommend using a clips and other tools to cut the tips of the filaments to generate a tapered tip of 45 degrees, and
to straighten the filaments to facilitate the filament loading process.
● Install Compatible filament
CHANGE CARTRIDGE
>LOAD FILAMENT
USE XYZPRINTING
CARTRIDGE NOW?
> YES
USE XYZPRINTING
CARTRIDGE NOW?
> NO
USER FILAMENT
APPLY SETTING
>NOZZLE: 210 ℃
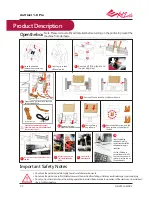
◆ Remove the filament stopper and tape and
install the filament cartridge into the empty
slot.
◆ Place and push to click the
cartridge locker
Activate LOAD FILAMENT function
on the control panel
A.
B.
C.
Insert filament into the guide hole until the printer
starts to load filament.
Press the release arm to open the feeding path
while inserting the filament
Then,
activate LOAD FILAMENT function
on the printer
◆
◆
◆
Functional operations and descriptions
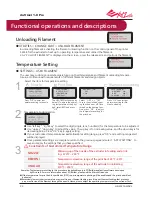
◆
Remove the cartridge from the cartridge
slot if any to use your own filament
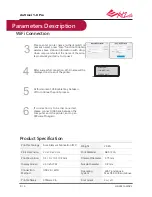
※ To specify your own temperature settings:
Select the printer component using the new settings.
To set the heating temperature, please refer to
instructions provided for "Temperature Settings"
function Select "APPLY SETTING" to start applying
your specified temperature settings. The process on
the left will start and the printing component will start
to heat up.
※ To use pre-defined temperature settings:
Select "APPLY SETTING" directly to enter the workflow
shown on the left.
* Print quality cannot be guaranteed if filaments from other
brands are used instead.
* The warranty does not cover stuck filaments, product failure,
damage, or defects resulting from the use of filaments from
other brands or other human errors.
Hang the spool on the filament spool
holder prepared by yourself


