


V1.5
-11-
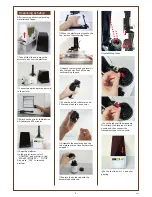
Printed Object Removal and Cleaning
Resin Tank Cleanup
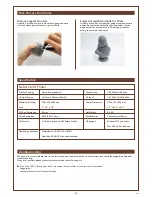
When removing prints from the printer, follow the procedure
to post-process the object and maintain your printer.
Always remove the
platform before
removing the resin tank to
avoid dripping leftover
material on printer surface.
Note
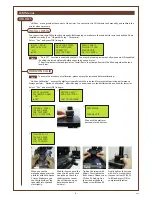
①
Remove the platform
Wear gloves before
removing the prints. Turn
the platform locker
counterclockwise until it
stops. And pull the
platform to remove it.
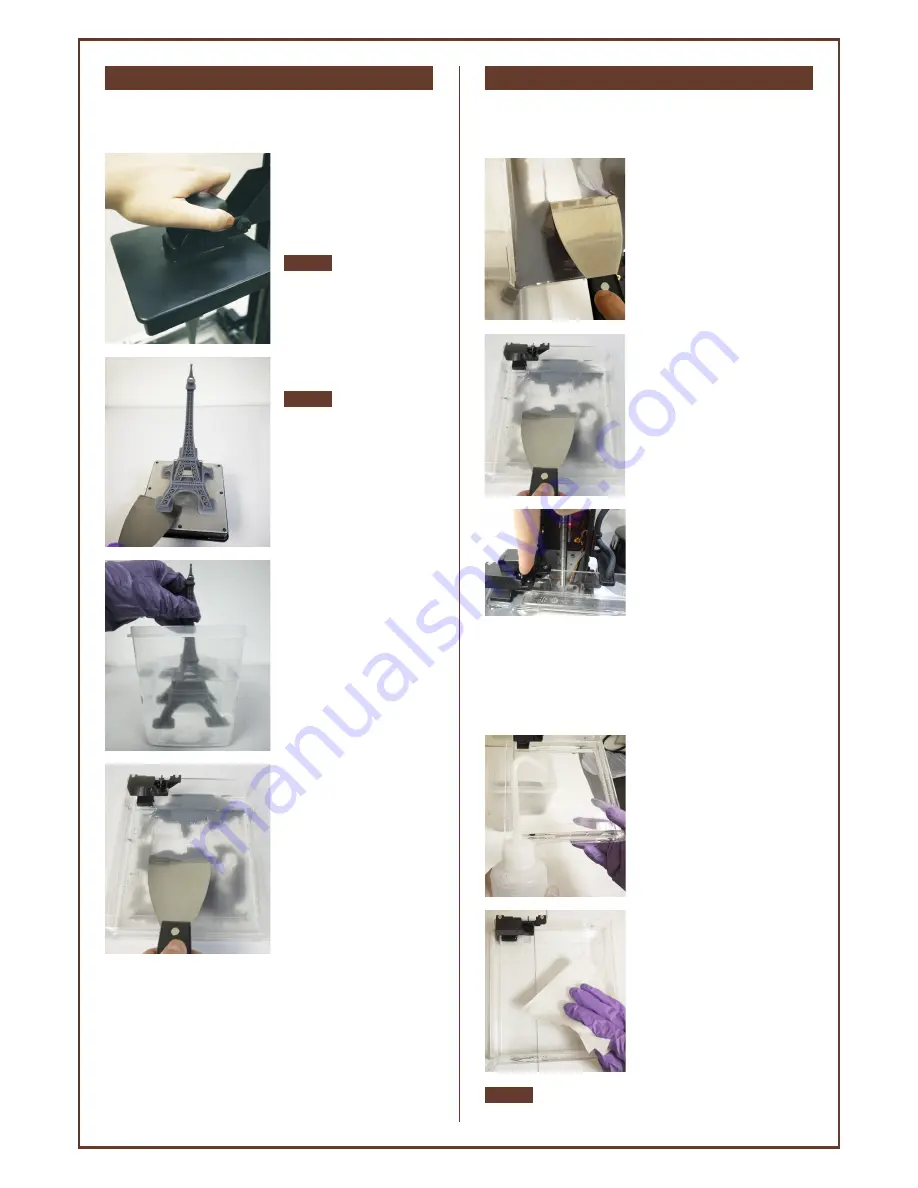
To remove any residue stuck to the bottom of the resin tank,
clean the tank level sensor covered resin, or to clean the
tank thoroughly, follow the procedure for cleaning:
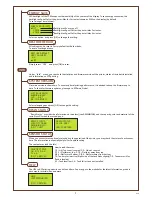
①
Pour uncured resin in the
tank into a waste bin. For
remaining resin, scrape the
surface of the tank gently while
pouring the liquid out.
Scrap off the print gently
to avoid damaging the
surface of the platform.
Note
②
Use the scraper to
remove print
Remove any residue in the
resin tank. Operate gently to
avoid scratching the surface
of the resin tank. Reinstall
the resin tank after cleaning.
Scrap off any residue and
remove excess resin from the
surface of the platform. Turn
the platform locker clockwise
until it stops when reinstall-
ing it to the printer.
Uncured resin in the tank can
be left for future printing. To
prevent dust from accumu-
lating on the resin, always
cover the lid over the printer
after removing any residue
from the tank or the
platform.
Place the printer away from
direct sunlight or UV lighting,
even if the lid is covered, or
resin in tank may cure and
solidify.
④
Cleanup and reinstall
Note
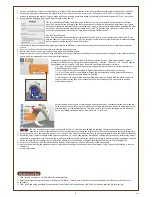
③
Rinse part in Alcohol (≧
75% Alcohol)
Pour alcohol into the rinse
basket, shake the print for
10 minutes, then rub it
with your fingers though-
roughly.
②
Scrape off the residue stuck
on the tank gently. Avoid
damaging the silicon finish.
⑤
You can either wait until the
alcohol in the tank evaporates
completely or wipe away the
alcohol with a lint-free cloth.
If resin in tank is cured, please replace the tank.
④
Spray alcohol on the tank
and the silicon finish, and wait
for around 1 minute. Gently
scrape residue and pour
remaining alcohol left in the
tank into the waste bin. Repeat
these steps until all residue has
been removed.
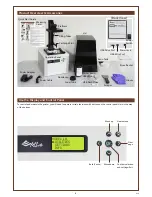
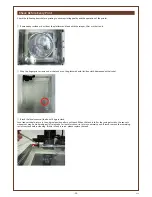
③
Clean the tank level sensor if it
gets stuck. Loosen the 2 screws
(A&B) above the sensor before
dismounting. Then brush any
resin in sensor parts and on the
floater with alcohol. To mount the
sensor on the tank, tighten the
screws over the sensor lightly.
Avoid over-tightening the screws
as the wall may crack.
Regular maintenance on the tank
level sensor is essential to
maximum the service life of the
resin tank and ensure the
smoothness of the operation.
A
B