


LCM Menus
UTILITIES
INSTALL RESIN
V1.5
-5-
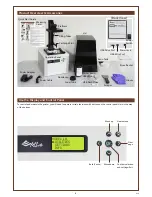
“Utilities” menu provides the control of the printer. You can instruct to fill the resin tank manually, and calibrate the
printer when necessary.
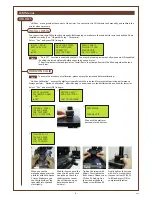
You can activate resin-filling function manually. Before doing so, make sure the resin bottle, resin tank and the lid are
installed correctly. (See “Unpack & Setup” for details).
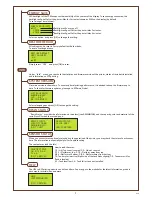
“Horizon Calibration” ensures the platform is parallel with the resin tank for more stable printing performance.
Always perform “Horizon Calibration” after changing to a new tank or a tank different the one used for last print.
Select “Yes” and press [OK] to begin:
• “Auto Fill” function is enabled by default. You may skip loading resin manually when auto-fill is enabled.
• Shaking the resin bottle well before use ensures an even color.
• The printer detects the tank level after "Install Resin" is activated. Resin will be filled only when the tank
level is low.
HORIZON CALIB
INSTALL RESIN
BOTTLE BY NOW
NO
►
YES
MAKE SURE PIPES
ARE INSTALLED
CORRECTLY
[
OK
]
FOR NEXT
RESIN TANK IS
FILLING UP NOW
PLEASE WAIT
…
[
OK
]
TO CANCEL
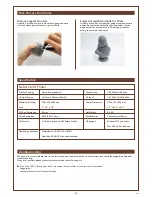
Select “Yes” and press [OK] to begin:
Note
To ensure the accurracy of calibration, please empty the resin tank before calibrating.
Note
①
START HORIZON
CALIBRATION NOW
?
NO
►
YES
②
REMOVE OBJECT
FROM PLATFORM
[
OK
]
TO CONTINUE
③
LOOSEN 4 SMALL
SCREWS ABOVE
THE PLATFORM
[
OK
]
TO CONTINUE
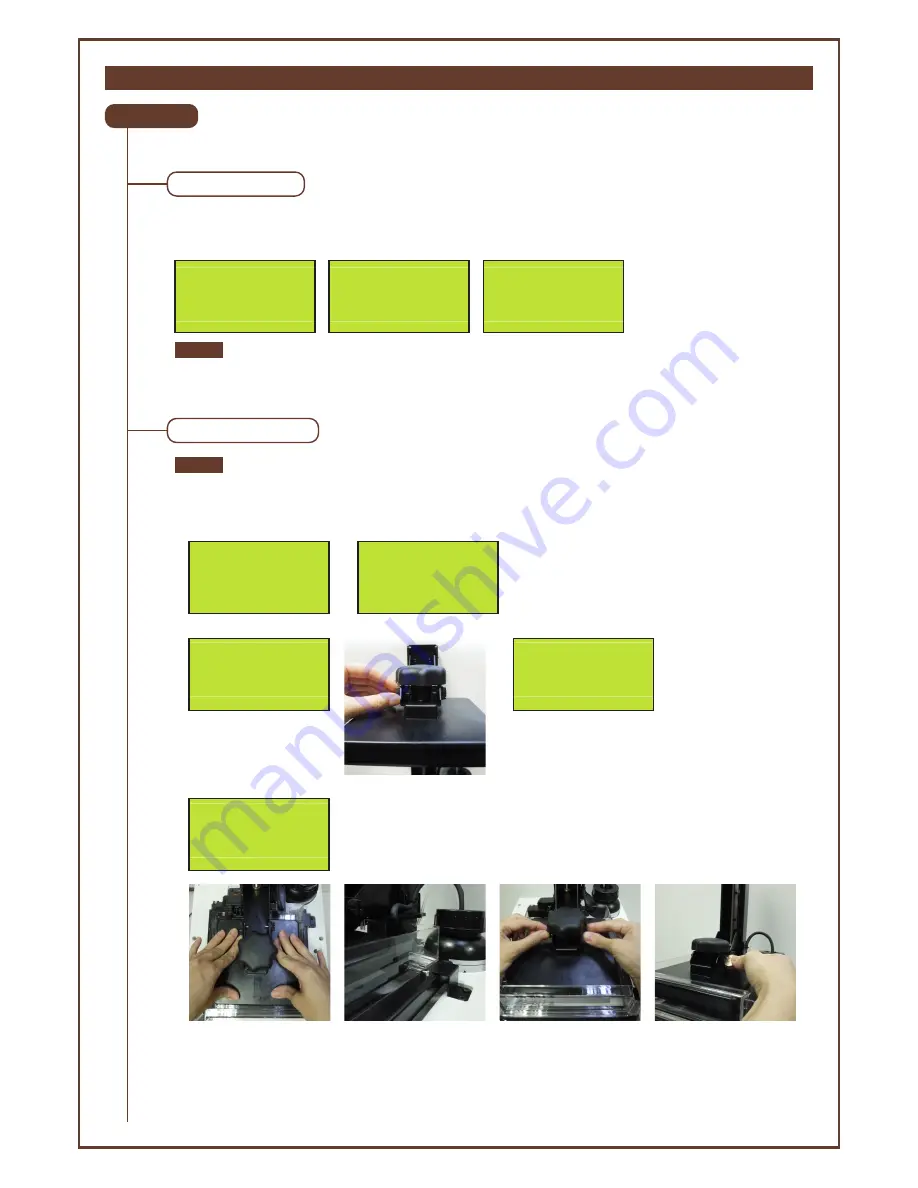
Tighten the screws with
fingers. First tighten the
front screws. Fasten screw
F1 then F2. And tighten
the screws at the back.
Fasten screw B1 then B2.
Finally tighten the screws
with a coin or other tools
(sequence from F1, B1, F2
to B2) and press [OK] to
complete calibration.
When you see the
message above, press the
platform with both hands
3 times. Make sure you
see the right side of the
tank sinks into the tank
slot slightly.
Wait for 5 seconds so the
silicon finish on the tank
can reshape. Check the
tank frame has reposi-
tioned (there's no gap
between the frame
holders).
⑤
TIGHTEN ALL 4
SCREWS ABOVE
THE PLATFORM
[
OK
]
TO FINISH
④
Wait until the platform
descends to the bottom.
PROCESSING
PLEASE WAIT
...
F1
F1
F2
F2
B1
B1
B2
B2


