PartPro300 xT
19
A. Clean Nozzle
B. Change Module
Before cleaning the extruder nozzle, first make sure that the filament has been unloaded and the guide tube has been
removed.
Please refers this chapter B. Change Module ⑤ ~ ⑦ .
Before change module, first make sure that the filament has been unloaded and the guide tube has been removed.
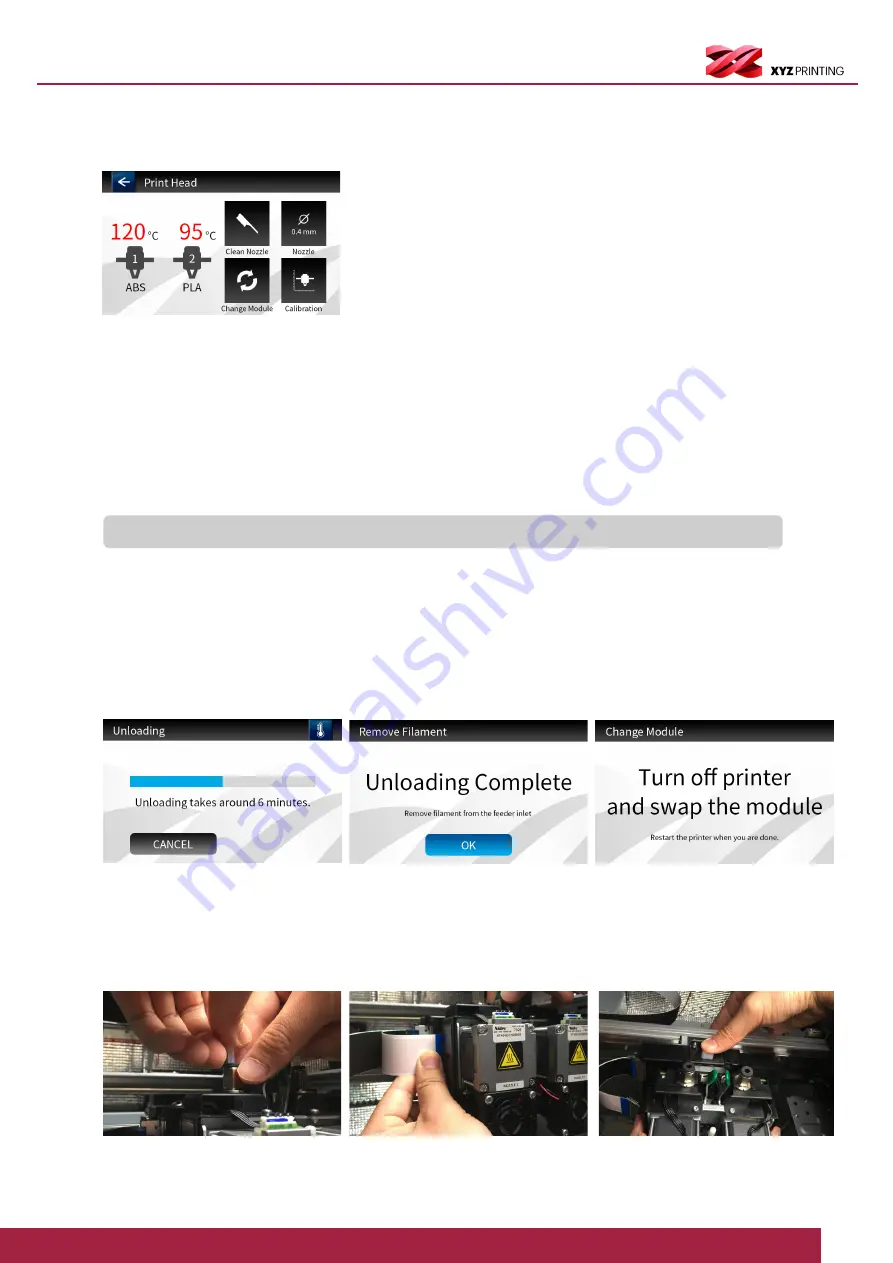
① Select “Change Module”.
② Wait until the print head moves to a proper position for change.
③ Turn off the power before change the print head.
④ Change the print head from above the machine.
•
Unload the extruder module
⑤ Press the feeding tube grip spring to take out the guide tube, and unplug the heating bus at the side of the extruder module.
⑥ Press the quick-detachment button to quickly remove the extruder module.
⑦ Press and hold the latch on two sides to unload the filament, and gently press the spring surrounding the feed port to
remove the guide tube.
•
Installing the module
⑧ Please refers 3.2 Print Nozzle and Filament Installation ① ~ ③ .
① Select the “Clean Nozzle”.
② The print bed will be lowered and the print extruder will move to a position slightly in front of the center.
③ When the temperature of the print head reaches the operating temperature, the cleaning operation starts. Please follow
steps as 8.1 Clean Out Your Filament Nozzle.
Note:
DO NOT touch the metal part of the print head as it becomes hot during the operation.
5.4 Print Head
Press settings icon, and continue to press print head calibration icon to adjust clean nozzle, change module and print head
calibration. In addition, user can know the nozzle diameter.


