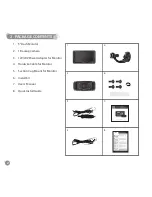
3
1. Frequency: 2.4GHz
2. Operating Voltage: DC 12V / 24V
3. Operating Temperature: -10~+50°C
4. Maximum Signal Range: 30 feet/10Metres
(without Interference or Obstruction)
5. Camera Water Resistance: IP67 rating
DASh MOnitOR inStALLAtiOn
1. Stick the Suction Cup Mount on the windshield and adjust to your desired position.
2. Hook the Dash Monitor on to the windshield mount.
3. Remove the Yada Dash Monitor protective overlay.
4. Now power the monitor:
a. 12V/24V Power Adapter
Take the 12V/24V Power Adapter and plug adapter into the right side of the Yada Dash
Monitor. Plug the other end into 12V/24V power port in your car.
b. Hard wire
Take the Hard Wire Power Adapter and plug adapter into the right side of the Yada Dash
Monitor. Run cable to fuse box and connect to fused accessory power source. Refer to
your vehicle owner manual for location of available accessory fuses.
5. At this time, the Yada Dash Monitor is ready to be automatically powered on when the vehicle
engine starts.
Warning: Many vehicles provide constant power to the 12V outlet. If your outlet provides constant
power, please remember to unplug the monitor when not in use to avoid draining the vehicle
battery.
BACkup CAMERA inStALLAtiOn
note: Camera installation on diesel vehicles may require different wiring install. See Below. You can
3. PrOduCT SPECIFICATIONS
4. INSTALLATION guIdE
Summary of Contents for BT54358-2
Page 1: ......


