background image

7

BRightnESS AnD COntRASt 
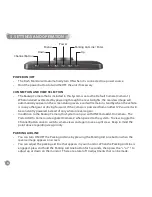
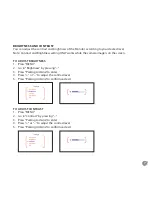
You can adjust the contrast and brightness of the Monitor according to your desired level. 
Note: Contrast and Brightness setting ONLY works while the camera image is on the screen.

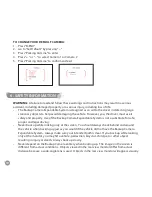
TO AdjuST BrIghTNESS

1.  Press “MENU”
2.  Go to “Brightness” by pressing “– “
3.  Press “Parking Aid Line” to enter
4.  Press “+ “ or “– “ to adjust the contrast level
5.  Press “Parking Aid Line” to confirm and exit 

TO AdjuST CONTrAST

1.  Press “MENU”
2.  Go to “Contrast” by pressing “– “
3.  Press “Parking Aid Line” to enter
4.  Press “+ “ or “– “ to adjust the contrast level
5.  Press “Parking Aid Line” to confirm and exit 

Summary of Contents for BT54358-2

Page 1: ......

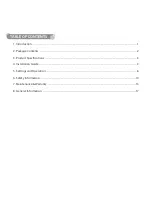
Page 2: ...E OF CONTENTS 1 Introduction 1 2 Package Contents 2 3 Product Specifications 3 4 Installation Guide 3 5 Settings and Operation 6 6 Safety Information 10 7 Maintenance Warranty 13 8 General Information...

Page 3: ...comfortable installing the product You can also contact Winplus at 866 294 9244 to speak to one of our installation specialists if you have any specific questions regarding the Backup Camera Expandab...

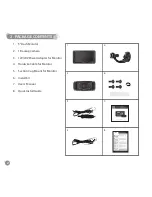
Page 4: ...Monitor 2 1 Backup Camera 3 12V 24V Power Adapter for Monitor 4 Hardwire Cable for Monitor 5 Suction Cup Mount for Monitor 6 Install Kit 7 User s Manual 8 Quick Install Guide 2 Package Contents 1 2 6...

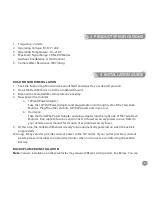
Page 5: ...end into 12V 24V power port in your car b Hard wire Take the Hard Wire Power Adapter and plug adapter into the right side of the Yada Dash Monitor Run cable to fuse box and connect to fused accessory...

Page 6: ...the vehicle manufacturer or reference a wiring diagram for your vehicle 5 At your taillight remove the light bulb socket from the reverse light housing 6 Determine the reverse light power wires for y...

Page 7: ...mly to the car to secure and get full contact between the license plate and the double sided tape Screw the license plate back onto the rear of your vehicle 16 Once license plate and Camera are secure...

Page 8: ...ed instead of only when in reverse gear In addition to the Backup Camera this System can pair with ONE Yada Add On Camera The Yada Add On Camera is designated Camera 2 when paired to the system To vie...

Page 9: ...ge is on the screen To Adjust Brightness 1 Press MENU 2 Go to Brightness by pressing 3 Press Parking Aid Line to enter 4 Press or to adjust the contrast level 5 Press Parking Aid Line to confirm and e...

Page 10: ...ra and select Camera 1 c Press Parking Aid line to confirm d The unit is now in pair mode if the monitor is able to connect with the camera the display will show Pair OK If no camera is found then the...

Page 11: ...ackup Camera that is included in this System is set as the Default Camera Camera 1 When installed as directed by powering through the rear taillights the rearview image will automatically appear on th...

Page 12: ...just as you would if the vehicle did not have the Backup Camera Expandable System Always make sure your intended path is clear If you back up while looking only at the monitor you may hit a vehicle p...

Page 13: ...hange When washing the vehicle with high pressure water be sure not to spray it around the Camera Otherwise water may enter the Camera unit causing water condensation on the lens a malfunction fire or...

Page 14: ...30 feet ALWAYS engage Parking Emergency Hand Brakes of the vehicle when testing the system Safety Around and Behind Other Vehicles Using a Backup Camera is not enough to completely overcome a vehicle...

Page 15: ...is limited express warranty shall be the exclusive remedy of the purchaser and Winplus North America makes no other warranty of any kind aside from the limited express warranty stated above NOTE Warra...

Page 16: ...stomer service section for customer contact numbers for other regions offices For customer service and technical support please call us at 1 866 294 9244 or email us at customercare winplususa com If...

Page 17: ...l use of the Backup Camera Expandable System In no event shall Winplus North America and or its affiliates have any liability for any losses whether direct or indirect in contract tort or otherwise in...

Page 18: ...UK 3 Please include a detailed explanation of the problem you are having 4 If your product is found by Winplus to have a defect in material or workmanship within the warranty period it will be repair...

Page 19: ...Interference Statement This equipment has been tested and found to comply with the limits for a Call B digital device pursuant to Part 15 of the FCC Rules These limits are designed to provide reasona...

Page 20: ...set forth for an uncontrolled environment End users must follow the specific operating instructions for satisfying RF exposure compliance This transmitter must not be co located or operating in conju...

Page 21: ...ith IC radiation exposure limits set forth for an uncontrolled environment End users must follow the specific operating instructions for satisfying RF exposure compliance This transmitter must not be...

Page 22: ...TH AMERICA EUROPE AUSTRALIA NEW ZEALAND ASIA 820 South Wanamaker Avenue Ontario CA 91761 Unit 4 Two Counties Estate Falconer Road Haverhill Suffolk CB9 7XZ U K Unit 2 991 Mountain Hwy Boronia Victoria...

Reviews: