70
Using the APRS set-up menu
Tip
The settings, “2 INTERVAL”, “3 PROPORTIONAL”, “4 DECAY”, “5 LOW SPEED”, and “6 RATE
LIMIT”are all disabled while SmartBeaconing is operating.
Selecting the digipeater route
This selects the call sign and ALIAS of the digipeater used.
Please refer to “Setting the digipeater route” ( P.41) for the details.
My call sign setting
This registers your own station call sign that is required for APRS communications.
APRS data cannot be sent when your own station call sign is not registered. Please
make sure to register your own station call sign.
Refer to “Setting your own station call sign” ( P.6) for the details.
Filter setting for messages received
The group filter for receiving messages and bulletin messages from specific groups
(ALL, CQ, QST, YAESU etc.) can be set.
A maximum of up to 9 characters can be entered.
“1 GROUP 1 ALL”, “2 GROUP 2 CQ”, “3 GROUP 3 QST”, “4 GROUP 4 YAESU”, “5
GROUP 5 (any)” and “6 GROUP 6 (any)” can be set for the group code.
For bulletin, “7 BULLETIN 1” to “9 BULLETIN 3” can be set.
1
Press
for one second or longer.
The set-up menu will be displayed.
2
Turn the DIAL, select
[10 APRS]
, then press
.
The menu list will be displayed.
3
Turn the DIAL, select
[17 MESSAGE GROUP]
, then
press
.
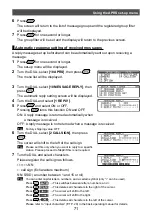
The message group list will be displayed.
4
Turn the DIAL to select a saved group number, then
press
.
The character input screen will be displayed.
5
Turn the DIAL, select characters, then press
.
Tip
You can enter capital letters, numbers, and a certain symbol (only “
∗
” can be used).
Press [
] → This switches between letters, numbers, and
∗
.
Press [
] → This deletes all characters to the right of the cursor.
Press [
] → This shifts the cursor to the left.
Press [
] → The cursor will shift to the right.
Press [
] → This deletes all characters to the left of the cursor.
Please refer to “Input characters” ( P. 20) in the basic operating manual for details.

