background image


User’s Manual/English/ Version 1.0/ Hypersound 128


Page7             

Index


Chapter 

3

                                                                    Connect to PC       

You need not switch off your computer when you connect the player to the PC 

since USB is Plug-and-Play. Before USB connecting with computer

disconnect the 

earphone from the player. 

Setup Connection 

(1)


Position the PC so that its USB ports can be easily accessed.   
(Note: The USB port(s) on you PC may be found on the front panel instead of 
the back panel. Contact your system vendor if need) 

(2)


Connect the flat port of the supplied USB cable to the USB port of PC; 

(3)


Connect the minor port of the cable to the mini-USB port of this player; 

(4)


Press 

Play

 button to turn on the player. A diagram appears on the LCD, 

indicating that the player is connected to your PC. The player starts to recharge 
the battery. 


Connect to PC 

3-1  For Windows 

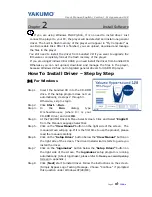
Step 10.


Once you have plugged in the player to your PC, system detects New 

hardware and starts to install the drivers automatically. Wait for system finish 
the installation. 

Step 11.


When finished, you can click 

Start

 -> 

Program

 -> 

Yakumo H.S 128 

MP3 Player

 -> 

Update

. If current firmware version is lower than Update 

firmware version, please click on 

Start

 button. Otherwise, you need not to 

update. Click on 

Close

 button to exit.   

Step 12.


The driver installation has finished. 

Step 13.


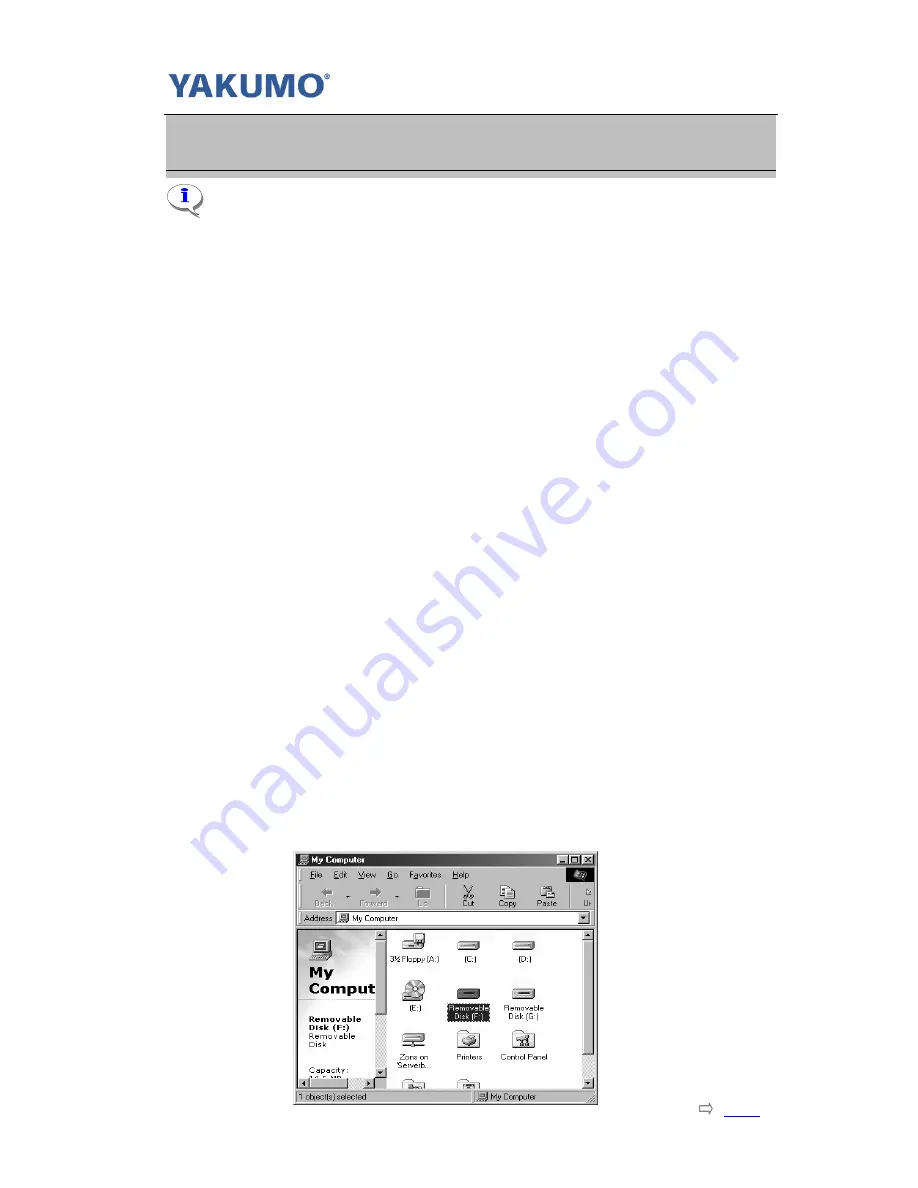
Double-click on 

My Computer 

on desktop. It shall be observed that one 

new 

Removable Disk

 appears in the My Computer window. It is the memory 

built-in the player.   

Step 14.


Now you can download your WMA/MP3 music to the player by copying 

the files to the new

 Removable Disk

.  


Summary of Contents for HYPERSOUND 128

Page 1: ......

Page 2: ...lick blue underlined text links to jump to another location in the document or to a location on the Internet Click the Index link at the bottom of any page to go to the index of the User s Manual Usin...

Page 3: ...ntosh OS 6 Chapter 3 Connect to PC 3 1 For Windows 7 3 2 For Macintosh OS 8 Chapter 4 Download Music 4 1 For Windows 9 4 2 For Macintosh OS 9 Chapter 5 Starts to Play 5 1 Getting Started 10 5 2 LCD Di...

Page 4: ...of Music Play Modes Digital Volume Adjustment Firmware Updateable Via USB Port No Need a Driver To Upload and or Download Windows ME xp 2000 Supports WINDOWS 98 ME 2000 Mac Os X Version 10 2 6 and abo...

Page 5: ...aying music shift Up Down the Operation Button causes to skip to Previous Next music And it will fast skip backward forward in one music track if keeps on shifting Up Down the button While playing mus...

Page 6: ...the music continues playing from the point Record voice Press and hold the A B Repeat REC button for 1 second to start record 8 Mini USB Port You can upload download manage the files via this port wit...

Page 7: ...USB cable to the USB port of PC Connect the minor port of the cable to the mini USB port of this player Press the Play button to turn on the player The Recharging starts The Power Capacity Indicator i...

Page 8: ...CD ROM drive If the Setup program does not run automatically do steps 2 through 3 Otherwise skip to step 4 Step 2 Click Start Run Step 3 In the Run dialog type D showmenu exe where D is your CD ROM d...

Page 9: ...tep 3 When the CD ROM file list window appears double click the MAC_OS icon When MAC_OS window appears double click the Hypersound128_V_1_1 sit icon You will be prompted to select one application inst...

Page 10: ...rs on the LCD indicating that the player is connected to your PC The player starts to recharge the battery Connect to PC 3 1 For Windows Step 10 Once you have plugged in the player to your PC system d...

Page 11: ...m the USB connection in a much secure manner When you are going to disconnect the player double click on this icon and click on the Stop button in the Remove Hardware Device dialog window And click on...

Page 12: ...p 3 Double click on the Removable Disk to open the drive The Removable Disk window appears Step 4 Right click on the Removable Disk window and click Paste in the menu Step 5 Starts to copy the files T...

Page 13: ...e player must press the Stop button until the Shut Down Bar has finished Otherwise the player returns to the status before press the Stop button Continue Holding To Power Off Continue Holding To Power...

Page 14: ...just the LCD screen contrast value Disable The backlight is off 3 seconds The backlight time 5 seconds The backlight time Back Light 10 seconds The backlight time Disable No power saving function 1 mi...

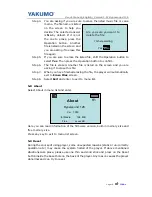
Page 15: ...re you want the section to start and press this button again where you want 1 2 3 4 5 7 6 8 11 10 9 ROCK m VOL M HERE WAITING Richard Marx 1 31 4 42 Song 01 21 1 A B ROCK m VOL I AM HERE WAITING Richa...

Page 16: ...t Record Press and hold the A B repeat REC button to start voice record You can also activate this function from the menu In menu list select Record and enter The player is ready to record To start re...

Page 17: ...lect Press and hold the Operation button to exit the menu 2 Play Modes Setting In the Setting list Select Play Modes and enter The Play Modes List appears Shift the Operation button to select one play...

Page 18: ...arning The file can not be recovered after erased Step 1 Cease the playback or recording when you start to erase files Step 2 Press the Operation button to enter menu Select Erase Files and enter Ther...

Page 19: ...to menu list 5 8 About Select About in menu list and enter Here you can read information of the firmware version built in memory size and free memory size Press any key to exit to menu list screen 5...

Page 20: ...f don t want to format now click on Close button to exit If want to format click on Start button to start format After it is finished click on Close button to exit Before click on Start button there i...

Page 21: ...and special weather conditions The player can not work if the firmware is corrupted Please refresh the firmware to fix this problem How To Refresh The Firmware 1 Press and hold the Play button of the...

Page 22: ...or long periods of time Precautions for Listening with the Earphones z Do not play your earphones at a high volume Hearing experts advise against continuous extended play z If you experience a ringing...

Page 23: ...ay 128 x 64 dots Dot Matrix LCD EL Blue Back Light Button Switch One Jog Dial type 3 way key Menu Next Previous Select Power On Play Pause button Stop Power Off button A B REC button Volume button Vol...

Page 24: ...um system requirements for operating the player Check the connection between the player and PC Re format the internal memory with the player s utility and download again Send to repair if failure stil...

Page 25: ...Please playback the same content on PC Download again if it playback well with PC If the problem is still there please re format the memory with the player s utility to clear the memory and try to dow...

Page 26: ...e continue from Step 3 Step 3 Open source image Click File Open image then select one image file LogoMaker supports 3 types of image file BMP GIF and ICO Step 4 Configure the convert options and conve...

Page 27: ...tation 90 deg Rotate source image by 90 degrees clockwise Left window will demo what the opening screen will be When you have finished configure click Convert Single or Convert All Notice Convert Sing...

Page 28: ...tion Resize tool Enable this size tool so you can change the visible area of the frame The visible area is the blue line block Auto size tool Click once LogoMaker will reduce to minimize visible area...

Page 29: ...er Please close LogoMaker after you save the logo file Or you can not stop the player in some cases 6 After download if I want to skip the opening screen what can I do Answer Press any key when the pl...

Page 30: ......

Reviews: