6
7
Code record
Administrator:
Code
1 2 3 4 1 2
b
c
f
e
d
a
1a-f
Yale
2
2
3
4
1
3a-c
a
b
c
1.
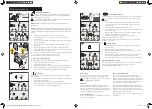
Change administrator code
All Code Handles are delivered with the same factory administrator
code. For security reasons, always change the code before using the
lock.
If the administrator code is lost, the handle cannot be re-programmed.
It is therefore very important to store the code safely.
NOTE! The administrator code can also be used as a user code to unlock the
handle.
The administrator code is used to add/erase user codes and to enable/disa-
ble the audio signal. When changing the administrator code, the handle will
reset to factory settings (audio signal enabled and user codes erased).
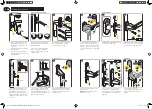
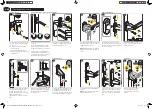
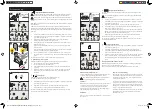
a. Write down the new administrator code before you start (6 digits).
b. Hold the lock button pressed to enter programming mode. The LED turns
steady green.
c. Enter the existing administrator code (new handle: 123412). The LED
turns steady green.
d. Press button 3 to change the administrator code. The LED turns steady
green.
e. Enter the new administrator code (6 digits). The LED turns steady green.
f. Re-enter the new administrator code. The new code is now set. The LED
flashes green along with a long beep.
g. Ensure that Code Handle works with the new code. Push the lock button
to lock and use the new code to unlock.
Store your codes and this manual safely!
2. Operation -unlocking/locking
Once the Code handle has been programmed, the handle can be used.
1. To unlock, enter a valid user code.
2. To lock, press the lock button.
3. Always check that the handle is locked after the lock button has been
pressed.
4. The handle must be in the 0°, 90° eller 180° position for it to be locked or
unlocked or else the handle will beep and LED flash red for 2 seconds.
3.
Activate/inactivate audio signal
Activate/inactivate audio signal
The code handle is delivered with the audio signal enabled. Do the following
to turn the audio signal off/on:
a. Hold the lock button pressed to enter programming mode. The LED turns
steady green.
b. Enter the administrator code. The LED turns steady green.
c. Press button 2 to turn the audio signal off/on. The LED flashes green with a
beep (audio signal on) or without a beep (audio signal off).
Operating instructions
Code record
User codes:
Code 1
Code 2
Code 3
Code 4
4a-f
b
c
f
e
d
a
4
3
2
1
5a-e
a
b
e
d
c
4.
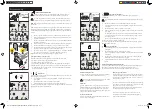
Add/change user codes
Apart from the administrator code, the Code Handle can store 4 additional
user codes.
The default factory code must be changed before a new user code can
be added.
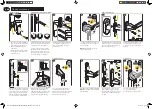
a. Before you start, write down the preferred user code (6 digits).
b. To enter programming mode, press and hold the lock button until the LED
will turn steady green.
c. Enter the administrator code. The LED will turn steady green.
d. Press button 1 to select programming of user codes. The LED turns steady
green.
e. Select one of the 4 memory positions by pressing the corresponding but-
ton, 1-4. The LED will turn steady green.
f. Enter the new user code (6 digits). The LED will flash green.
Test the new code by locking and unlocking.
Repeat the steps above the store additional codes in the remaining memory
positions.
If the administrator code is lost, you will not be able to re-program the
handle!
5.
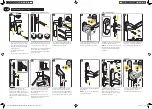
Erase user codes
a.
Hold the lock button pressed to enter programming mode. The LED turns
steady green.
b.
Enter the administrator code. The LED turns steady green.
c.
Press button 4 to select programming of user codes. The LED turns
steady green.
d.
Select which one of the 4 memory positions to be erased by pressing the
corresponding button, 1-4. The LED turns steady green.
e.
Press the lock button to erase the user code. The LED flashes green.
Lost codes
A new user code can be entered using the administrator
code, see step 4 (“Enter/change user code”).
If the administrator code is lost, you will not be able
to re-program the handle!
Security
If an incorrect code is entered five times consecutively,
the code handle will be disabled for 3 minutes and cannot
be opened during this time. The purpose is to prevent
unauthorised people from opening the handle. The LED
flashes red and the handle beeps repeatedly during this
time.
General maintenance
Windows and window doors must be maintained accor-
ding to the manufacturer’s instructions.
Reset/change administrator code
If you change the administrator code, the handle will also be reset (audio
signal enabled and additional user codes erased).
See step 1 (“Enter/change administrator code”).
Batteries and battery warnings
A battery warning is given when the battery capacity is
reduced to a minimum. The LED flashed red along with
a beep every time a button is pressed, to indicate the
need to replace the batteries. In addition, after entering a
correct code, the LED flashes red along with a beep five
times to accentuate the need to replace the batteries.
Battery lifetime depends upon several parameters such
as battery quality and frequency of operation. With
normal usage the batteries will last for several years. It is
recommended to use batteries of a well-known brand for
best performance.
If the battery capacity is below minimum, the handle will
not respond at all.
CH manual SVENSKA-ENGELSKA-DANSKA-NORSKA-210913.indd 6-7
2021-10-01 10:07


