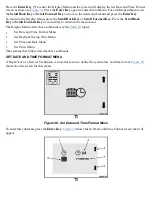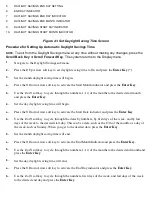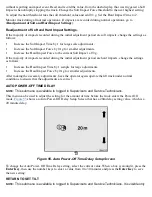
5.
DAYLIGHT SAVINGS END DAY SETTING
6.
END DAY INDICATOR
7.
DAYLIGHT SAVINGS END DAY INDICATOR
8.
DAYLIGHT SAVINGS END MONTH INDICATOR
9.
DAYLIGHT SAVINGS START DAY INDICATOR
10.
DAYLIGHT SAVINGS START MONTH INDICATOR
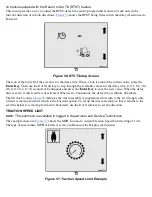
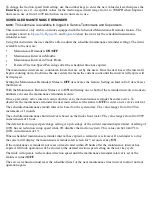
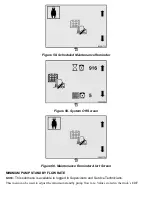
Figure 41. Set Daylight Saving Time Screen
Procedure for Setting Up Automatic Daylight Savings Time
NOTE:
To exit from the Daylight Savings menu at any time without making any changes, press the
Scroll Back Key
or
Scroll Forward Key
. The system returns to the Display menu.
1.
Navigate to the Daylight Savings submenu.
2.
Press the
2
Up Arrow soft key to set daylight saving time to On and press the
Enter Key
(*).
3.
Set the month daylight saving time will begin.
a.
Press the
3
Down Arrow soft key to activate the Start Month indicator and press the
Enter Key
.
b.
Use the
2
or
3
soft key to cycle through the numbers, 1-12, of the months to the desired start month
and press the
Enter Key
.
4.
Set the day daylight saving time will begin.
a.
Press the
3
Down Arrow soft key to activate the Start Date indicator and press the
Enter Key
.
b.
Use the
2
or
3
soft key to cycle through the dates by numbers, by first days of the week, and by last
days of the week to the desired start day. This can be a date, such as the 13th of the month, or a day of
the week, such as Sunday. When you get to the desired date, press the
Enter Key
.
5.
Set the month daylight saving time will end.
a.
Press the
3
Down Arrow soft key to activate the End Month Indicator and press the
Enter Key
.
b.
Use the
2
or
3
soft key to cycle through the numbers, 1-12, of the months to the desired end month and
press the
Enter Key
.
6.
Set the day daylight saving time will end.
a.
Press the
3
Down Arrow soft key to activate the End Day indicator and press the
Enter Key
.
b.
Use the
2
or
3
soft key to cycle through the numbers, first days of the week, and last days of the week
to the desired end day and press the
Enter Key
.
Summary of Contents for ERC030VA
Page 8: ...Figure 3 Supervisor Flowchart Sheet 1 of 4 ...
Page 9: ...Figure 3 Supervisor Flowchart Sheet 2 of 4 ...
Page 10: ...Figure 3 Supervisor Flowchart Sheet 3 of 4 ...
Page 11: ...Figure 3 Supervisor Flowchart Sheet 4 of 4 Table 1 Supervisor Menu Flowchart A B C D E F G H ...
Page 21: ...Hydraulics Icon Alert Screens Cycle the Key Secure Battery Release Park Brake ...
Page 22: ...Operator Out of Seat Release Pedal Release Hydraulic Input Traction Switch ...
Page 23: ...Hydraulic Switch Temperature Too High Lift Limit Charge Battery ...
Page 26: ...Display Title Screen Status Title Screen Truck Setup Title Screen ...
Page 105: ...Figure 71 Steering Wheel Number of Turns Valid Entry ...

