Crankshaft and Main Bearings Repair
600 YRM 496
Crankshaft and Main Bearings Repair
REMOVE
1.
Remove bracket for cooling fan.
2.
Remove six capscrews and plate from crankshaft
pulley. Remove six capscrews that hold crankshaft
pulley to timing pulley.
3.
Remove capscrew from timing pulley. Install special
tool on crankshaft to remove timing pulley. Rotate
tool until it touches front of crankshaft. Hit tool with
hammer to loosen timing pulley. Remove pulley,
dowel pin, and tapered ring. Remove tool.
4.
Remove oil pan and oil strainer.
5.
Remove rear cover. Remove front cover with oil
pump.
6.
Remove caps for connecting rods. Put identification
mark on each cap so they will be installed in correct
location.
7.
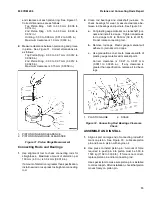
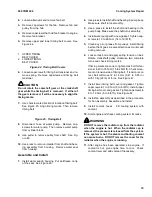
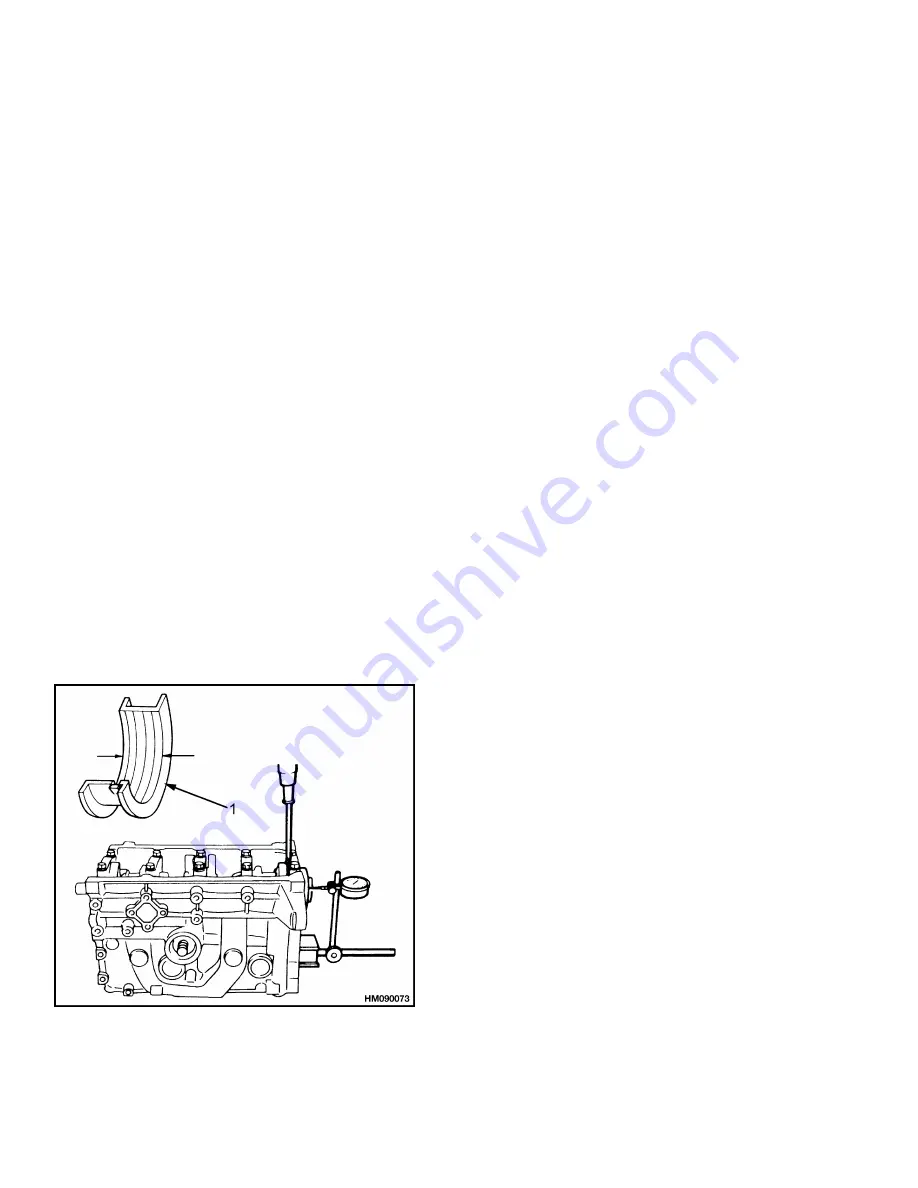
Before removing crankshaft, measure clearance
between crankshaft and flange of center main
bearing.
See Figure 26.
Push crankshaft fully
forward before making measurement.
Maximum clearance is 0.30 mm (0.012 in.). If clear-
ance is greater than specification, replace center
main bearing or crankshaft.
1.
CENTER MAIN BEARING
Figure 26. Crankshaft Clearance Measurement
8.
Put identification marks on bearing caps. Loosen
capscrews for main bearing caps in steps. Then
remove capscrews, caps, and crankshaft.
INSPECT AND REPAIR
Crankshaft
1.
Inspect crankshaft for wear, cracks, or other dam-
age. Replace crankshaft if it has cracks.
2.
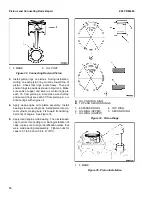
Use micrometer to measure diameter of journals for
crankshaft. See Figure 27. Make measurement at
several locations for each journal. Correct dimen-
sions for journals are as follows:
Main Journal Diameter - 59.937 to 59.995 mm
(2.3597 to 2.3620 in.)
Connecting Rod Journals - 50.940 to 50.955 mm
(2.0055 to 2.0061 in.)
Rear Oil Seal Surface - 89.946 to 90.000 mm
(3.5412 to 3.5433 in.)
Front Oil Seal Surface - 33.961 to 34.000 mm
(1.3371 to 1.3386 in.)
If measurements are less than specifications, grind
crankshaft and install undersize bearings.
3.
Check crankshaft for straightness. See Figure 27.
Put front and rear journals in V blocks and rotate
crankshaft one complete turn. Maximum amount
that dial indicator should indicate is 0.03 mm
(0.0012 in.).
4.
Check oil passages crankshaft. Make sure pas-
sages are clean and have no restrictions.
Main Bearings
NOTE: Do not clean main bearings. If any bearings are
too dirty, replace all main bearings.
1.
Inspect main bearings for damage.
If any main
bearing is damaged, all main bearings must be re-
placed.
2.
To inspect main bearings for wear, measure clear-
ance between main bearings and crankshaft. See
Figure 28.
a.
Install crankshaft in cylinder block.
10
Summary of Contents for GDP16-20AF
Page 37: ......


