Group 03
General Maintenance and Diagnostic Data
General Troubleshooting
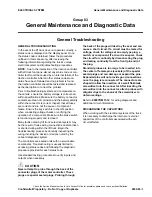
GENERAL TROUBLESHOOTING
In the event the lift truck does not operate correctly, a
status code is displayed on the display panel. Once
the status code is obtained, follow the procedures
outlined in this manual only after reviewing the
following information regarding the truck’s unique
electrical system and troubleshooting procedures.
NOTE:
Due to the interaction of the traction controller
with all truck functions, almost any status code or con-
troller fault could be caused by an internal failure of the
traction controller. After all other status code proce-
dures have been followed and no problem is found,
the traction controller should be tested and replaced
as the last option to correct the problem.
Prior to troubleshooting systems and components on
the vehicle, ensure the battery voltage is correct and
within specifications. Make sure the battery connector
contacts are clean of corrosion and the battery polarity
within the connector is correct. Inspect that all fuses
are correct and are not the cause of component
failure. Ensure the key switch is in the ON position
when conducting voltage checks or verifying the
operation of a component. Make sure the brake switch
is functioning properly and is closed.
Many faults noted by lift truck’s electrical system may
be the result of loose wiring connections and/or broken
or shorted wiring within the lift truck. Begin the
troubleshooting process by carefully inspecting the
wiring involving the device or devices noted by the
onboard diagnostic system. .
The controllers are sealed units with no serviceable
components. Troubleshooting is usually limited to
accessing status codes and following the diagnostic
procedure provided for each status code.
Use standard testing procedures to verify inputs and
outputs when necessary.
CAUTION
Never attempt to probe through the back of the
connector plugs of the motor controller. These
plugs are special sealed plugs. Probing through
the back of the plugs will destroy the seal and can
cause a short circuit. If a circuit must be tested for
voltage, check for voltage at an amp-type plug, a
switch, or component. If a circuit is suspect, check
the circuit for continuity by disconnecting the plug
and testing continuity from the front (pin end) of
the plug.
Standard probes are too large to be inserted into
the center of female pins (sockets) of the special
sealed plugs and can damage or expand the pins.
Expanded pins will not provide good connections
once the plug is reconnected. The connectors are
shaped to allow the insertion of a small flat-blade
screwdriver into the connector. After inserting the
screwdriver into the connector, attach probes with
alligator clips to the shank of the screwdriver to
obtain readings.
Refer to
8000YRM 1512
for wiring diagrams and
additional circuit information.
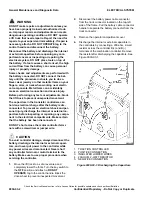
DISCHARGING THE CAPACITORS
When working with the electrical systems of the truck,
it is necessary to discharge the internal or external
capacitors of the controllers associated with each
circuit affected.
ELECTRICAL SYSTEM
General Maintenance and Diagnostic Data
Check the Service Manual section in Yale Axcess Online for possible updates and check pertinent Bulletins
Confidential/Proprietary - Do Not Copy or Duplicate
9030-03-1
Summary of Contents for MPB045VG
Page 1: ...Maintenance CONTROLLER DIAGNOSTICS MPB045VG A245 PART NO 550095689 9000 YRM 1671 ...
Page 4: ......
Page 6: ......
Page 10: ...9030 4 ...
Page 24: ...NOTES 9030 03 14 ...
Page 83: ......
Page 84: ...9000 YRM 1671 10 19 9 15 1 15 12 14 10 14 4 14 ...


