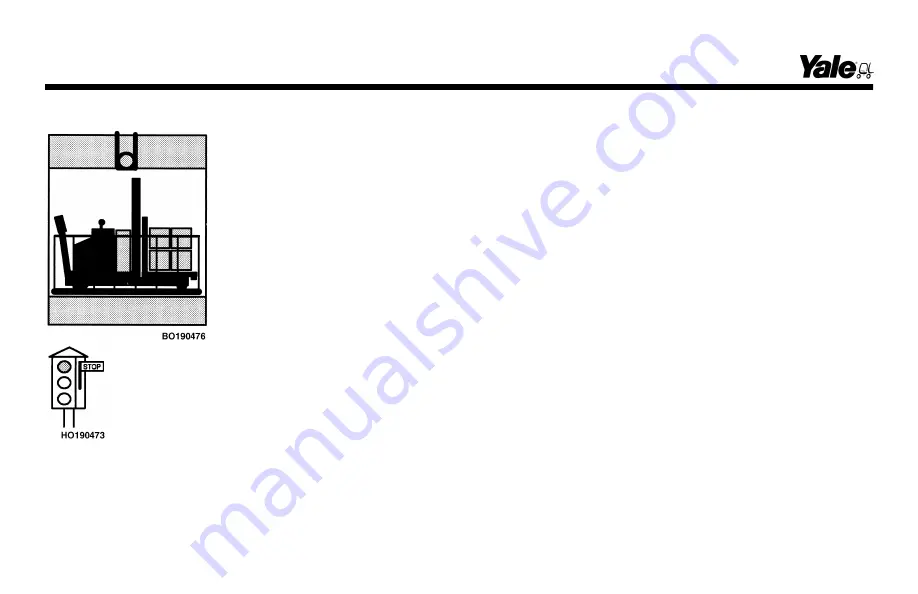
4. Elevators -
Do not drive a lift truck into an elevator
unless authorized to do so. Approach the elevator slowly.
After the elevator is properly lev-
eled, center the lift truck so that
the elevator is balanced. When
the lift truck is in the proper posi-
tion, put the controls in neutral,
return the control handle to the
vertical position to apply the
brake, and shut off the power. It
is advisable that all other person-
nel leave the elevator before the
lift truck enters or leaves.
5. Drive Carefully -
Observe
traffic rules and be in full control of the lift truck at
all times. Be completely familiar with all the driv-
ing and load handling techniques contained in
this
Operating Manual
.
Operating the Truck
1.
Make sure a charged battery of the correct voltage is
installed and connected.
2.
Turn key switch to the
ON
position.
3.
Move the control handle downward away from the
upright position. This will energize the electrical system.
The brakes are automatically applied when the steering
handle is in the extreme upper or lower position.
4.
Rotate the speed/direction control in the direction of
travel. Rotate further until desired travel speed is reached.
Maximum rotation of the control causes maximum travel
speed.
Contact authorized maintenance personnel if a warning or
fault statement appears on the dash display.
DO NOT
operate the truck until the problem is corrected.
Driving and Direction Changes
The operator can change the direction of travel while the lift
truck is moving by moving the speed/direction control in the
opposite direction. This action uses the motor for braking
and is called
PLUGGING
. Plugging can take place at any
travel speed. The lift truck will come to a stop and then
accelerate in the opposite direction. Plugging is a normal
method used to stop the lift truck and is proportional to how
much the speed/direction control is moved in the opposite
direction.
Operating Procedures
42
Summary of Contents for MSW020-E
Page 12: ...Figure 2 Nameplate Warning Labels and Decals Model Description 10...
Page 60: ...Figure 15 Maintenance Points MSW025 030 F Maintenance Schedule 58...
Page 81: ...Figure 23 Remove Install Battery From Battery Power Pack Maintenance 79...
Page 92: ...A TOP VIEW B LEFT VIEW 1 DRIVE END 2 FORK END 3 STRAP Figure 24 Lifting Points Maintenance 90...
Page 93: ...Figure 25 Putting the Lift Truck on Blocks MSW MRW Shown Maintenance 91...
Page 96: ...A TOP VIEW B LEFT VIEW 1 STRAP 2 ANCHOR POINT Figure 26 Lift Truck Tie Downs Maintenance 94...
Page 97: ...Spacer 7 18 5 18 11 17 8 16 1 16 7 14 2 13 9 09 9 08 3 08...


