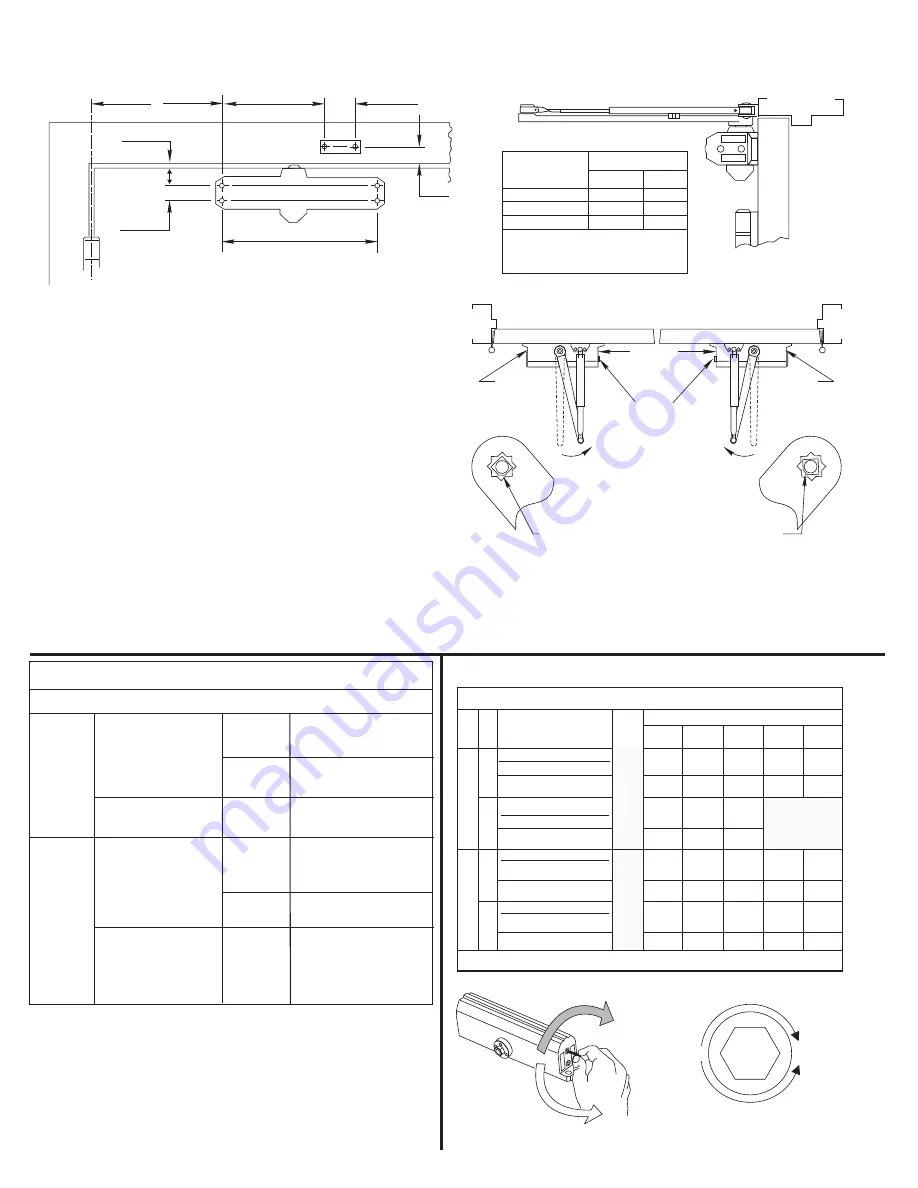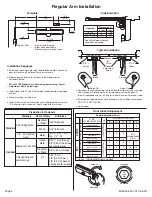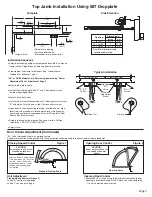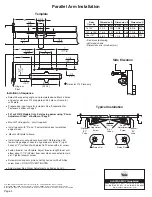
Regular Arm Installation
Page 2
80-9350-2527-010 (06-09)
6
(152)
1-3/4
(44.5)
1-1/4
(32)
3/4
(19.1)
9-1/16
(230.2)
1/2
(12.7)
A
Template
Hinge or Pivot
C
L
• Do not scale drawing.
• Right hand door shown.
• Dimensions are in inches (mm).
Installation Sequence
!
!
!
!
!
Select door opening angle using template above. Mark 4 holes on
door for closer and 2 holes on frame for arm shoe.
Prepare door and frame for fasteners See “Preparation for
Fasteners” below.
Install closer with “S” and “L” adjustment valves toward hinge edge
of door.
Mount arm shoe to frame face.
Install main arm onto closer pinion shaft, indexing main arm mark
“S” with pinion flat as shown at right. Fasten with arm screw.
!
251 or 251BF Models Only. Set closing power using “Power
Adjustment Chart” below right.
Side Elevation
Opening
To 100°
101° to 120°
121° to 180°
Dimension A
inches
7
6
3-1/2
mm
178
152
89
* Door/Wall/Hardware/Jamb
conditions permitting
Typical Installation
Right Hand Door
Left Hand Door
Optional
“BC”
Valve
“S” & “L”
Valves
Power
Adjustment
Screw
Preload
Preload
Pinion Flat
!
!
Open door to allow connecting rod to be inserted into arm slide. Insert rod
and close door. Preload main arm by rotating away from hinge until
forearm is perpendicular (at 90° angle) to door. Secure with forearm screw.
Screw pinion cap onto pinion shaft by hand or with a Phillips screw driver -
DO NOT OVER TIGHTEN.
Adjust closer.
!
Door Closer Adjustment
Power Adjustment Chart
DOOR
INTERIOR
INTERIOR
EXTERIOR
EXTERIOR
251BF
251
TYPE
OF INSTALLATION
REGULAR ARM
TOP JAMB
PARALLEL ARM
REGULAR ARM
TOP JAMB
PARALLEL ARM
REGULAR ARM
REGULAR ARM
TOP JAMB
PARALLEL ARM
TOP JAMB
PARALLEL ARM
MAXIMUM DOOR SIZE
34”
(0.85 m)
36”
(0.9 m)
40”
(1 m)
44”
(1.1 m)
48”
(1.2 m)
1
2
5
8
2
3
3
5
1
2
6
9
4
5
5
7
2
3
8
12
6
7
7
10
3
4
9
10
10
14
3
5
11
13
13
16
*18 -360° TURNS MAXIMUM AVAILABLE
*
FULL 360
TURNS
OF PO
WER ADJUSTMENT
SHAFT
o
NOT
RECOMMENDED
USE 251
Increase
Decrease
1/8”
Hex
Key
Increase
Decrease
FULL 360
TURNS
OF PO
WER ADJUSTMENT
SHAFT
o
“S” & “L”
Valves
1
2
3
4
Z
Y
S
Pinion Flat
1
2
3
4
Z
Y
S
9/32” (7 mm);
3/8” (9.5 mm) dia. x
3/8” (9.5 mm) deep on
door opposite to closer
Standard
Optional
Through-bolts and
grommet-nuts
All
Preparation for Fasteners
Door or Frame
Fasteners
Drill-Sizes
Self-Drilling Screw
Wood
3/16” (4.30 mm)
1/4” - 20 machine
screw
Metal
Drill: #7 (0.201” dia.)
Tap: 1/4” - 20
Sleeve nuts and bolts
Hollow
Metal
9/32” (7 mm) through;
3/8” (9.5 mm) door face
opposite to closer
Aluminum
or Wood
3/8” (9.5 mm) through
Aluminum
or Metal
No drill required


