background image

Chapter 11 Service and Maintenance

See also: 

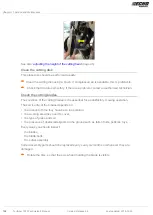
adjusting the height of the cutting head

 (page 98).

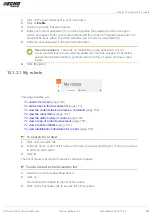
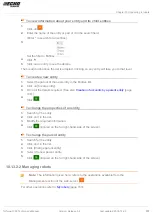
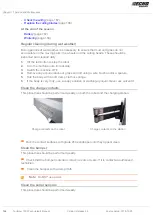
Clean the cutting disk

This procedure should be performed weekly.

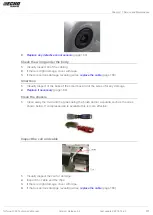
Clean the cutting disc using a brush. If compressed air is available, this is preferable.

 Check that it rotates smoothly. If there is a problem contact an authorized technician.

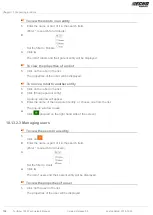
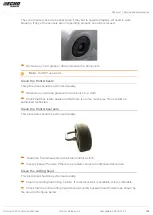
Check the cutting blades

The condition of the cutting blades is the essential for a satisfactory mowing operation.

The service life of the blades depends on:

the amount of time they have been in operation,

the working area they need to cover,

the type of grass and soil,

the presence of obstacles/objects on the ground such as fallen fruits, pebbles, toys, ...

Every week you should inspect:

-

the blades,

-

the blade bolts,

-

the cutter assembly.

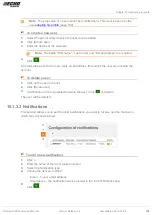
Cutter assembly parts should be replaced every every six months or whenever they are
damaged.

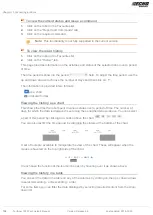
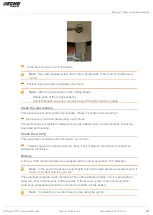
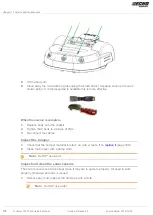
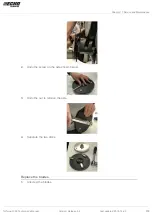
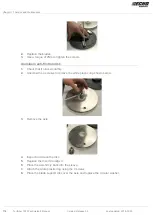
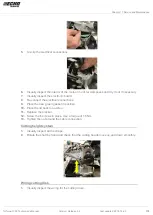
 Rotate the disc, so that the screw head holding the blade is visible.

166          Turfmow 1000 Technician's Manual

 Version: Release 3.5

 Last updated: 2018-12-20

Summary of Contents for ECHO Robotics Turfmow 1000

Page 1: ...ftware version 3 5 Familiarity with the contents of this manual is required before operating the robot Turfmow 2000 and Turfmow 1000 are registered trademarks of Yamabiko Europe Avenue Lavoisier 35 1300 Wavre Belgium www belrobotics com ...

Page 2: ... contained herein and gives no other warranty or undertaking as to its accuracy Yamabiko Europe S A N V can accept no responsibility for damages resulting from the operation of the equipment its accessories and peripherals or any related software Yamabiko Europe S A N V reserves the right to amend this document at any time without prior notice Yamabiko Europe S A N V and its affiliates are not lia...

Page 3: ...t with a positioning beacon 40 7 1 3 Return to station with a station loop 41 7 1 4 Dimensions associated with the charging station 42 7 1 5 Critical distances for a straight wire 42 7 1 6 Placement of the charging station 44 7 1 7 Charging station electronic board 44 7 1 8 Installing a channel board outside of the charging station 46 7 1 9 Installing an inductor in the charging station 46 7 1 10 ...

Page 4: ...8 9 Troubleshooting Error messages 130 9 1 Battery 131 9 1 1 Battery temperature issue 131 9 1 2 Battery over voltage 131 9 1 3 Bad battery connection 131 9 1 4 Bad battery measure 132 9 1 5 BMS communication wire is not connected 132 9 1 6 Shutdown in 2min inhibit shutdown principal unblock brakes 133 9 2 Installation 133 9 2 1 No positioning beacon detected 133 9 2 2 Station contact lost for 0 s...

Page 5: ...rs issue detected 143 9 5 6 Collisions at start up 0 143 9 5 7 Collision too close to station X m 143 9 5 8 DMA Error on sonars 0 144 9 5 9 LongCollision 0 event detected 144 9 5 10 Still in collision 0 alarm 144 9 5 11 Wait for no collision 145 9 5 12 Did not find the zone due to collision 0 145 9 5 13 ManualTask shall not complete MotorDrive is in safety 145 9 5 14 The wire is currently configur...

Page 6: ... 12 6 Front wheel and axle 189 12 7 Correcting lid closure problems 189 13 Notices 192 14 Declaration of conformity 193 15 Technical specifications Turfmow 1000 194 16 Winter service check list 196 17 Glossary 200 18 Abbreviations 203 19 Robot registration details 204 ...

Page 7: ...uish between installations that use a positioning beacon and those that use a return to station loop In The Actions menu page 99 there is a new option to start the robot working in a specific parcel Instructions on Installing an inductor in the charging station page 46 Release 3 0 Multi fields page 60 Return to station with a station loop page 88 Complex garden and with station loop page 90 Mono f...

Page 8: ... It can be changed at any moment by Echo EU without the need for prior announcement Updated information can be obtained from the website https myrobot echorobotics com Turfmow 1000 has been designed to high safety standards but residual risks are always possible and the recommended safety and protective measures must be followed Version This manual refers to Software version 3 5 to see the current...

Page 9: ... link to a word in the glossary Use active periods Indicates an option to highlight in the user interface this is less than 5m italic script for emphasis 1 An entry in the user interface Indicates a maintenance operation menu entry Sequence of menu selections in the interface Infrastructure Peripheral wires Indicates a variable parameter value Turfmow 1000 Technician s Manual Version Release 3 5 L...

Page 10: ...ot contains a comprehensive set of Sensors page 18 which ensure its safe and reliable operation A user can exercise direct control over the robot using the User Interface page 96 Once a robot is registered on the portal running on a web server the robot can send information to this server alarms and activities for example which a user can see by connecting to the server Through this server the use...

Page 11: ... the mechanical components 3 Obstacle detection sonars Sensors detect an object in the path of the robot For more information see Obstacle detection sonars page 18 4 Front wheels Front wheels 5 Bumper The bumper page 18 is a pressure sensor which will cause the robot to change direction when it touches an obstacle 6 Rear wheels The rear wheels are driven and are equipped with brakes to ensure safe...

Page 12: ... cutting blades which are rotated on the head and which cut the grass Figure 4 Detail of the cutting head A Bracket B Cable entry C Motor housing D Blade support disc E Anti friction disc F Cutting blade G Pantograph If a problem is detected it is possible to disable any number of cutting heads page 103 12 Turfmow 1000 Technician s Manual Version Release 3 5 Last updated 2018 12 20 ...

Page 13: ...n the robot crosses the peripheral wire it registers a change in phase of the signal in the wire which indicates it is leaving the field As a consequence it will change direction in order to return into the field See Work mode page 23 12 On Off switch Switches the robot on or off Identification labels There are two identification labels providing information about the individual robot The identifi...

Page 14: ... an optional extra that are installed behind the rear wheels to clean them See Installing the wheel brushes page 72 Dimensions Figure 7 Rear view dimensions Figure 8 Side view dimensions 14 Turfmow 1000 Technician s Manual Version Release 3 5 Last updated 2018 12 20 ...

Page 15: ...The A weighted emission sound pressure level at the operator position does not exceed 70 dB A Mass in kilograms This can be seen on the identification label See Figure 5 Identification label under the Stop lid page 13 4 2 The charging station Figure 10 Components of the charging station 1 Charge arms 2 Base Turfmow 1000 Technician s Manual Version Release 3 5 Last updated 2018 12 20 15 ...

Page 16: ... normally Red blinking no peripheral wire can be detected This could be because the wire has been cut or that it is too long Red steady indicates a problem This could be due to the wire being too short less than 200m or there is a problem with the electronics 5 Identification label 6 Input for power cable 7 Inputs for peripheral cables Technical details Details of the charging station can be seen ...

Page 17: ...ich is detected by the robot This enables the robot to locate the charging station to a very high level of accuracy 200mm See returning to the charging station page 25 The station positioning beacon is normally installed in the charging station but can be installed in a separate location This may be necessary if the detection of the charging station is not sufficiently accurate due to obstacles or...

Page 18: ...ansmit a constant sonar signal 40kHz When these hit an obstacle the reflected waves are received by the sensors and the speed of the robot is reduced to 200mm s less than 1km h Figure 13 Detection of obstacles by sonar sensors The robot gently touches the obstacle at low speed The robot moves backwards and chooses a random direction between 60 and 120 These sensors can detect objects that are at l...

Page 19: ...s If this movement frees the obstacle from the body the robot will perform a manoeuvre to avoid the object and continue mowing If not after 10 seconds the robot will register an alarm and remain in safe mode stationary until the obstacle is removed Coil The induction coil detects the intensity of the magnetic field that is generated within the peripheral wire The maximum intensity is located on th...

Page 20: ...oning beacon page 63 Tilt Rollover sensor The tilt sensor detects the angle of the slope on which the robot is mowing If this angle exceeds 30 58 an alarm will be raised and the robot will stop moving The rollover sensor detects whether the robot has been tipped upside down or whether someone is trying to start the motor when the robot is upside down Show Temperature sensor The temperature sensor ...

Page 21: ... the battery or for a rest period Inactive state page 35 The robot can enter an inactive state if there is a condition that causes the mowing mission state to be halted The robot will return to the mowing state when the problem has been resolved and a specific command has been issued to tell the robot to resume the autonomous mowing state The service state page 36 is one that can be initiated by t...

Page 22: ...es the battery For more details see Charge mode page 29 Wait station When the battery has been charged the robot may remain at the charging station depending on the program and the current conditions For more details see Wait in charging station mode page 30 Border mode In this mode the robot mows the border of the field For more details see Border mode page 30 Go zone In this mode the robot goes ...

Page 23: ...e peripheral wire The charging station emits a signal that generates an electro magnetic field within the area bounded by the peripheral wire The robot is equipped with a coil that senses the magnetic field The strength of the electro magnetic field is greatest at the boundary and as the robot arrives at the wire it slows down It then passes over the wire and the coil senses a change in phase This...

Page 24: ... and gently touch the obstacle as indicated by the pressure sensors on the bumper The robot will reverse and then rotate through a random angle in order to proceed with the mowing Figure 20 Robot maneuvers around an obstacle Decisions A At a certain moment the robot will take the decision to return to the charging station This could be because The battery needs charging The programmed mowing time ...

Page 25: ... certain moment it will decide to return to its charging station The maneuvers used to return to the station depend on the type of installation Single mowing field with positioning beacon page 25 Multiple mowing fields with positioning beacon page 26 Single mowing field with station loop page 27 Multiple mowing fields with station loop page 28 6 1 2 1 Single mowing field with positioning beacon Th...

Page 26: ...ed the loopstep page 200 The robot will turn again through 90 o and move along the peripheral wire towards the charging station This manoeuvre is termed the trackwire page 202 Once the robot has arrived at the charging station it enters Charge mode page 29 6 1 2 2 Multiple mowing fields with positioning beacon This chapter describes how the robot returns to the charging station through a series of...

Page 27: ...00 to turn towards Peripheral wire B at point D When it reaches the wire at point E it turns through 90 o again and follows the wire page 202 to arrive at the charging station Once the robot has arrived at the charging station it enters Charge mode page 29 6 1 2 3 Single mowing field with station loop This chapter describes how the robot returns to the charging station from a single mowing area us...

Page 28: ...ich is where the two wires overlap It then follows the station loop wire until it arrives at the charging station Once the robot has arrived at the charging station it enters Charge mode page 29 6 1 2 4 Multiple mowing fields with station loop This chapter describes how the robot returns to the charging station through a series of mowing fields using a station loop page 201 to locate the station 2...

Page 29: ...Figure 23 Charge mode When the robot arrives at the charging station the robot will connect to the charging points and the battery will be charged Decisions B The robot will stay at the charging station until the battery is fully charged an instruction is issued The operations that will be performed depends on how the robot has been programmed and external conditions The robot will wait in station...

Page 30: ...battery has been charged until the normal program needs to commence a specific command is issued 6 1 5 Border mode Figure 25 Border mode Note Border mode only operates when the installation configuration uses a single mowing field and a positioning beacon to locate the charging station 30 Turfmow 1000 Technician s Manual Version Release 3 5 Last updated 2018 12 20 ...

Page 31: ...ecause the mowing schedule demands it or a specific command has been issued Go zone mode describes the maneuvers the robot makes to leave the station and start mowing These depend on the type of installation configuration Single field with positioning beacon page 31 Multiple mowing fields with positioning beacon page 32 Single mowing field with station loop page 33 Multiple mowing fields with stat...

Page 32: ...ng fields with positioning beacon In this configuration there are multiple wires each defining a parcel area to be mowed Before leaving the station the robot must decide in which parcel to start mowing This will depend on The defined mowing schedule for each parcel If the schedule dictates that a specific parcel must be mowed at this time the robot will start mowing in that parcel The percentage v...

Page 33: ...re the two mowing fields overlap Once in Parcel R it will travel for a certain distance along the track border in this parcel until it reaches point D when it will turn into the field and start mowing These distances are specified in the StartZone parameters for the parcel 6 1 6 3 Single mowing field with station loop This configuration contains two wires one defining the field to be mowed and the...

Page 34: ...to be mowed as well as the station loop wire No mowing takes place within the station loop it is just used to guide the robot into and out of the charging station Before leaving the station the robot must decide in which field parcel to start mowing This will depend on The defined mowing schedule for each parcel If the schedule dictates that a specific parcel must be mowed at this time the robot w...

Page 35: ...n into the field and start mowing The distance the robot travels along the track border before starting to mow and the angle it turns through are specified in the StartZone parameters for the parcel in which the mowing starts Parcel R in this example 6 2 Inactive state Some condition may arise which causes the robot to halt its autonomous mowing mission and enter an inactive state until the active...

Page 36: ...he Self test mode page 36 before recommencing any activity Self test mode Whenever the robot has been in the Standby mode it will perform a self test to check the integrity of the entire system including electronics sensors mechanics and software When the result of the self test is successful it will resume the autonomous working state If the result of the self test is NOT successful it will regis...

Page 37: ...u page 121 in the Technician s menu page 114 Install Wizard This is used to set installation parameters See Configuration page 73 Note The Installation Wizard can only be used for a mono field installation using a positioning beacon Turfmow 1000 Technician s Manual Version Release 3 5 Last updated 2018 12 20 37 ...

Page 38: ...nstalled separately The peripheral wire s define the limits to which the robot will mow The charging station generates a signal in the peripheral wire that creates a electro magnetic field enabling the robot to detect the field Obstacles page 52 must be avoided This may be achieved by movements executed by the robot when a sensor has detected the obstacle In some cases however this is not possible...

Page 39: ...d with the charging station page 42 Critical distances for a straight wire page 42 Placement of the charging station page 44 Charging station electronic board page 44 Installing a channel board outside of the charging station page 46 Installing an inductor in the charging station page 46 Selection of charging station type on the positioning beacon board page 47 7 1 1 Criteria determining the posit...

Page 40: ...s parameters Direction In the example shown above this is Clockwise When the robot reaches point A it turns through 90 and makes the loopstep towards the wire B It then travels along the wire until it reaches the charging station C The distance between A or B and C is defined by the Access parameters Station entry min and max parameter Note If no positioning signal is detected after the robot has ...

Page 41: ...station as shown in the figure below Figure 30 Return to station loop When the robot needs to return to the charging station it follows the track border along the peripheral wire of the field s it is mowing When the robot detects the station loop wire it moves along the wire until it arrives at the station The approximate dimensions of the return loop are Length 2 is 2 5m maximum Width is Maximum ...

Page 42: ...ions associated with the charging station 7 1 5 Critical distances for a straight wire Note These distances apply to the situation where a positioning beacon is used to detect the charging station Minimum length of straight peripheral wire on incoming side 3m Minimum length of straight peripheral wire on outgoing side 1m Radius of obstacle free zone 12m 42 Turfmow 1000 Technician s Manual Version ...

Page 43: ...re on the incoming side is 8m Minimum length of straight wire on the outgoing side is 1m Critical distances for an S Shaped wire Case 2 The figure below illustrates the case where the robot can detect the positioning signal before it reaches point A which is the minimum distance on the vertical section of the wire required for the robot to perform the loopstep manoeuvre Figure 34 S shaped wire Cas...

Page 44: ... angle of the charge arms is at 45 Figure 35 Correct positioning of the charging station and the robot 7 1 7 Charging station electronic board The charging station must contain a board for each peripheral wire channel that is included in the installation Note It is also possible to install a signal channel board in an external box page 46 Each board contains the following components 44 Turfmow 100...

Page 45: ...ERIAL PC interface for updates 5 JWIRE Peripheral wire 6 JTR1 DC supply 7 JTR2 DC supply 8 JCHRG 32 V contact arm F1 20 A fuse mains F2 1 A fuse electronic board 9 Magnetic signal channel selection switch Channels 0 1 2 3 4 5 9 are available The default factory selection is channel 0 Turfmow 1000 Technician s Manual Version Release 3 5 Last updated 2018 12 20 45 ...

Page 46: ...l an external channel board near the charging station if there is insufficient space in the charging station A specific box is provided for this Product number YB 062 00015 3A Simply connect the two ends of the peripheral wire to the connections shown below Figure 37 External channel board 1 Mains connection 2 Peripheral wire connections 7 1 9 Installing an inductor in the charging station If the ...

Page 47: ...of charging station type on the positioning beacon board The figure below shows the bank of 8 switches on the positioning beacon board and the direction used for ON and OFF Figure 39 Charging station type switches Switch 1 2 3 4 5 6 7 8 Purpose Not used Not used TM2000 station Ball Picker station TM1000 station Charge Drop station Not used Turfmow 1000 Technician s Manual Version Release 3 5 Last ...

Page 48: ... the area to be mowed lies within the complete site The distance between the peripheral wire and this boundary will vary depending on the characteristics of the site The peripheral wire starts and ends at the charging station Echo EU recommends laying the wire in a clockwise direction around the field Figure 40 Peripheral wire laid in a clockwise direction The peripheral wire needs to take obstacl...

Page 49: ... associated with the charging station Details of these are set out in the chapter on the charging station page 39 Recommended Depth 50 to 70mm Minimum depth This should be 20mm However The cable should never be able to come to the surface where it could be damaged It should be deep enough in locations exposed to heavy duty applications e g in front of goals on football pitches Maximum depth It is ...

Page 50: ...4 Raised hard landscaping Distance between raised hard landscaping and the peripheral wire 650mm Width of grass not mowed 330mm Figure 45 Hard landscaping level with grass Distance between the hard landscaping and the peripheral wire 200mm Width of grass not mowed 0mm Figure 46 Lawn level planting Distance between lawn level planting and the peripheral wire 500mm Width of grass not mowed 180mm Not...

Page 51: ...ack border from Zone B through the strait and return to the charging station in Zone A Length of the strait Minimum distance between wires 1m 3 5m 1m Length of strait 5m 4 0m 5m Length of strait 15m 4 5m Sites with long lanes Figure 48 Site with long isolated lane A long isolated lane represents an area where the intensity of the magnetic field between the wires is high There is a risk that the ro...

Page 52: ...down moves forward until it touches the obstacle gently reverses and then turns through an angle to continue mowing Note The detection of obstacles relies on the constant operation of all 5 sonars If a sonar fails an alarm is raised and the robot works at low speed after the failure of any sonar The sonar sensors can only detect an object if its Min height is 400mm and its Min width or diameter is...

Page 53: ...the boundary to be mowed page 53 3 Distance between the obstacles when this is LESS than 5m use an island page 58 when this is MORE than 5m use a pseudo island page 59 4 Size of the obstacle when the side or the diameter of the obstacle is LESS than 5m use an island page 58 when the side of the diameter of the obstacle is MORE than 5m use a pseudo island page 59 Obstacles near the boundary to be m...

Page 54: ...ees Figure 52 Trees with roots that go straight down into the ground Large trees with roots that go straight down into the ground without surface roots can generally be detected by the sensors Figure 53 Trees surrounded by a level zone When the trees are surrounded by a level zone the best solution is to fill the cavity with soil or wood chips to level off the ground 54 Turfmow 1000 Technician s M...

Page 55: ...When the trees have surface roots an island page 58 or pseudo island page 59 must be used Figure 55 Sapling Trees with very small trunks need to be protected with poles that the sensors can detect Turfmow 1000 Technician s Manual Version Release 3 5 Last updated 2018 12 20 55 ...

Page 56: ...horizontal mattress on a trampoline if it is at a height of more than 400mm The trampoline footage can trap cutting heads and damage heads and blades Possible solutions are use an island pseudo island set protection planks around the footage of the trampoline use protection poles The maximum distance between poles is 400mm Sculptures This will of course depend on the size and the type of sculpture...

Page 57: ... flooded take additional appropriate reserve If the required reserve distance is not available install a barrier such as a row of protection poles See Figure 58 Critical factors associated with water page 57 Remember The charging station must be located at least 15m from the water s edge The figure below summarizes some critical factors associated with the placement of the charging station and the...

Page 58: ...page 52 The peripheral wire is taken around the obstacle and the approach and return wires laid next to each other Figure 59 Route of the peripheral wire around an island Note The wire must be laid around an island in the opposite direction to which it is laid around the field It is recommended that the peripheral wire is laid in a clockwise direction from the charging station The wire must then g...

Page 59: ...bstacle is less than 5m from the peripheral wire less than 15m from the charging station less than 5m from another island or pseudo island Note A pseudo island can also be used if the maximum of 5 islands have been installed See Dealing with obstacles page 52 The peripheral wire is laid around the obstacle maintaining a specific distance between the approach and the return wires Turfmow 1000 Techn...

Page 60: ...robot will move around the obstacle as shown in the figure below Figure 63 Robot route around a pseudo island 7 3 Installing multi fields It is possible to connect several peripheral wire loops to a single station Each field is defined by a peripheral wire loop that starts and ends at the station Each peripheral wire loop is assigned to a different signal channel in the charging station The chargi...

Page 61: ...station Wire 2 Parcel 2 is a neighbor of Wire 1 Parcel 1 Wire 3 Parcel 3 is a neighbor of Wire 3 Parcel 3 It is also a neighbor of Wire 4 Parcel 4 Wire 3 Parcel 3 is a transition zone used to connect the main mowing areas of Wires 1 and 2 The proportion of time that the robot spends mowing in Wires 1 and 4 is determined by the percentage values assigned to the corresponding parcels For Wires 1 and...

Page 62: ...e wires to the charging station there are specific conditions that must be respected Rule 1The start and finish wires should lie next to each other when they enter the station There should be no gaps in the loops The correct and incorrect method of cabling is shown below Rule 2The wires should not cross The wires for one field should be taken around the other field The distance between them must b...

Page 63: ...etails of the switches to set the positioning beacon see Selection of charging station type on the positioning beacon board page 47 Figure 66 Components on the positioning signal board 1 Single chip UWB transceiver 2 Antenna 3 Inertial Motion Unit IMU 4 CPU 5 Switch to set the positioning beacon 6 Set of three support brackets 7 Power cable connector The positioning beacon board can be Installed i...

Page 64: ...connect the power from the charging station If the charging station is connected to the mains using a power cable unplug the cable If the station is connected directly to an electrical cabinet first remove the station cover see below and then remove the fuse inside the station 2 Remove the cover from the charging station Undo the 4 8mm nuts connecting the cover to the base 3 If the station is conn...

Page 65: ... page 63 Note One of these should be a metal grounded support See Upgrade the positioning board supports page 69 6 Connect the power cable to the wire board Ensure the wire is properly screwed and secured 7 Take the cable behind the wire and positioning boards and push the other end into the socket on the positioning board Turfmow 1000 Technician s Manual Version Release 3 5 Last updated 2018 12 2...

Page 66: ...ay be that the radio waves are emitted at a height at which the robot cannot detect them This can be resolved by locating the positioning beacon at a point low enough for the robot to detect it In all cases the recommended installation height is below 1m For any specific installation requirements or to set it at a higher level please contact the After Sales department To install the positioning be...

Page 67: ... pressing it onto the four plastic spacers 4 Pass the cable through the cable gland Make sure that the cable gland is properly tightened 5 Connect the cable to the socket on the positioning board Turfmow 1000 Technician s Manual Version Release 3 5 Last updated 2018 12 20 67 ...

Page 68: ...the charging station If the charging station is connected to the mains using a power cable unplug the cable If the station is connected directly to an electrical cabinet first remove the station cover see below and then remove the fuse inside the station 2 Remove the cover from the charging station Undo the 4 8mm nuts connecting the cover to the base 3 If the station is connected directly to an el...

Page 69: ...it clicks 6 Screw the hex nut 7 Re connect the power cable of the positioning board into its socket by gently pushing it until it clicks 8 Replace the station cover 9 Configure the settings Use the technician s menu page 114 Infrastructure Stations Upgrade the positioning board supports Initially the beacon positioning board was mounted in the station with a set of plastic supports It is recommend...

Page 70: ...ects power from the connection on the wire board to the connection on the positioning board Early positioning boards were supplied with a four position power cable New boards are powered through a five position cable To change the power cable 1 Disconnect the power cable from the beacon positioning board Press the locking guard down gently and remove the cable from the socket as shown below 2 Disc...

Page 71: ...res are required If the slope is near the peripheral wire the robot should return to charging station by descending the slope Charging station If the entire site is sloping the station should be located at the top or the bottom not on the slope It is preferable to locate the station at the top of the slope rather than the bottom to avoid problems with flooding The robot has no brake in charge mode...

Page 72: ...the wheel brushes The wheel brushes are fixed to the body behind the rear wheels The installation kit contains the following items 2x brushes 2x brackets 2x 5 screws 2x 5 flat washers 2x 5 crinkled washers 1 Turn the body so that it is lying on its rear 2 Remove the three black covers that cover the fixation holes 72 Turfmow 1000 Technician s Manual Version Release 3 5 Last updated 2018 12 20 ...

Page 73: ...the type of installation Mono field installation These can be set using The Install wizard page 73 if using a positioning beacon The menus in the interface page 78 if using a return to station loop Multi field installation In this case the configuration parameters are set using the menus in the interface page 78 7 7 1 Configuration using the wizard This section describes the installation parameter...

Page 74: ... for these parameters can be seen in the Technician s menu page 114 To configure the installation using the wizard 1 Before using the Install Wizard it is necessary to locate the robot a the position shown in the figure below Figure 71 Placement of the robot before using the Install Wizard The robot must be Inside the peripheral wire At a distance that corresponds to the maximum dimension of the t...

Page 75: ... above and represents the distance required for the loopstep With Next highlighted press 7 Confirmation is requested that the robot is parallel to the wire towards the station i e facing the correct direction in which to enter the charging station With Next highlighted press 8 Close the cover The robot will now a rotate on the spot making approximately 1 2 turns b turn towards the wire c move towa...

Page 76: ...If you answer YES the screen will then display the proposed parameters for following the track border after the trackwire movement Max Distance and Min Distance are illustrated in the figure below Figure 73 Start zone parameters determined by the wizard 13 Edit the values if necessary then highlight Confirm and press 14 You will now see the message The Mower will attempt to reach its initial posit...

Page 77: ... in the direction of the starting point It continues past the starting point for about 2m It then turns through 180 and returns to the starting point facing in the original direction 15 Open the lid The screen displays the proposed entry station parameters Figure 75 Parameters determined by the wizard 16 Edit the values if necessary 17 Use the to highlight Confirm and press The operation of the wi...

Page 78: ... installation is a mono field installation define the Start zone parameters for the station General configuration procedure using a station loop Open the technician s menu Select Infrastructure Peripheral wires and create the required number of wires for the installation For each wire assign the channel number and check the reverse phase Select Infrastructure Parcels Define the properties of the p...

Page 79: ...d move towards the wire The robot will choose a random distance that lies between the minimum and maximum values Figure 76 Minimum and Maximum Station entry distances Dist before alarm This is the maximum distance that the robot should travel along the wire in the direction of the station before it issues an alarm The value is set at 29m and in most cases this does not need to be modified It may b...

Page 80: ...you can specify the specific parcel Default means coming from any other parcel Coming from This option appears if you are defining a start zone for parcel It defines the parcel preceding the one in which the start zone will be implemented Percentage The proportion of times this start zone will be used Edit percentage Allows you to edit the percentages applied to different parcels If only one parce...

Page 81: ...starting zone set the Distance Min Distance Max values to 0 Distance Min and Distance Max are measured from The charge station if the start zone is located in the same parcel as the charging station as shown in Figure 79 Minimum and Maximum Start zone distances measured from charging station page 81 This will be the case if the charging station contains a positioning beacon The point where the rob...

Page 82: ...ined and the robot will choose a random value between the defined limits Figure 81 Start Zone Angle Delete StartZone Allows you to delete the start zone 7 8 Installation examples This section contains some useful examples of installations Football fields page 82 Mono field with two start zones page 87 Return to station with a station loop page 88 Complex garden and with station loop page 90 7 8 1 ...

Page 83: ...eld Peripheral wire in front of goals In the example shown below the peripheral wire loops in front of the goals This means that the goal nets can remain in position whenever the robot is mowing Figure 83 Peripheral wire in front of goals 7 8 1 2 Charging station beside the field without a handrail In this case the charging station can be installed at any suitable position Turfmow 1000 Technician ...

Page 84: ...d assign the channel number for the field as set using the rotating switch in the charging station page 44 5 Check the distance value shown in the title of the user screen This should be positive If it is not select Reverse phase and check the button ON 6 Press twice to return to the Infrastructure menu 7 Select Parcels and then select the parcel associated with the single wire 8 Select Use trackb...

Page 85: ...e station Figure 85 Charging station in large enclosure behind fence The robot detects the charging station at point D and moves onto the wire It then travels along the wire until it reaches the charging station Note The maximum distance between the point D and charging station is 28m If the distance is longer than this the robot will stop and issue a No contact alarm The configuration is S shaped...

Page 86: ... the robot to enter the enclosure The entrance to the enclosure is narrow being just the distance between two fence poles Figure 87 Charging station in narrow enclosure protected by the fence The dimensions of such an enclosure are critical and are shown in the figure below The robot must be able to enter the enclosure dock at the charging station then turn around inside the enclosure in order to ...

Page 87: ...nes are used to ensure that the robot starts mowing in both areas on a regular basis This saves both time and wire The layout of the installation is shown in the figure below This example assumes the use of a charging station with a positioning beacon Figure 89 Mono field with two start zones The following configuration parameters should be set 1 Only one wire field is required Turfmow 1000 Techni...

Page 88: ...m max 12 Set the station entry distances Select Access param Station entry min max Recommended values are 5m min and 10m max 13 Set the station exit distances Select Access param Min Max exit dist Recommended values are 5m min and 10m max 14 Add Start zone 1 Select StartZones Create new start zone 15 For the parameter Following from select Default 16 For the Direction select CW Clockwise 17 For th...

Page 89: ...order width 0 5m This therefor represents an absolute maximum width of 3 0m The depth of the loop wire within the field to be mowed D1 must be 0 25m Figure 91 Depth of loop wire within the field to be mowed If the station is located outside of the field to be mowed the depth of the loop wire D2 can be a maximum depth of 0 07m Figure 92 Depth of loop wire outside of the field to be mowed When insta...

Page 90: ...ted wire and press 14 Rename this field to LAWN 15 Select Signal channel and assign the channel number for the large field to be mowed 16 Check the value shown at the top of the screen This should be positive If it is not select Reverse phase and check the button ON 17 Press twice to return to the Infrastructure menu 18 Select Parcels and then select the parcel associated with the LAWN wire 19 Set...

Page 91: ...etails on all the configuration parameters see the Technician s menu page 114 1 Press 9 on the interface screen for a few seconds to obtain the technician s menu 2 Select Infrastructure Peripheral wires 3 On the Wire settings screen select the first entry in the list Wire CH X 4 Rename this Wire to LOOP 5 Select Signal channel and assign the channel number for the small station loop 6 Check the va...

Page 92: ...e button next to Wire 4 17 Press to return to the Parcels list 18 Select Edit parcels percentage Set the value for the LOOP parcel to 0 Set the values for the other parcels as required based on the relative sizes of the fields 19 Select the newly created field and press 20 Press to return to the Infrastructure men 21 Select Stations Create new station 22 A name is generated which you can modify if...

Page 93: ... Charging the battery The battery must always be charged using the charging station Any other power source car battery charger can cause damage and loss of warranty coverage Never connect an external electrical element to the battery cable Sealed parts Your robot contains components that are sensitive to electrostatic discharge Do not attempt to access sealed parts Important If you notice unusual ...

Page 94: ...efective guards or shields or without safety devices Note Avoid using the machine in bad weather conditions especially when there is a risk of lightning 8 2 Safety notices The symbols shown below appear on the machine Each of them is described below Warning This automatic machine can be dangerous if misused Warnings and safety instructions on the machine and described in this manual must be follow...

Page 95: ...y be ejected with force causing injury Do not ride the machine Do not ride on the machine Never use the machine as a means of transportation Do not stand or sit on the machine or load objects onto it or the charging station Animals Keep animals away from the robot when it is operating Supervise children This appliance is not intended for use by persons including children with reduced physical sens...

Page 96: ...smart box which contains the on board computer to manage the operations of your robot is located under the Stop button lid Note The robot needs to switched ON before you can use any of the functions available from the interface 96 Turfmow 1000 Technician s Manual Version Release 3 5 Last updated 2018 12 20 ...

Page 97: ...ation buttons The arrow buttons allow you to highlight menu options 6 The Back button Exits a menu and returns you to the previous level 7 The Accept button Accepts an operation or setting 8 Service menu button Provides a number of commands used most commonly by the service personnel See The Service Settings menu page 107 9 Settings menu button Allows you to define operational settings See The Set...

Page 98: ...charge Message Shows the current status of the robot or error message page 130 8 3 1 Using the interface The user interface allows you to perform the following operations Operational To define a weekly mowing schedule page 101 To enable disable specific cutting heads page 103 To set the number of times the border mode is used each week page 104 To adjust the cutting height of the blades page 105 T...

Page 99: ...nt Always stop the robot first by hitting the big red stop button These operations would be performed if the robot has been stopped during its normal operation schedule or if it has stopped because an alarm has been raised If an alarm has been raised you need to correct the problem before executing the operations See Troubleshooting Error messages page 130 1 Go charge Return to the charging statio...

Page 100: ...ilable for a single field installation with a positioning beacon 4 Mow now on Leave the charging station and continue mowing in a specific parcel A list of parcel appears in which you can choose the required one Note This option only appears for a multi field installation To execute the operations 1 Click 2 Press the up and down arrows to highlight the required command or press the numeric key tha...

Page 101: ...e implemented or inactive ignored A schedule for one day and for one parcel can be copied to other days of the week The complete schedule can be ignored and the robot set to work at all times To define a mowing schedule Note By default when the robot is delivered the schedule is set to work continuously 1 Press 2 Press the up and down arrows to highlight Schedule then press A screen like the one b...

Page 102: ...end time values where the cursor is flashing then press 8 Press the down arrow key to select the active check box 9 Press to activate the defined session In the figure above Period 1 is active Period 2 is inactive 10 Repeat the process for all the days and the time periods required Note You can copy the defined schedule to another day page 103 11 Press to return to the Parcel Schedule screen shown...

Page 103: ... to the day to which the schedule is to be copied More than one day can be selected 4 Press 5 Press to return to the overview of the schedule To ignore the mowing schedule 1 Press 2 Highlight Edit 3 Press 4 Use the arrow keys to highlight Follow sched and press to uncheck the button Cutting heads The robot is supplied with 3 cutting heads which under normal conditions should all be used When there...

Page 104: ...e disabled head Border Sets the number of times the border mode is used each week The border mode will be implemented at regular intervals during the week Note This option is only available for a single field installation with a positioning beacon To set the number of border mode operations per week 1 Press 2 Press the up and down arrows to highlight Border then press The following screen appears ...

Page 105: ... then press The following screen appears which shows the current height at which the heads are set Note If this value is negative it implies that a reset of the parameters has taken place and that the blade height values need to be re calibrated See The Service menu page 121 3 Press the down arrow key to highlight the Set value 4 Use the left and right arrow keys to scroll to the required value 5 ...

Page 106: ...e specific commands can be issued To lock the system 1 Press 2 Press the up and down arrows to highlight System locking then press 3 Highlight OK then press The following screen will appear and you will need to enter the robot s pin code in order to access the menus again To unlock the system 1 Enter the 4 digit PIN code 2 Press The robot will then wait for a new command to be issued 8 3 3 1 LCD s...

Page 107: ...Enables you to set up the connectivity for the robot page 108 Operations Enables you to set some operating conditions page 110 Device This enables you to define a name for the robot and to view a number of characteristics that relate to the robot page 110 Security Enables you to change or disable the PIN code and to set a Geofence page 112 A Geofence defines an area in which the robot can operate ...

Page 108: ...th the robot for the following reasons To enable the robot to communicate with the portal on the web server This allows you to monitor the state of the robot To update the robot software version The robot connects the remote server on a regular basis to check if a new software version is available If there is the robot starts to download it as a background task while it continues to work as usual ...

Page 109: ...has connected to Entries in normal text are available but which have not been used indicates the actual network to which the robot is connected indicates that the network to which the robot is connected is not encrypted using either WPA or WPA2 technologies This is therefore an insecure network and the indicates a warning indicates that the network has been disabled To connect to a different known...

Page 110: ...rameters Min temp Sets the lowest temperature that the robot will operate at Note Mowing at too low a temperature can damage the grass Edit parcels percentage This option enables you to view and modify the percentage values page 201 assigned to each of the parcels that have been defined The percentage value assigned to a parcel determines the proportion of times the robot will start mowing in the ...

Page 111: ... the main menu Device info To see the device info 1 Press 2 Press the arrow keys to highlight Device then press 3 Highlight Device info and press 4 Use the arrows to scroll through the list Robot name The name of the robot Serial number Serial number of the robot Latitude Current latitude of the robot position Longitude Current longitude of the robot position Visible satellites Number of satellite...

Page 112: ...ys to highlight Device then press 3 Highlight System version and press 4 Use the arrows to scroll through the list Version Current software version in a human readable format Brain version Current Artifical Intelligence AI version Use this when reporting a problem System version Current version of the system software Use this when reporting a problem Software version Current version of the applica...

Page 113: ... circular area is defined by its center and a radius Note This functionality is not fully supported in the current version The current location of the center point can be viewed in the device settings menu page 110 To define and implement a security zone 1 Move the robot to the required center of the security zone 2 Press 3 Press use the arrow keys to highlight Security then press 4 Press the arro...

Page 114: ...ll the current user settings so that valid testing can be implemented Note The method described here removes all the current configuration settings AND the current software version To remove the configuration settings and RETAIN the current software version see 99 Reset Factory page 128 in the Service menu To perform a factory reset 1 The robot needs to be switched ON If it is already on switch it...

Page 115: ...ween the robot and the wire is indicated Signal channel The signal frequency channel for the peripheral wire This corresponds to the channel set using the rotating switch in the charging station page 44 In the case of a multi field installation each wire used must be assigned to a specific channel Reverse phase The sign of the phase on the inside of the field is opposite to that on the outside Thi...

Page 116: ...d parcels There is by default one parcel associated with each wire For each parcel the name and indication of the return direction is shown Selecting a parcel and pressing displays the list of parcel properties given below Edit parcels percentage This allows you to view and set the percentage values for all parcels The percentage value determines the proportion of time that the robot will start wo...

Page 117: ... page 201 when leaving or returning to the station Note This parameter value must be checked ON if the installation contains an island This parameter can be checked OFF in small loops wires which are used just for the robot to return to the station See Return to station with a station loop page 88 Trackbord Min Trackbord Max The minimum and maximum values allowed for the track border page 201 The ...

Page 118: ...distance defined by this parameter 1 5m and does not find the station it will issue an alarm The recommended value of this parameter is the length of the peripheral wire around the field to be mowed The default value is 1000m Neighboring parcels It is necessary to define how parcels are located relative to each other so that the robot can determine the route required to reach a particular parcel T...

Page 119: ...This parameters defines whether the station is used to charge the robot or not Connected to parcels This defines which of the defined parcels the station is connected to For a multi field installation a list of defined parcels will be presented and button next to the required one must be checked ON Note This parameter must be defined for a multi field installation Station Inside Parcel s Wire This...

Page 120: ...ave the station Start Zones This menu displays a list of the defined start zones page 80 and enables you to create a new one Start zones define where the robot will start mowing after it has left the station Note A start zone defined here is only used for a installation that contains a single wire and a positioning beacon 8 4 3 Mobile connection In the absence of a wireless network the robot conta...

Page 121: ... The robot should not be left in Demonstration mode 8 4 5 Service The Service menu contains the following entries Calibrations page 121 Information page 122 Tests page 122 Software update page 128 99 Reset Factory page 128 8 4 5 1 Calibrations Cutting heads This allows you to calibrate the rotational speed of the cutting heads 1 If you have modified or installed a new cutting head select Calibrate...

Page 122: ...total distance traveled by the robot to date This information is used to decide when maintenance is required Bumper resistance Displays the current value of the bumper resistance This should lie in the range 82 94k ohms 8 4 5 3 Tests This menu enables you to execute tests on a number of components These tests will be carried out before the robot is delivered to a customer and at the end of a regul...

Page 123: ...he correct range and that it responds to pressure from an obstacle The following information is shown X Y BUMPER SENSORS X represents the current test in the current sequence Y represents the total number of tests to be performed in the current sequence BUMPER SENSORS is the name of the current test Activate sensors The sides of the bumper that need to be tested by activating Bumper Left Bumper Ri...

Page 124: ...that need to be tested by activating by lifting Lift1 Lift2 Lift3 Lift4 Disable Sensors The lift sensors that need to be disabled by depressing them Lift1 Lift2 Lift3 Lift4 To test the Lift Sensors 1 Check which Lift sensors are listed below Activate sensors 2 Lift each of sensors in turn 3 If the lift sensor is operating correctly the item will be remove from the list 4 Repeat for the remaining l...

Page 125: ...tion that is impeding its function If not replace it if necessary Signal Sensors This checks the functionality of the coil that is used to detect a signal on a peripheral wire The following information is shown X Y COIL0_CENTER X represents the current test in the current sequence Y represents the total number of tests to be performed in the current sequence COIL0_CENTER is the name of the current...

Page 126: ...t the sonar sensors are operating correctly If any of the sonar sensors are found to be defective they need to be replaced page 189 An indication of which sensor needs to be replaced is given Lid In order for the robot to be able to execute its missions the lid needs to be shut and to form a closed circuit between magnets on the lid and relays on the body This circuit needs to be open when the lid...

Page 127: ... behind the magnet or adjust the position of the relay NO not magnetized soon enough open reed side magnet must be lower Add spacer between magnet and lid Contact between the Normally Open NO relay on the indicated side is not being made because the magnet is too high The NO relay is the upper one You need to add a spacer between the magnet and the lid to lower it and then run the test again NO an...

Page 128: ...remove all the configuration parameters AND the current software version see Factory reset page 114 8 4 6 Technician settings Advanced parameters Max speed Sets the maximum speed at which the robot will to move The maximum allowable speed of the robot is 1m s 3 6km h Wire crossing distance Sets the distance the robot will move when it crosses the peripheral wire before turning back into the field ...

Page 129: ... current magnetic distance between the robot and the wire An indication of the shape of the pulse emitted on this signal channel or whether a this channel is connected Station id The current distance between the robot and the positioning beacon Turfmow 1000 Technician s Manual Version Release 3 5 Last updated 2018 12 20 129 ...

Page 130: ...g station page 134 No peripheral signal page 135 No positioning beacon detected page 133 No station contact detected page 135 No station found in any field page 136 Noise on bumper page 142 SelfTest failed to clear within 15s page 140 Shutdown in 2min inhibit shutdown principal unblock brakes page 133 Some wires not well configured Please add at least one parcel to each wire page 134 Sonars issue ...

Page 131: ...or below the allowed limit Symptoms Observations The robot remains at the charging station Solution Wait for the temperature of the battery to return to normal 9 1 2 Battery over voltage Scenario Occurs when one or more battery cell voltage is over the limit Solution Take a photo of the GUI screen and report the problem to your dealer Note the date time and robot S N 9 1 3 Bad battery connection S...

Page 132: ...f the GUI screen and report the problem to your dealer Note the date time and robot S N 2 Change the battery 9 1 5 BMS communication wire is not connected Scenario Occurs when the BMS Battery Management System wire is not connected properly This refers to the electronic part of the battery Solution 1 Check battery connection i e that the screws indicated in the picture below are properly tightened...

Page 133: ...w Solution 1 Press to inhibit the shutdown 2 Push the robot to the charging station Note DO NOT send the machine to station on its own it will stop again 9 2 Installation 9 2 1 No positioning beacon detected Scenario Occurs when the robot has been instructed to search for a station containing a positioning beacon and it fails to find one Solution 1 Check that the robot is close to a positioning be...

Page 134: ...at least one parcel to each wire Scenario Occurs when the configuration of wires and parcels is incorrect Meaning Reason At least one wire must be defined in the installation configuration and at least one parcel must be assigned to each wire Solution Check the installation configuration See Configuration using the menus page 78 9 2 4 No charge current Check contacts and charging station Scenario ...

Page 135: ...re outlined below Solution 1 Check that the robot is located inside the peripheral wire 2 Check that the charging station is powered up 3 Check all peripheral wire connections 4 Check the integrity of the peripheral wire using a multi meter 9 2 8 Wrong wire and parcels Configuration Scenario Occurs when the robot has encountered a problem while mowing in a particular parcel When the robot re start...

Page 136: ...ect the station positioning signal beacon this error message is shown Solution 1 Check that the positioning beacon is powered up To do this remove the charging station cover and check that the LED is blinking on the positioning beacon card 2 Check that there is no obstacle on the path between the robot and the positioning beacon 9 2 11 Wire Lost during TrackWire Scenario Occurs when the robot is f...

Page 137: ...integrity using a multi meter 9 4 2 Station not found while doing border Scenario Occurs when the robot is trimming the borders In border mode the machine follows its wire then touches the charging arm This message is displayed when the robot failed to find the charging station This only occurs if a positioning beacon is being used to locate the charging station Solution 1 Check there is no obstac...

Page 138: ...hen a cutting head should be spinning but is not Meaning Reason The cutting head is dirty or blocked Solution Visually inspect and clean the cutting heads Note The cutting heads can be tested and calibrated using the Technician s menu page 114 Select Service Tests Cutting motor 9 4 5 Head 0 did not start Scenario Occurs when a cutting head should be spinning but it does not start Meaning Reason Cu...

Page 139: ...ure fluctuations Solution See Correcting lid closure problems page 189 9 4 8 Unexpected exit zone event Scenario Occurs when the robot did not exit from the station correctly possibly turning in the wrong direction Meaning Reason This can arise because there is problem with the configuration of the robot obstacles are impeding the exit from the station Solution 1 If a return to station loop is bei...

Page 140: ...obstacles near the robot 3 Check that the robot is not sliding due to mud If this is the case stop the robot s activities and rectify the situation 9 4 11 SelfTest failed to clear within 15s Scenario When the robot starts up it executes a self test of a range of functions This error occurs if a failure occured on any of the functions tested Solution The same series of tests can be performed using ...

Page 141: ...n power supply 2 Check the DC voltage on station arms which should be 32V 3 Check and clean the contacts 9 4 14 Wait for 5 Seconds of full contact Scenario As the robot docks in the charging station it waits 5 seconds to verify that contact is made Reason This message appears if the Stop cover is opened during these 5seconds Solution Close the lid and allow the 5seconds to pass before opening the ...

Page 142: ...that the station is properly grounded 9 5 2 Lift X Detected Front Rear Left Right Scenario Occurs when a body lift is detected Meaning Reason An obstacle has caused the body to be lifted Solution 1 Remove the obstacle 2 Clean the lift 3 Check the magnet 9 5 3 Too many repetitive collisions Scenario Occurs when a series of repetitive collisions is detected Meaning Reason Too many obstacles 142 Turf...

Page 143: ...4 Select Service Tests Sonars system 9 5 6 Collisions at start up 0 Scenario The machine can not resolve a collision at start up Meaning Reason There is an obstacle blocking the machine start up Solution 1 Remove obstacles 2 Push the machine into an obstacle free area 3 If a return to station loop is being used check that the robot is turning in the correct direction in order to enter the station ...

Page 144: ...io Occurs when either a lift or a backwards sensor has been blocked for at least 10s Solution 1 Remove the obstacle 2 If a return to station loop is being used check that the robot is turning in the correct direction in order to enter the station The direction is set as a configuration parameter in the Technician s menu page 114 Infrastructure Parcels If the phase on the loop circuit is incorrect ...

Page 145: ...olution Remove the obstacle 9 5 13 ManualTask shall not complete MotorDrive is in safety Scenario The robot did not start Solution Take photos and send the information to your dealer 9 5 14 The wire is currently configured to be ignored Scenario The robot sends a cautionary message before starting work It can come out of its area and there is a risk it could fall into water Solution Disable demo m...

Page 146: ...ns which can only be issued using this method of communication 10 1 Remote access via the web server This method of communication allows a user to connect to the robot using a smartphone tablet or PC via a web server using the internet Figure 101 Remote access via the web server Each Turfmow 1000 machine can send data to and can receive commands from the web server A user can also receive informat...

Page 147: ... user can Receive notifications about problems encountered by the robot alarms and warnings Issue commands to remotely control the robot such as send to station start from station Change or remotely configure some parameters such as the working hours Information about robot configuration parameters that can be modified through the web server is available online on the FAQ page Monitor the performa...

Page 148: ... activated page 151 In the case where an end user purchases a robot directly an account will be created using the information received on the registration card supplied with the robot See Creation of an account by an end user page 150 10 1 2 Creating accounts The creation of an end user account can be done by The parent entity a distributor or dealer for example This is done when the parent entity...

Page 149: ...account for the manager of this entity can be created For this procedure the email address of the manager is required 1 Click on the newly created entity in the Entities list New distributor following the example above This will be reflected in the hierarchy at the top of the page 2 Click on Create user 3 Enter the details of the new entity manager Note The fields First name Last name and E mail a...

Page 150: ... code for the robot An example of where this information can be found on the card is shown below Figure 105 Robot number and activation code on the registration card To open an account 1 Go to https myrobot echorobotics com registration OR Go to https myrobot echorobotics com login and click on Create an account 2 Enter all the details required All fields are required 3 Click Confirmation At this ...

Page 151: ... the email Important If you did not receive the email or you did not respond rapidly enough follow the procedure to initiate an activation page 151 To activate an account 1 Open the Account validation email received from Echo EU 2 Copy the link in the email into the address bar of a browser 3 Enter the password you wish to use Recommendation There are no restrictions on the password but it is reco...

Page 152: ...e email address used to activate the account 3 Enter the password defined when you activated the account 4 Click Login You can then Modify your profile parameters page 152 Change your password page 152 See a list of your robots and information about their history alarms statistics and the map of the field they mow See My robots page 153 Create and manage users and entities This functionality is on...

Page 153: ...ts This page enables you To search for a robot page 153 To add a robot to the favourites list page 153 To view the current status and issue a command page 154 To view the robot history page 154 To view the alarm history of a robot page 155 To view a map of a robot s movement page 155 To view a robot s statistics page 155 To view identification information for a robot page 156 To search for a robot...

Page 154: ... This shows the time the robot spent in various states over a period of time The number of days for which the data is displayed is set using the period field shown above You can select a part of this period by clicking on a button above the chart You can also restrict the time period by dragging the sliders at the bottom of the chart A set of tools are available to manipulate the view of the chart...

Page 155: ...n next to the date and choose the start and end date required Click Set 4 Click Get Data Note You can add a Symbolic map of the field which improves the visualization of the robot movements To do this 1 Go to http geojson io Satellite OSM views 2 Follow the instructions on their site 3 Copy the contents of the generated file 4 On the robot s map page click on Manage Geojson 5 Import the contents o...

Page 156: ... the properties of an entity page 157 To change the parent entity page 157 Manage robots This enables you To view the robots in an entity page 158 To view the properties of a robot page 158 To move a robot to another entity page 158 Manage users This enables you To view the users in an entity page 158 To view the properties of a user page 158 To create a new user page 159 To delete a user page 159...

Page 157: ...d See also Creation of accounts by a parent entity page 148 4 Click To change the properties of an entity 1 Search for the entity 2 Click on it in the list 3 Modify the required information 4 Click located on the far right hand side of the screen To change the parent entity 1 Search for the entity 2 Click on it in the list 3 Click Change parent entity 4 Select the new parent entity 5 Click located...

Page 158: ... Change parent entity A pop up window will appear 3 Enter the name of the new parent entity or choose one from the list The pop up window closes 4 Click located on the right hand side of the screen 10 1 3 2 3 Managing users To view the users in an entity 1 Click on 2 Enter the name or part of it in the search field Enter to search for all users 3 Set the filter to Users 4 Click The list of users a...

Page 159: ...te the account To delete a user 1 Click on the user in the list 2 Click Delete user 3 Confirmation will be requested to delete the user Click to confirm The user will be deleted 10 1 3 3 Notifications This section allows you to set the robot notifications you want to receive and the manner in which they will be delivered To add a new notification 1 Click 2 Enter the name of the robot serial number...

Page 160: ...y searching for Belrobotics in the app store Note Before you can use the app your need to have set up an account page 148 and activated it The functionality available from the app is a subset of the functions available when accessing the server through a web browser It provides the functions in My robots page 153 To see information about a robot tap on the robot in the list To see the alarm histor...

Page 161: ...Chapter 10 Connecting to robots To see the location of the robot tap on Turfmow 1000 Technician s Manual Version Release 3 5 Last updated 2018 12 20 161 ...

Page 162: ... operation causing an accident and damaging parts Note If you notice any unusual behavior or damage call a technician When carrying out these maintenance procedures the following safety regulations should be observed Stop the machine Always switch off the power and wait for the cutting blades to stop before handling the machine Operate the disabling device before working on or lifting the machine ...

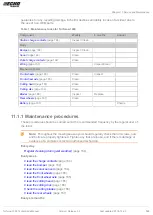
Page 163: ... Charge 11 1 1 Maintenance procedures These procedures should be carried out at the recommended frequency by the regular user of the robot Note Throughout the mowing season you should regularly check that all screws nuts and bolts are properly tightened Tighten any that are loose and if there is damage or evidence of a problem contact an authorized technician Every day Regular cleaning during wet ...

Page 164: ...r a spatula 5 Rub the body with a soft damp cloth or sponge 6 If the body is very dirty use a soapy solution or washing up liquid Never use solvents Clean the charge contacts This procedure should be performed weekly on both the robot and the charging station Charge contacts on the robot Charge contacts on the station Rub the contact surfaces with grade 280 sandpaper until they appear clean Clean ...

Page 165: ...y and that there is not too much play If so contact an authorized technician Clean the front wheel axle This procedure should be performed weekly Clean the front wheel axle with a brush and or a cloth Visually inspect the axle If there is a problem contact an authorized technician Clean the cutting head This procedure should be performed weekly Clean the cutting head using a brush If compressed ai...

Page 166: ... essential for a satisfactory mowing operation The service life of the blades depends on the amount of time they have been in operation the working area they need to cover the type of grass and soil the presence of obstacles objects on the ground such as fallen fruits pebbles toys Every week you should inspect the blades the blade bolts the cutter assembly Cutter assembly parts should be replaced ...

Page 167: ...d and cleaned Check the wiring This procedure should be performed every six months Visually inspect the wiring under the robot If any problems are detected contact an authorized technician Battery Turfmow 1000 robotic mowers are equipped with the latest generation LFP batteries Note In the event of leakage of electrolyte flush with water and seek medical help if it comes in contact with the eyes e...

Page 168: ...een on the user interface screen 4 Start the robot and test it comes back normally to the charging station 11 2 Service Servicing should be carried out by an authorized technician The procedures involved in the annual service are listed below Note All the torques required for the maintenance procedures are listed in the Torque references page 183 See also Winter service check list page 196 Use glo...

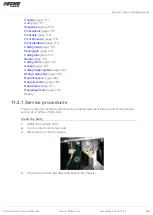
Page 169: ...9 Wiring cutting disk page 178 Rear lift sensor page 180 Rear silent blocs page 180 Rear wheels page 181 Rear wheel motor page 181 Battery 11 2 1 Service procedures These procedures should be carried out by an authorized technician as part of the annual service of a Turfmow 1000 robot Clean the body 1 Switch the machine OFF 2 Turn the robot onto its rear side 3 Disconnect un clip the cables 4 Unsc...

Page 170: ...m 3 Re connect the cables Inspect the bumper 1 Check that the bumper material is intact no cuts or tears If so replace it page 189 2 Clean the bumper with a damp cloth Note Do NOT use water Inspect and clean the sonar sensors The sonar sensors need to be kept clean if they are to operate properly All need to work properly otherwise an alarm is issued 1 Remove any mud grass or dirt and wipe with a ...

Page 171: ...nd of the screen for any damage 2 Replace if necessary page 189 Clean the chassis 1 Clean away the mud and the grass using the brush and or a spatula such as the ones shown below If compressed air is available this is more effective Inspect the coil and cable 1 Visually inspect the coil for damage 2 Inspect the cable and the clips 3 If there is slight damage cover with tape 4 If there is serious d...

Page 172: ...hat they turn easily and that there is not too much play If so replace them page 189 Clean and inspect the front wheel axle 1 Clean the axle of mud and grass with a brush and or a cloth If compressed air is available this is more effective 2 Visually inspect the condition of the axle and replace page 189 if necessary Front lift sensor Check that the sensor moves up and down easily 172 Turfmow 1000...

Page 173: ...sensor using the bolt underneath and remove it 2 Place the new silentbloc in place in the position as shown below 3 Fix the new silentbloc in place using the bolt underneath Use a torque of 6Nm Turfmow 1000 Technician s Manual Version Release 3 5 Last updated 2018 12 20 173 ...

Page 174: ...backward and forwards as shown by the arrow in the figure below 3 Check that the cutting disc rotates smoothly Pantograph 1 Check that there is not too much play in the pantograph by moving it in the direction shown below 2 Replace if necessary page 189 Cutting disk 1 Remove the cutting head by unscrewing the screw shown below 174 Turfmow 1000 Technician s Manual Version Release 3 5 Last updated 2...

Page 175: ...tenance 2 Undo the screw on the axle shown below 3 Undo the nut to remove the axle 4 Separate the two discs Replace the blades 1 Unscrew the blades Turfmow 1000 Technician s Manual Version Release 3 5 Last updated 2018 12 20 175 ...

Page 176: ...ews to remove the white plastic ring shown below 3 Remove the axle 4 Inspect and clean the disc 5 Replace the disc if damaged 6 Place the axle firmly back into the sleeve 7 Attach the white plastic ring using the 4 screws 8 Place the blade support disc over the axle and replace the circular washer 176 Turfmow 1000 Technician s Manual Version Release 3 5 Last updated 2018 12 20 ...

Page 177: ... hexagonal washer Tighten it to 20Nm 11 Set the screw in the axle 12 Place the disc assembly back onto the cutting head axle Make sure that the screw shown above touches the flat surface of the cutting head axle as shown below Turfmow 1000 Technician s Manual Version Release 3 5 Last updated 2018 12 20 177 ...

Page 178: ...e to the sheathing with tape 3 Replace clips if necessary 4 Replace the cable page 189 if damaged Cutting motor 1 Undo the 6 screws shown below 3 on the motor casing and 3 on the bracket 2 Remove the bracket 3 Loosen the nut on the cable connection and lift the lid 4 Remove the green gasket 178 Turfmow 1000 Technician s Manual Version Release 3 5 Last updated 2018 12 20 ...

Page 179: ...asket in position 10 Place the lid back in position 11 Replace the bracket 12 Screw the 6 screws in place Use a torque of 1 5Nm 13 Tighten the nut around the cable connection Cutting height system 1 Visually inspect all the straps 2 Rotate the shaft by hand and check that the cutting heads move up and down smoothly Wiring cutting disk 1 Visually inspect the wiring for the cutting discs Turfmow 100...

Page 180: ... 1 Replace the rear sensor silentblocs 2 Check the movement of the bracket to ensure the correct rear lift detection 3 Check the movement of the bracket to ensure the correct reverse detection 4 Check the wiring 5 Repair any minor damage to the sheathing with tape 6 Replace clips if necessary 180 Turfmow 1000 Technician s Manual Version Release 3 5 Last updated 2018 12 20 ...

Page 181: ...s that hold the rear plate in place 4 Remove the cables The upper one is the power the lower one is the control 5 Undo the nuts on the motor housing There are two on the top two on the side and two on the bottom Note Make sure to only undo the screws shown below Turfmow 1000 Technician s Manual Version Release 3 5 Last updated 2018 12 20 181 ...

Page 182: ...g correct orientation is assured by the position of the screw holes 12 Tighten the screws to 15Nm 13 Re connect the cables 14 Replace the back plate Tighten the bolts to 6Nm 15 Put the washers back in the correct orientation flat side towards axle curved side towards wheel 16 Clean the axle 17 Grease the axle 182 Turfmow 1000 Technician s Manual Version Release 3 5 Last updated 2018 12 20 ...

Page 183: ...outer sleeve so that it can tighten on the wheel axle 19 Push the complete sleeve firmly into place 20 Tighten up the wheel screw to 65Nm 11 2 2 Torque references This section lists all the torque values that must be applied during the servicing procedures for Turfmow 1000 Technician s Manual Version Release 3 5 Last updated 2018 12 20 183 ...

Page 184: ...m 4 7 Nm 5 2 Nm 6 2 Nm 7 2 Nm 8 7 5 Nm Loctite 2701 9 1 5 Nm Loctite 243 10 6 Nm Loctite 243 11 3 Nm 12 13 3 Nm Loctite 243 14 1 5 Nm 15 12 Nm 16 15 Nm 17 3 Nm 18 3 Nm 19 3 Nm 184 Turfmow 1000 Technician s Manual Version Release 3 5 Last updated 2018 12 20 ...

Page 185: ... Service and Maintenance 20 10 Nm 21 6 Nm 20 3 Nm Loctite 243 21 6 Nm Loctite 2701 24 6 Nm 25 2 Nm Loctite 243 26 20 Nm Loctite 243 Turfmow 1000 Technician s Manual Version Release 3 5 Last updated 2018 12 20 185 ...

Page 186: ...28 1 5 Nm 11 2 3 Lift sensor raiser kits Instructions for installing raiser kits on front and rear lift sensors Figure 106 Install raiser kit on a front lift sensor 186 Turfmow 1000 Technician s Manual Version Release 3 5 Last updated 2018 12 20 ...

Page 187: ...d If the version is V2 3B make sure that you can see a blue or white mark as shown below Figure 108 Colored mark on a V2 3B board If the version is V2 3B but there is no colored mark you must replace it For the boards that have the colored mark a cable has been added behind the card Turfmow 1000 Technician s Manual Version Release 3 5 Last updated 2018 12 20 187 ...

Page 188: ...Chapter 11 Service and Maintenance 188 Turfmow 1000 Technician s Manual Version Release 3 5 Last updated 2018 12 20 ...

Page 189: ...n on this will be available in a forthcoming edition of the manual 12 4 Replace the smartbox Information on this will be available in a forthcoming edition of the manual 12 5 Cutting head Information on this will be available in a forthcoming edition of the manual 12 6 Front wheel and axle Information on this will be available in a forthcoming edition of the manual 12 7 Correcting lid closure prob...

Page 190: ...h the reed relays and close the circuit which allows the robot to operate When the lid is open the circuit it open thus preventing the robot from operating When the lid is depressed the roles of the two relays are reversed and the circuit is open thus preventing the robot from operating If there are problems with the lid closure you can analyze the problem by running a test Select Service Tests Li...

Page 191: ... magnet YB 505 03012 Screw M3x12 Figure 112 Location of the magnets on the lid The magnets must be magnets must be at the correct height so that when the lid is closed or pressed down they connect with the correct relays If necessary spacers must be placed behind the magnets if they are too low and the position of the relays must be adjusted with spacers if the magnets are too high This can be det...

Page 192: ...sing the battery Do not allow the battery to come into contact with water Caution Take care when handling and using the battery Do not crush heat incinerate short circuit dismantle or immerse in any liquid Risk of leakage or rupture Do not charge below 0 C Only use charger specified in the user s manual Recycle your battery Refer to the user s manual for battery recycling instructions Indicates th...

Page 193: ...Chapter 14 Declaration of conformity 14 Declaration of conformity Turfmow 1000 Technician s Manual Version Release 3 5 Last updated 2018 12 20 193 ...

Page 194: ... cutting blades 9 Low cut minimum 22mm High cut maximum 80mm Adjustment of cutting heads Electronic Maximum noise level 70dB A Battery Type LFP Nominal Voltage 25 6V Nominal Capacity 19 2Ah Max charge current 19 2A Energy 491 5Wh Working temperature range Between 20 C and 60 C Time to fully charge minimum 90 minutes Weight and dimensions Weight 48kg Length 1002mm Width 1044mm Height 466mm Software...

Page 195: ... be available in a future version Multiple starting zone Yes Multi field optional Yes Multi robot In a future release Safety Lift sensors Yes Reverse sensors No Bumper Electronic 1 Valid for a lawn that is rectangular flat without obstacles without fertilizer and watering being mowed 24 24 and 7 7 2 Valid for a lawn that is rectangular flat without obstacles with fertilizer and watering being mowe...

Page 196: ...ice OK NOK If NOK indicate why Charge Bumper Smartbox Lift Sensors Backward Sensors Signal Sensors Drive Motor Cutting Motor Sonar Sensors Lid Do 2 cutting height tests highest lowest in_use and check all heads go to correct height Trajectory check select a trajectory along a straight line 20 30m long without obstacles check in particular if straight line followup if possible Noise start the machi...

Page 197: ...mpness or condensation on the screen Smamrtbox If the client has indicated a problem with GPS signal replace it Inspect the inside of the bodywork cable condition attachment and path of cables cable connections loof for any deterioration between the chassis and the bodywork check the areas under the black protectors check the the soldered connection on the charge contacts check the JEA40 connector...

Page 198: ... Loctite243 on the pantograph screws and tighten to 7 Nm Replace the cutting blades Inspect the cutting head motor grease Inspect the backwards sensors magnet grease Rear silentbloc replace if necessary or at least every 2 years If the robot is equipped with a raiser kit page 186 be sure to use the latest version Inspect all cables check connections repair damage Remove the rear wheels Main box ch...

Page 199: ...r Sensors Lid Do 2 cutting height tests highest lowest in_use and check all heads go to correct height Trajectory check select a trajectory along a straight line 20 30m long without obstacles check in particular if straight line followup if possible Noise start the machine report abnormal levels noises wheels cutting heads body vibrations Noise report any abnormal noise from the cutting height mot...

Page 200: ...tion using a positioning beacon Entity A collection of robots and users that operate within a site Information about the robots in an entity can be viewed on the web server Field An area of grass to be mowed with a defined boundary This boundary is defined by a single peripheral wire Island A loop in the peripheral wire specially installed to prevent the robot mowing inside it The peripheral wire ...

Page 201: ...e entire area which includes the area to be mowed as well as surrounding landscaping that is not mowed Station loop A station loop is a short wire around a charging station which is used to guide the robot into the station When the robot detects that it is in the station loop it follows the wire until it arrives in the station Station positioning beacon A device usually installed in the charging s...

Page 202: ...mber of times if necessary Figure 116 Maneuvers to avoid an obstacle within the track border Trackwire Movement of the robot along the peripheral wire as it enters and leaves the charging station Figure 117 Trackwire movement to the charging station Due to the manner in which the peripheral wire is detected the Trackwire movement takes a waveform nature Figure 118 Trackwire manoeuvre to leave the ...

Page 203: ...oint Name GSM BMS Battery Management System LFP Lithium Ferrous Phosphorous UWB Ultra Wide Band CPU Central Processing Unit GPS Global Positioning System AP Access Point WiFi Turfmow 1000 Technician s Manual Version Release 3 5 Last updated 2018 12 20 203 ...

Page 204: ...tration details Each robot should be registered on the portal You can note here the Serial Number and the Email address used in the registration Serial Number Email address 204 Turfmow 1000 Technician s Manual Version Release 3 5 Last updated 2018 12 20 ...

Page 205: ...Turfmow 2000 and Turfmow 1000 are registered trademarks of Yamabiko Europe ...

Reviews: