122
Chapter 10—Control Room Monitoring
DM1000 Version 2—Owner’s Manual
3 To solo and monitor Input Channels, press the corresponding LAYER button
to select a Layer that contains the desired channels, then press the channel
[SOLO] buttons.
The channel [SOLO] button indicators and the MONITOR [SOLO] indicator light up.
Only the soloed Input Channel signals are fed to the Control Room Monitor outputs.
4 To solo and monitor Output Channels, press the LAYER [MASTER] button,
then press the channel [SOLO] buttons.
Input and Output Channels (Aux Out 1–8, Bus Out 1–8) cannot be solo-monitored simul-
taneously. For example, if you solo an Input Channel, then solo an Output Channel, the
first solo channel is temporarily cancelled.
If you solo an Output Channel first, then solo an Input Channel, canceling the Input Chan-
nel’s solo will activate the Output Channel’s solo.
5 You can unsolo all soloed channels by pressing all illuminated channel
[SOLO] buttons.
The button indicators turn off. You can also unsolo all soloed channels by pressing the
MONITOR [CLEAR] button.
Using the Control Room Monitor
1 Connect a monitoring system to the outputs (by default, OMNI OUT 11&12)
to which the Control Room Monitor signal is patched.
To monitor the signal via headphones, connect headphones to the PHONES jack.
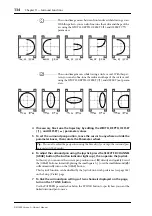
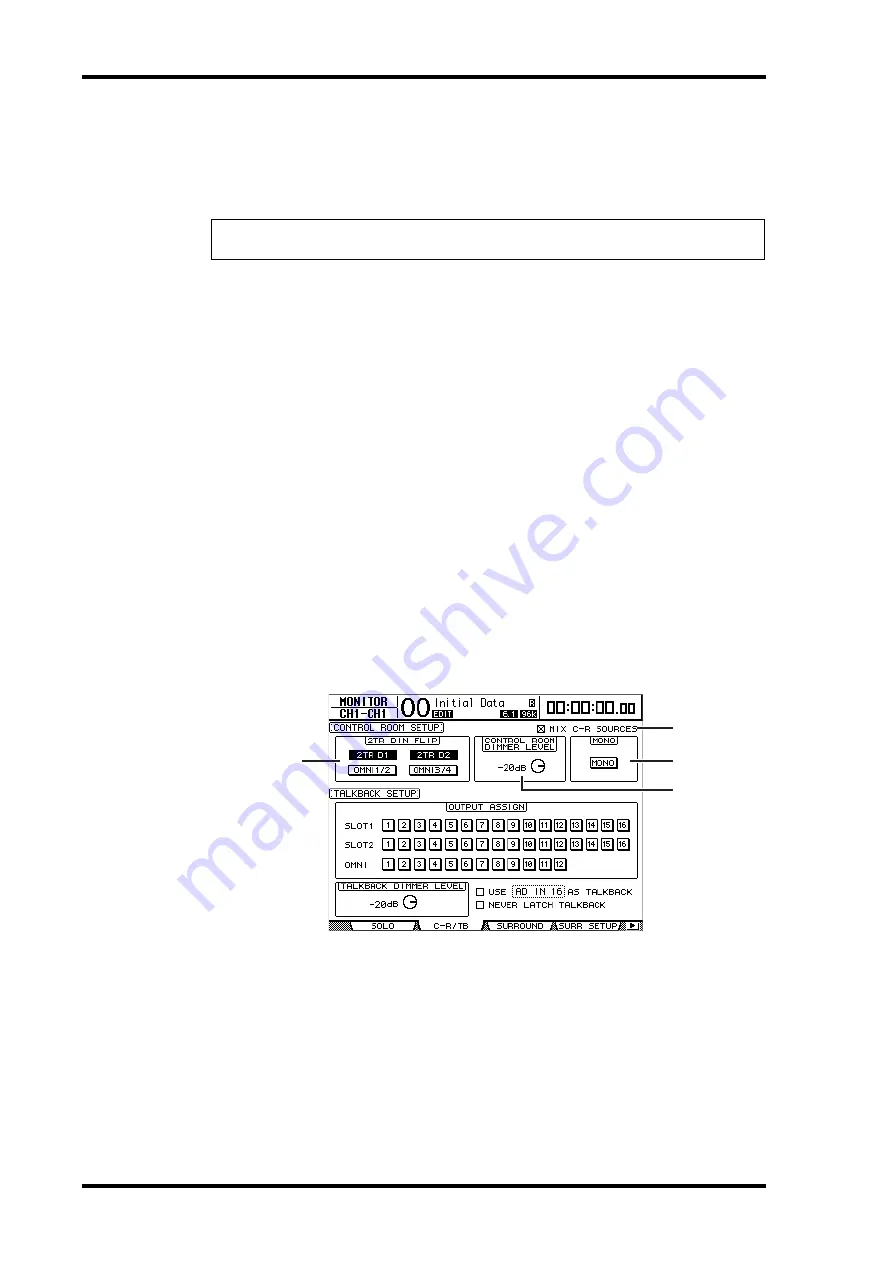
2 Press the MONITOR [DISPLAY] button repeatedly until the Monitor | C-R/TB
page appears.
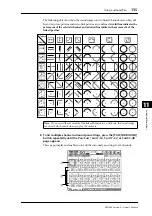
A
2TR DIN FLIP
This parameter enables you to specify the signal source that will be monitored when you
press the MONITOR [2TR D1] or [2TR D2] button.
•
2TR D1 & OMNI 1/2
... These buttons select the 2TR IN DIGITAL 1 and OMNI IN 1/2
inputs respectively as the signal source that will be monitored
when you press the [2TR D1] button.
•
2TR D2 & OMNI 3/4
... These buttons select the 2TR IN DIGITAL 2 and OMNI IN 3/4
inputs respectively as the signal source that will be monitored
when you press the [2TR D2] button.
Tip:
If the SEL MODE parameter is set to Mix Solo on the Monitor | Solo page, you can solo
multiple Input Channels simultaneously.
3
4
2
1
Summary of Contents for 006IPTO-F0
Page 42: ...42 Chapter 3 Operating Basics DM1000 Version 2 Owner s Manual ...
Page 52: ...52 Chapter 4 Connections and Setup DM1000 Version 2 Owner s Manual ...
Page 92: ...92 Chapter 7 Bus Outs DM1000 Version 2 Owner s Manual ...
Page 108: ...108 Chapter 8 Aux Sends DM1000 Version 2 Owner s Manual ...
Page 146: ...146 Chapter 11 Surround Functions DM1000 Version 2 Owner s Manual ...
Page 214: ...214 Chapter 16 Automix DM1000 Version 2 Owner s Manual ...
Page 385: ...DM1000 Block Diagram ...


