192
Chapter 16—Automix
DM1000 Version 2—Owner’s Manual
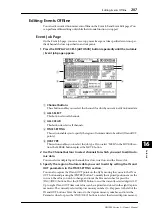
5 Adjust the faders, Encoders, [ON] buttons, and other controls of the channels
selected in Step 3.
6 To record EQ events, use the SELECTED CHANNEL section to edit the EQ set-
tings of the currently-selected channel.
To select other channels, press the [AUTO] button to turn off the [AUTO] button indicator,
then use the [SEL] buttons to select channels.
7 To stop Automix recording, stop the timecode source, or move the cursor
to the STOP button on the page, then press [ENTER].
A confirmation message appears asking whether you want to update the existing Automix
data (i.e., keep the edits just recorded).
Move the cursor to YES and press [ENTER] to update the data, or move the cursor to NO
and press [ENTER] to discard the edits and return to the previous condition. Even after you
update the existing Automix data, unless you proceed to the next recording, you can still
restore the previous data by moving the cursor to the UNDO button on the Main page and
pressing [ENTER].
Tip:
To punch channels out of recording, press the corresponding [SEL] buttons to change the
button indicators from red to green.
Tip:
Scene and library recalls are always recorded, regardless of the selection in the OVER-
WRITE section and the [SEL] button status.
Tip:
• When you stop Automix recording, all channels are disarmed, and the [SEL] button indi-
cators light up green.
• If you use the AUTO REC button instead of the REC button in Step 1, the AUTO REC button
will continue to flash after you stop Automix recording. In this way, you can resume recording
when you restart the timecode source. To cancel record ready mode, move the cursor to the
AUTO REC button, then press [ENTER].
• If the Mix Update Confirmation preference is off on the Setup | Prefer3 page, the confirma-
tion window for updating the existing Automix data will not appear, and the edits just
recorded will be retained.
Note:
• You can rerecord events as many times as you like. Remember, however, that unlike the first
pass, on subsequent passes existing events for the currently-punched in parameter are over-
written.
• You can reduce the risk of overwriting important data by punching in and out only necessary
parameters using the buttons in the OVERWRITE section.
Summary of Contents for 006IPTO-F0
Page 42: ...42 Chapter 3 Operating Basics DM1000 Version 2 Owner s Manual ...
Page 52: ...52 Chapter 4 Connections and Setup DM1000 Version 2 Owner s Manual ...
Page 92: ...92 Chapter 7 Bus Outs DM1000 Version 2 Owner s Manual ...
Page 108: ...108 Chapter 8 Aux Sends DM1000 Version 2 Owner s Manual ...
Page 146: ...146 Chapter 11 Surround Functions DM1000 Version 2 Owner s Manual ...
Page 214: ...214 Chapter 16 Automix DM1000 Version 2 Owner s Manual ...
Page 385: ...DM1000 Block Diagram ...


