18
Input Channels
01V96i—Reference Manual
Setting the Input
Channels from the
Display
To set the Input Channel parameters, you can either move the
cursor to the desired parameter on the display and change the
value, or operate the desired button or control on the top
panel to directly change the setting.
This section explains how to set the parameters via the dis-
play.
Switching the Signal Phase
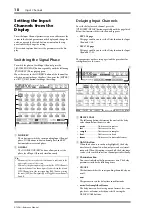
To switch the phase of each Input Channel, press the
[
/INSERT/DELAY] button repeatedly until the following
/INS/DLY | Phase page appears.
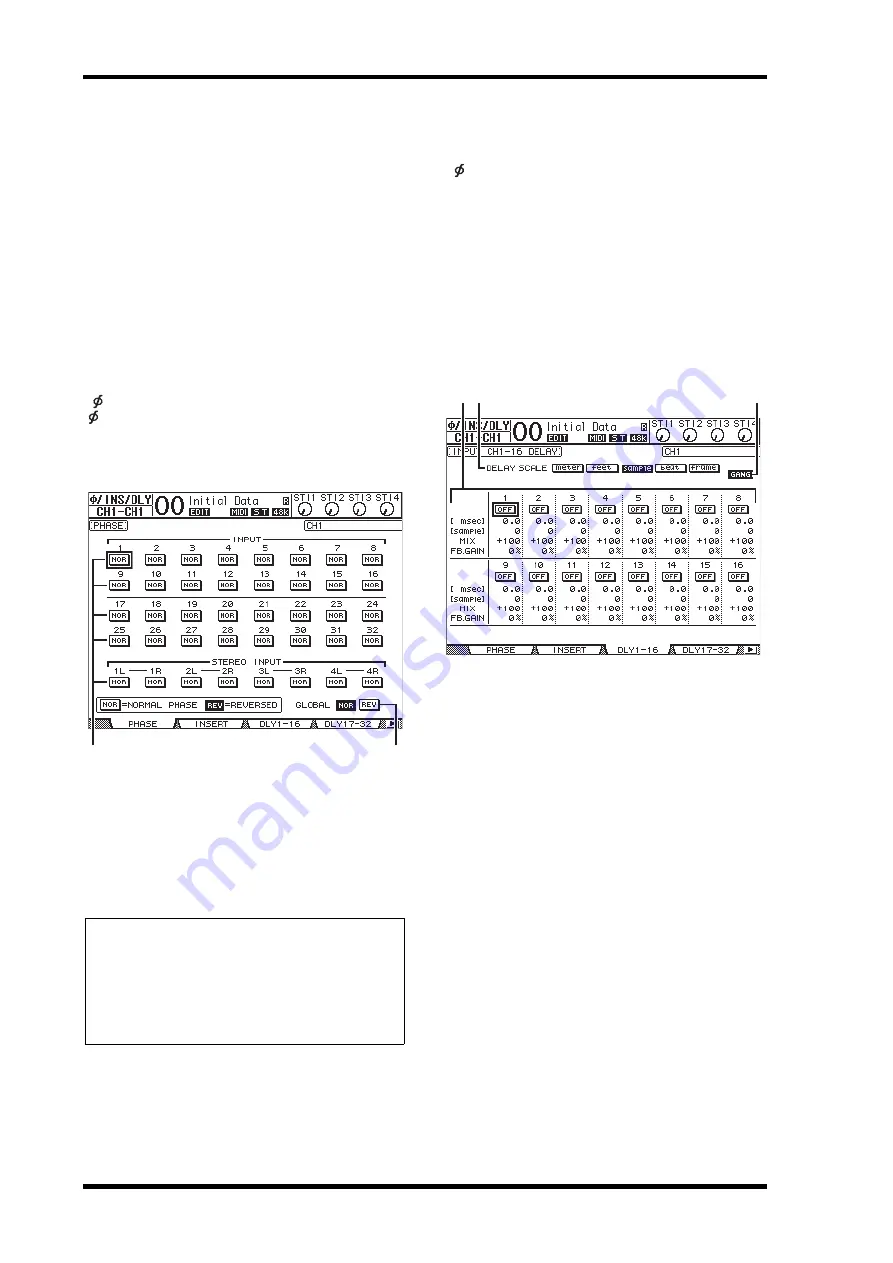
Move the cursor to the NOR/REV button of the channel for
which you want to change the phase, then press the [ENTER]
or [INC]/[DEC] buttons to change the setting.
1
NOR/REV
These buttons switch the corresponding Input Channel
phase. NOR buttons indicate normal phase, and REV
buttons indicate reversed phase.
2
GLOBAL
The GLOBAL NOR/REV buttons allow you to set the
phase for all Input Channels simultaneously.
Delaying Input Channels
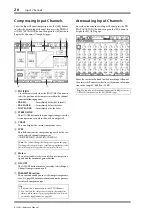
To set the delay for each channel, press the
[
/INSERT/DELAY] button repeatedly until the page listed
below that contains the desired channels appears.
• DLY 1-16 page
This page enables you to set the Delay function for Input
Channels 1–16.
• DLY 17-32 page
This page enables you to set the Delay function for Input
Channels 17–32.
The parameters on these two pages (and the procedure for
setting them) are the same.
1
DELAY SCALE
The following buttons determine the units of the delay
value shown below the msec value.
•
meter
........................Units are set to meters.
•
feet
............................Units are set to feet.
•
sample
......................Units are set to samples.
•
beat
...........................Units are set to beats.
•
frame
........................Units are set to timecode frames.
2
GANG button
When this button is turned on (highlighted), the delay
time for each channel in a channel pair can be set simul-
taneously. When this option is turned off, the delay time
can be set for each channel in a channel pair individually.
3
Channel section
You can set individual delay parameters here. The delay
parameters include the following items:
• ON/OFF
This button switches the corresponding channel delay on
or off.
• msec
This parameter sets the delay time in milliseconds.
• meter/feet/sample/beat/frame
The delay time can be set using units of meters, feet, sam-
ples, beats, or frames, which you select by using the
DELAY SCALE buttons.
Tip:
•
The name of the currently-selected channel is indicated in the
upper-right corner of the screen.
•
You can set the phase separately for each of the ST IN Channels
or for each channel in a channel pair. If you selected the desired
ST IN Channel using the corresponding [SEL] button, pressing
the same [SEL] button repeatedly will toggle between channels
L and R.
1
2
2
1
3


