background image

Contents

Introductory pages

About this manual 0-6

Introduction to the Yamaha XV 0-6
Identification numbers 0-7
Buying parts 0-8
General specifications 0-8
Maintenance techniques, tools and working facilities 0-11
Safety first! 0-17
Motorcycle chemicals and lubricants 0-18

Troubleshooting 0-19

Chapter 1
Tune-up and routine maintenance 1-1

Chapter 2 Part A
Engine, clutch and transmission (XV535 models) 2A-1

Chapter 2 Part B

Engine, clutch and transmission (XV700 through 1100 models) 2B-1

Chapter 3 Part A
Fuel and exhaust systems (XV535 models) 3A-1

Chapter 3 Part B
Fuel and exhaust systems (XV700 through 1100 models) 3B-1

Chapter 4 Part A
Ignition system (XV535 models) 4A-1

Chapter 4 Part B

Ignition system (XV700 through 1100 models) 4B-1

Chapter 5 Part A
Steering, suspension and final drive (XV535 models) 5A-1

Chapter 5 Part B
Steering, suspension and final drive (XV700 through 1100 models) 5B-1

Chapter 6 Part A
Brakes, wheels and tires (XV535 models) 6A-1

Chapter 6 Part B
Brakes, wheels and tires (XV700 through 1100 models) 6B-1

Chapter 7 Part A
Frame and bodywork (XV535 models) 7A-1

Chapter 7 Part B
Frame and bodywork (XV700 through 1100 models) 7B-1

Chapter 8 Part A

Electrical system (XV535 models) 8A-1

Chapter 8 Part B

Electrical system (XV700 through 1100 models) 8B-1

Chapter 9
Wiring diagrams 9-1

Conversion factors

Index IND-1

Summary of Contents for 1985 XV700 Virago

Page 1: ...B Fuel and exhaust systems XV700 through 1100 models 3B 1 Chapter 4 Part A Ignition system XV535 models 4A 1 Chapter 4 Part B Ignition system XV700 through 1100 models 4B 1 Chapter 5 Part A Steering suspension and final drive XV535 models 5A 1 Chapter 5 Part B Steering suspension and final drive XV700 through 1100 models 5B 1 Chapter 6 Part A Brakes wheels and tires XV535 models 6A 1 Chapter 6 Par...

Page 2: ...0 4 Yamaha XV The 1994 XV535S model The 1985 XV700 Virago model ...

Page 3: ...Yamaha XV 0 5 TheTR1 model The 1994 XV1100 Virago model ...

Page 4: ...e of the vehicle assume you are sitting on the seat facing forward Motorcycle manufacturers continually make changes to specifi cations and recommendations and these when notified are incorporated into our manuals at the earliest opportunity Even though we have prepared this manual with extreme care neither the publisher nor the author can accept responsibility for any errors in or omissions from ...

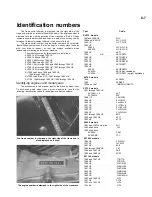
Page 5: ... given machine is look for the following identification codes in the engine and frame numbers The frame number is stamped in the right side of the frame and is also displayed on a decal The engine number is stamped in the right side of the crankcase Year Code XV535 models 1987and 1988 US 2GV 1989 and 1990 US 3JC1 3JC2 1993 US 3JC7 3JC8 1994 US XV535 3JCA 3JCB XV535S 3JCB 3JCD 1988 UK 3BT1 1989 UK ...

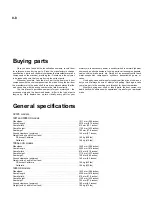
Page 6: ... be obtained for roughly half the price of new ones but you can t always be sure of what you re getting Once again take your worn part to the wrecking yard breaker for direct comparison Whether buying new used or rebuilt parts the best course is to deal directly with someone who specializes in parts for your particular make General specifications XV535 models 1987 and 1988 US models Wheelbase 1511...

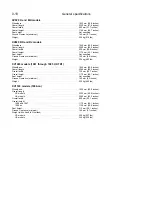
Page 7: ...8 inches Overall width US models 805 mm 31 7 inches UK models 840 mm 33 1 inches Overall height US models 1160 mm 45 7 inches UK models 1210 mm 47 6 inches Seat height not specified Ground clearance minimum 145 mm 5 7 inches Weight dry US models 225 kg 496 lbs UK models 211 kg 465 lbs XV750 models 1988 on US Wtieelbase 1525 mm 60 0 inches Overall length 2285 mm 90 0 inches Overall width 840 mm 33 ...

Page 8: ... 5 inches Weight 224 kg 493 lbs XV1000 models 1981 through 1985 UK TR1 Wheelbase 1540 mm 60 6 inches Overall length 2265 mm 89 2 inches Overall width 730 mm 28 7 inches Overall height 1170 mm 46 1 inches Seat height Not specified Ground clearance minimum 140 mm 5 5 inches Weight 220 kg 485 lbs XV1100 models 1986 on Wheelbase 1525 mm 60 0 inches Overall length US models 2235 mm 88 0 inches UK model...

Page 9: ...a to lay the disassembled parts out on a clean surface in the order that they were removed It may also be helpful to make sketches or take instant photos of components before removal When removing fasteners from a component keep track of their locations Sometimes threading a bolt back in a part or putting the washers and nut back on a stud can prevent mixups later If nuts and bolts can t be return...

Page 10: ... a wise one To help the owner decide which tools are needed to perform the tasks detailed in this manual the following tool lists are offered Maintenance and minor repair Repair and overhaul and Special The newcomer to practical mechanics should start off with the Maintenance and minor repair tool kit which is adequate for the simpler jobs Then as confidence and experience grow the owner can tackl...

Reviews: