CABLE ROUTING
2-50
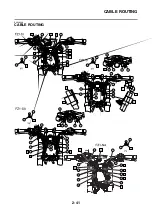
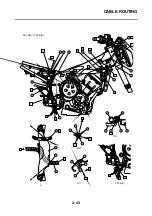
FZ1-N(X)/FZ1-S(X)
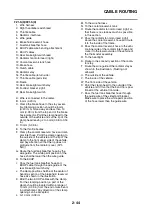
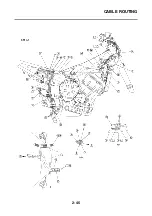
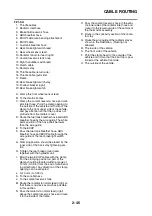
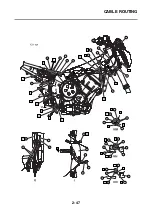
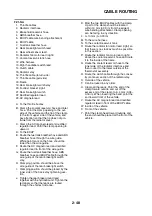
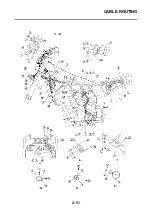
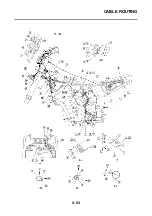
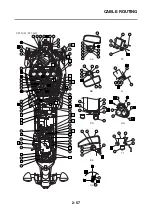
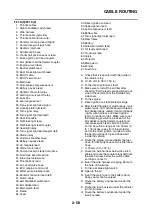
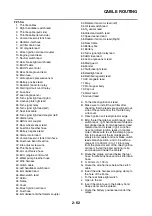
1. Clutch cable
2. Water pump breather hose
3. Oil level switch lead
4. Sidestand switch lead
5. O
2
sensor lead
6. Coolant reservoir tank drain hose
7. Wire harness
8. Battery negative lead
9. Seat lock cable
10.AC magneto lead
11.Rectifier/regulator lead
12.Water pump inlet pipe
13.Radiator fan motor lead (left)
14.Radiator stay
15.Main switch lead
16.Immobilizer lead
17.Left handlebar switch lead
18.Horn
19.Clutch cable swaging metal
20.Throttle cables
21.Stay assembly
22.Upper bracket
23.Right handlebar switch lead
24.Brake hose
25.Horn lead
26.Throttle body
27.Stay 1
28.Drive chain case cover
29.Starter motor lead
30.Fuel tank breather hose
31.EXUP cables
32.Rear brake light switch lead
33.Rear brake fluid reservoir hose
34.Speed sensor lead
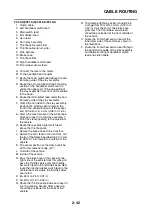
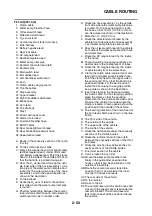
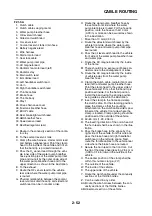
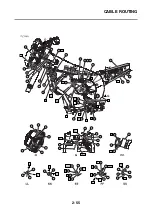
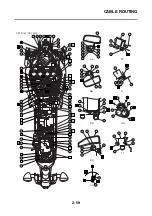
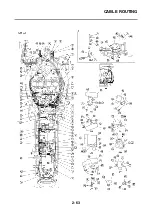
A. Route in the concavity section of the radia-
tor stay.
B. To the coolant reservoir tank
C. Clamp the wire harness, AC magneto lead,
rectifier/regulator lead, starter motor lead
and battery negative lead. Point the clamp
head to the inside of the vehicle and fit it so
that the band tip is pointed downward.
D. Pass the O
2
sensor lead through the vehi-
cle inner side of the hose assembly 1 junc-
tion pipe of the water pump inlet pipe and
route it by the outer down side of the hose
assembly 1 and to the upper direction as
shown in the illustration.
E. To the exhaust
F. Route the O
2
sensor lead to the vehicle
rear side where the water pump inlet pipe
is routed.
G. Physical relationship between the coolant
reservoir tank drain hose tip and sidestand
switch lead can be in random order.
H. Route the hose assembly 1 by the vehicle
front side where the water pump inlet pipe
is routed. For the hose tip position, route
the hose so that 10 mm (0.39 in) or more
can be assured as shown in the illustration.
I. More than 10 mm (0.39 in)
J. Route the sidestand switch lead by the
vehicle front side where the hose assembly
1 and water pump inlet pipe are routed.
K. Pass the oil level switch lead to the vehicle
front side of the water pump breather hose
and water pipe.
L. Route the AC magneto lead by the inside
of the frame.
M. There should be no exposure of bare con-
ductors due to the misalignment of tubes.
N. Route the AC magneto lead by the inside
of vehicle away from the water hose.
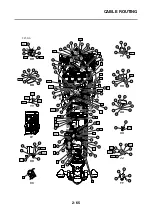
O. Clamp the clutch cable, radiator fan motor
lead (left) and water pump breather hose.
Point the clamp head to the upper side of
the vehicle and fit it so that the band tip is
positioned inside. For the band position,
install the band using the engine position
as a guide as shown in the illustration.
P. Insert the clamp to the frame and clamp
the clutch cable. For the clamping position,
place the clamp so that the caulking
attachment on the clutch cable side is posi-
tioned at the vehicle front side where the
clamp is located. Clamp opening should be
positioned at the outside of the vehicle.
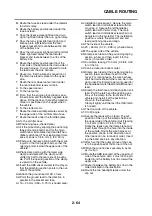
Q. The inserting direction of the onion-head of
the horn lead shall be as shown in the illus-
tration.
R. The front side of the vehicle.
S. The outside of the vehicle.
T. The upper side of the vehicle.
U. The inside of the vehicle.
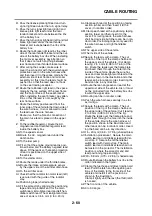
V. Route the clutch cable under the convexity
sections of the throttle bodies.
W. Route the radiator fan motor lead (left)
between the convexity sections of the throt-
tle bodies.
X. Route the wire harness between the con-
vexity sections of the throttle bodies.
Y. Innermost section of the vehicle.
Z. Can be routed in any order.
AA.Route the water pump breather hose
finally in the guide after passing other
hoses so that it can be positioned on the
outside of the vehicle.
AB.Route the coolant reservoir tank drain
hose so that it is positioned at the inner-
most part in hoses and leads.
AC.The rear side of the vehicle.
AD.To the radiator
AE.Open to the air
AF.The coolant reservoir tank drain hose shall
cross with the speed sensor lead under the
rear arm bracket. The coolant reservoir
tank drain hose shall be positioned above
the vehicle.
Summary of Contents for 2008 Fazer FZ1-N
Page 1: ...SERVICE MANUAL FZ1 N X FZ1 S X FZ1 SA FZ1 NA 2008 5D0 28197 E1 ...
Page 6: ......
Page 8: ......
Page 44: ...SPECIAL TOOLS 1 35 ...
Page 63: ...TIGHTENING TORQUES 2 18 ...
Page 69: ...LUBRICATION POINTS AND LUBRICANT TYPES 2 24 ...
Page 72: ...LUBRICATION SYSTEM CHART AND DIAGRAMS 2 27 EAS20410 LUBRICATION DIAGRAMS ...
Page 74: ...LUBRICATION SYSTEM CHART AND DIAGRAMS 2 29 ...
Page 76: ...LUBRICATION SYSTEM CHART AND DIAGRAMS 2 31 ...
Page 78: ...LUBRICATION SYSTEM CHART AND DIAGRAMS 2 33 ...
Page 79: ...LUBRICATION SYSTEM CHART AND DIAGRAMS 2 34 1 Main axle 2 Oil delivery pipe 3 Drive axle ...
Page 80: ...LUBRICATION SYSTEM CHART AND DIAGRAMS 2 35 ...
Page 81: ...LUBRICATION SYSTEM CHART AND DIAGRAMS 2 36 1 Cylinder head 2 Crankshaft ...
Page 82: ...COOLING SYSTEM DIAGRAMS 2 37 EAS20420 COOLING SYSTEM DIAGRAMS ...
Page 83: ...COOLING SYSTEM DIAGRAMS 2 38 1 Water pump 2 Radiator 3 Radiator fan ...
Page 84: ...COOLING SYSTEM DIAGRAMS 2 39 ...
Page 85: ...COOLING SYSTEM DIAGRAMS 2 40 1 Radiator cap 2 Radiator 3 Oil cooler 4 Thermostat ...
Page 86: ...CABLE ROUTING 2 41 EAS20430 CABLE ROUTING ...
Page 88: ...CABLE ROUTING 2 43 MM NN OO FZ1 S X H M M N N O H O FZ1 N X FZ1 S X ...
Page 90: ...CABLE ROUTING 2 45 ...
Page 92: ...CABLE ROUTING 2 47 ...
Page 96: ...CABLE ROUTING 2 51 ...
Page 98: ...CABLE ROUTING 2 53 ...
Page 100: ...CABLE ROUTING 2 55 ...
Page 106: ...CABLE ROUTING 2 61 ...
Page 108: ...CABLE ROUTING 2 63 ...
Page 114: ...CABLE ROUTING 2 69 EE E E F F FF AA A A FZ1 S X ...
Page 116: ...CABLE ROUTING 2 71 ...
Page 118: ...CABLE ROUTING 2 73 ...
Page 121: ......
Page 159: ...ELECTRICAL SYSTEM 3 38 A FZ1 N X FZ1 NA B FZ1 S X FZ1 SA ...
Page 160: ...ELECTRICAL SYSTEM 3 39 ...
Page 163: ......
Page 249: ...INSTALLING THE TRANSMISSION 5 88 ...
Page 366: ...AIR INDUCTION SYSTEM 7 15 ...
Page 370: ...IGNITION SYSTEM 8 1 EAS27090 IGNITION SYSTEM EAS27110 CIRCUIT DIAGRAM ...
Page 374: ...ELECTRIC STARTING SYSTEM 8 5 EAS27160 ELECTRIC STARTING SYSTEM EAS27170 CIRCUIT DIAGRAM ...
Page 380: ...CHARGING SYSTEM 8 11 EAS27200 CHARGING SYSTEM EAS27210 CIRCUIT DIAGRAM ...
Page 381: ...CHARGING SYSTEM 8 12 2 Rectifier regulator 3 AC magneto 6 Main fuse 7 Battery ...
Page 383: ...CHARGING SYSTEM 8 14 ...
Page 384: ...LIGHTING SYSTEM 8 15 EAS27240 LIGHTING SYSTEM EAS27250 CIRCUIT DIAGRAM FZ1 N X ...
Page 386: ...LIGHTING SYSTEM 8 17 EAS5D01027 CIRCUIT DIAGRAM FZ1 S X ...
Page 390: ...SIGNALING SYSTEM 8 21 EAS27270 SIGNALING SYSTEM EAS27280 CIRCUIT DIAGRAM ...
Page 396: ...COOLING SYSTEM 8 27 EAS27300 COOLING SYSTEM EAS27310 CIRCUIT DIAGRAM ...
Page 399: ...COOLING SYSTEM 8 30 ...
Page 400: ...FUEL INJECTION SYSTEM 8 31 EAS27330 FUEL INJECTION SYSTEM EAS27340 CIRCUIT DIAGRAM ...
Page 443: ...FUEL INJECTION SYSTEM 8 74 ...
Page 444: ...FUEL PUMP SYSTEM 8 75 EAS27550 FUEL PUMP SYSTEM EAS27560 CIRCUIT DIAGRAM ...
Page 447: ...FUEL PUMP SYSTEM 8 78 ...
Page 448: ...IMMOBILIZER SYSTEM 8 79 EAS27640 IMMOBILIZER SYSTEM EAS27650 CIRCUIT DIAGRAM ...
Page 457: ...IMMOBILIZER SYSTEM 8 88 ...
Page 462: ...ABS ANTI LOCK BRAKE SYSTEM 8 93 EAS27740 ABS COMPONENTS CHART FZ1 SA ...
Page 464: ...ABS ANTI LOCK BRAKE SYSTEM 8 95 FZ1 NA ...
Page 466: ...ABS ANTI LOCK BRAKE SYSTEM 8 97 EAS27750 ABS CONNECTOR LOCATION CHART FZ1 SA ...
Page 468: ...ABS ANTI LOCK BRAKE SYSTEM 8 99 FZ1 NA ...
Page 476: ...ABS ANTI LOCK BRAKE SYSTEM 8 107 EAS27810 BASIC PROCESS FOR TROUBLESHOOTING ...
Page 500: ...ELECTRICAL COMPONENTS 8 131 EAS27970 ELECTRICAL COMPONENTS ...
Page 502: ...ELECTRICAL COMPONENTS 8 133 ...
Page 504: ...ELECTRICAL COMPONENTS 8 135 EAS27980 CHECKING THE SWITCHES ...
Page 533: ...TROUBLESHOOTING 9 6 ...
Page 538: ...YAMAHA MOTOR CO LTD 2500 SHINGAI IWATA SHIZUOKA JAPAN ...

