CVP-509/505:
K
e
yboard Stand Assemb
ly
CVP-509/505/503/501 Owner’s Manual
111
3
CVP-509/505: Keyboard Stand
Assembly
CAUTION
• Assemble the stand on a flat floor with ample space.
• Be careful not to confuse parts, and be sure to install all parts in the correct direc-
tion. Please assemble in accordance with the sequence given below.
• Assembly should be carried out by at least two persons.
• Be sure to use the correct screw size, as indicated below. Use of incorrect screws
can cause damage.
• Be sure to tighten up all screws upon completing assembly of each unit.
• To disassemble, reverse the assembly sequence given below.
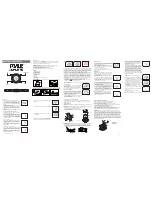
1
Remove all parts from the box. Confirm that all
parts shown in the illustration are provided.
2
With the key cover closed, lean A against the
wall.
1
Spread a large soft cloth, such as a blanket on the floor in front of
the wall.
2
Place A on the cloth with the keyboard side turned to the wall.
3
Raise A from the backside, and lean A against the wall with the
keyboard side on the bottom.
Have a Phillips-head (+) screwdriver of the appropriate size ready.
B
C
E
G
F
F
A
A
D
Main unit
Front leg (left)
Front leg (right)
Rear leg
Pedal box metal
Pedal box
Bundled pedal cord
inside
Rear legs metal cover
AC power cord
4 x 10 mm screws for the cover x 2
5 x 30 mm long screws x 4
5 x 18 mm short screws x 10
Washers x 4
CAUTION
To prevent the key cover from accidentally opening during
assembly, press down on the key cover, making sure that the
sheet (shown) remains in place.
Assembly Parts
4 x 20 mm thin screws x 3
Protective pads x 2
CAUTION
• Be careful not to pinch your fingers.
• Do not lay the main unit upside-down on the floor.
Place the protection pads under the keyboard.
10cm
10cm
Large soft cloth
CAUTION
• The top part of the music rest is not fixed. Support the music rest
with your hand so that the music rest will not fall.
• Do not place the main unit with the rear side facing down.
Protective pads
CAUTION
Please do not touch the speaker net. Doing so may damage the
speaker inside.


