a
b
1
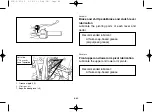
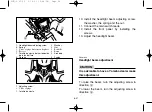
1. Adjusting screw
1. Vis de réglage
1. Tornillo de ajuste
8-97
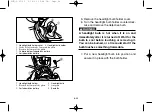
10. Install the headlight beam adjusting screw,
the washer, the spring and the nut.
11. Connect the main switch leads.
12. Install the front panel by installing the
screws.
13. Adjust the headlight beam.
EBU01089
Headlight beam adjustment
c
C
It is advisable to have a Yamaha dealer make
this adjustment.
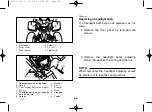
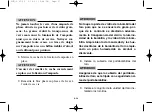
To raise the beam, turn the adjusting screw in
direction
a
.
To lower the beam, turn the adjusting screw in
direction
b
.
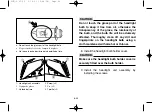
1
3
4
2
1. Headlight beam adjusting screw
2. Washer
3. Spring
4. Nut
1. Vis de réglage du faisceau de phare
2. Rondelle
3. Ressort
4. Écrou
1. Tornillo de ajuste de la orientación
2. Arandela
de la luz del faro
3. Resorte
4. Tuerca
5VM-9-61-05 3/14/03 10:48 PM Page 98
Summary of Contents for BLASTER YFS200S
Page 2: ...5VM 9 61 01 3 14 03 9 34 PM Page 1 ...
Page 16: ...5VM 9 61 01 3 14 03 9 34 PM Page 15 ...
Page 28: ...1 4 5VM 9 61 01 3 14 03 9 34 PM Page 27 ...
Page 32: ...1 8 5VM 9 61 01 3 14 03 9 34 PM Page 31 ...
Page 36: ...1 12 5VM 9 61 01 3 14 03 9 34 PM Page 35 ...
Page 72: ...4 8 5VM 9 61 02 3 14 03 9 35 PM Page 9 ...
Page 167: ...7 1 Riding Your ATV 5VM 9 61 04 3 14 03 9 37 PM Page 2 ...
Page 168: ...7 2 Conduite Conducción du del VIT ATV 7 5VM 9 61 04 3 14 03 9 37 PM Page 3 ...
Page 264: ...8 16 5VM 9 61 05 3 14 03 10 48 PM Page 17 ...
Page 356: ...8 108 5VM 9 61 06 3 14 03 9 40 PM Page 1 ...
Page 382: ...10 16 5VM 9 61 06 3 14 03 9 40 PM Page 27 ...

