12
CD-S2000
CD-S2000
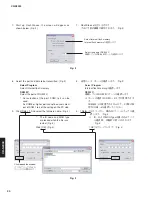
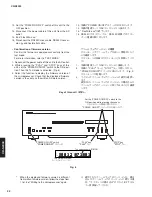
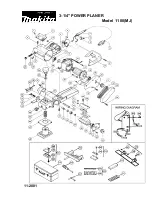
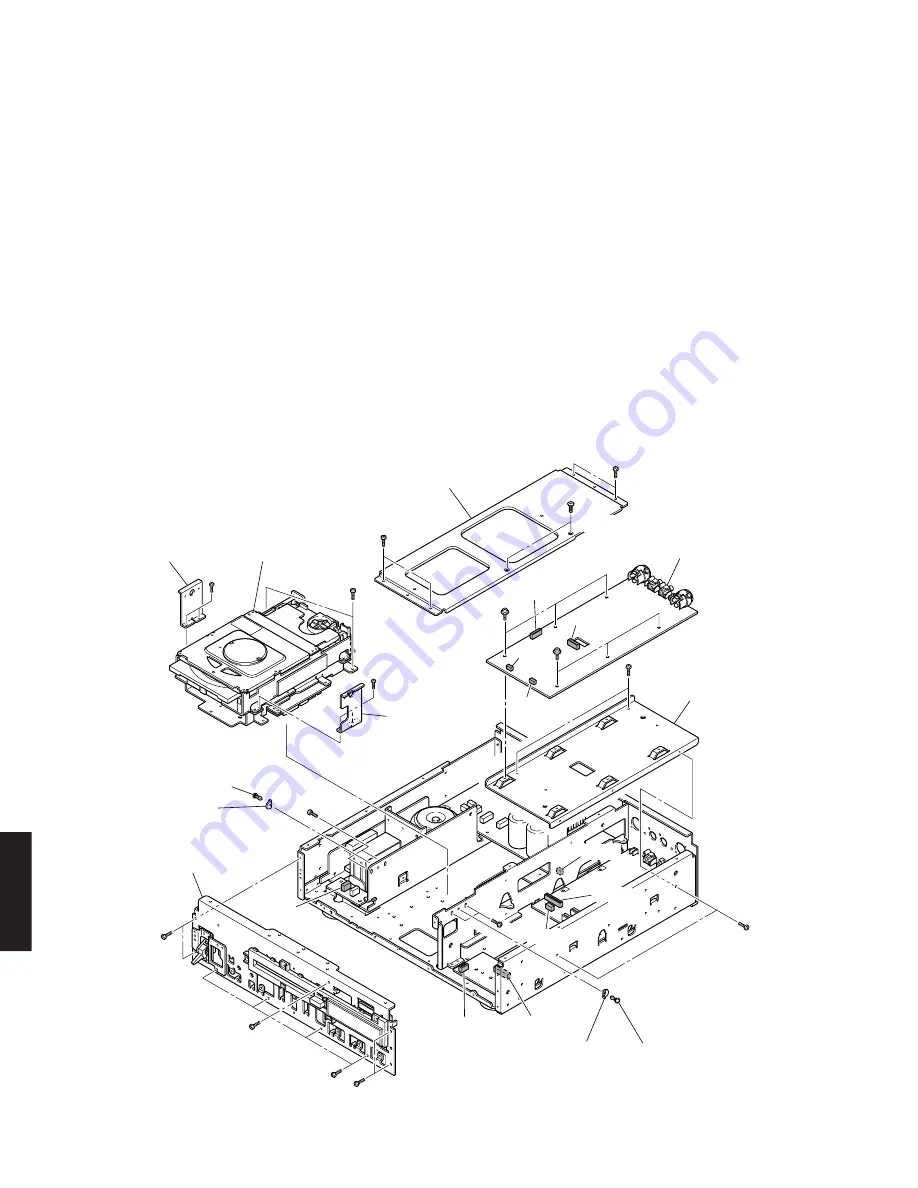
4. フロントフレームASSYの外し方
a.
8
のネジ4本、
9
のネジ2本を外し、フレームトップを
取り外します。(Fig. 4)
b.
0
のネジ9本を外します。(Fig. 4)
c. CB601、CB902を外します。(Fig. 4)
d. フロントフレームASSYを取り外します。(Fig. 4)
5. AUDIO P.C.B.の外し方
a.
A
のネジ6本を外します。(Fig. 4)
b.
B
のネジ4本、
C
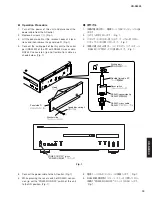
のネジ4本を外します。(Fig. 5)
c. CB1-2、CB5-6を外します。(Fig. 4)
※ CB5、CB6を取り付ける場合、必ずCB5側へBlue/
Black色のケーブル、CB6側へRed/Black色のケー
ブルを取り付けてください。
d. AUDIO P.C.B.の前方を持ち上げ、取り外します。
(Fig. 4)
Fig. 4
4. Removal of Front Frame ass’y
a. Remove 4 screws (
8
), 2 screws (
9
) (B, G models) and
then remove the frame top. (Fig. 4)
b. Remove 9 screws (
0
). (Fig. 4)
c. Remove CB601 and CB902. (Fig. 4)
d. Remove the front frame ass’y. (Fig. 4)
5. Removal of AUDIO P.C.B.
a. Remove 6 screws (
A
). (Fig. 4)
b. Remove 4 screws (
B
) and 4 screws (
C
). (Fig. 5)
c. Remove CB1-2 and CB5-6. (Fig. 4)
*
When installing CB5 and CB6, be sure to con-
nect the Blue/Black color cable to CB5 and the
Red/Black cable to the CB6.
d. Lift the front of AUDIO P.C.B. and then remove it. (Fig. 4)
Frame top
フレームトップ
AUDIO P.C.B.
(B, G, J models)
Loader ass'y
ローダーASSY
Front frame ass'y
フロントフレーム ASSY
Support AUDIO
サポートAUDIO
D
A
8
H
F
G
E
E
8
9
A
0
0
0
0
D
CB301
CB302
CB612
CB903
CB601
CB902
CB1
CB2
CB5
CB6
Frame mecha L
フレームメカL
Frame mecha R
フレームメカR
Push rivet
プッシュリベット
Push rivet
プッシュリベット
Support F
サポートF
Support F
サポートF


