background image

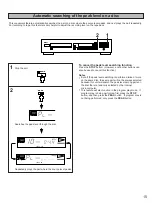
13

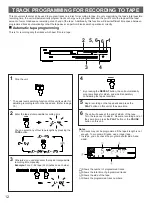
1

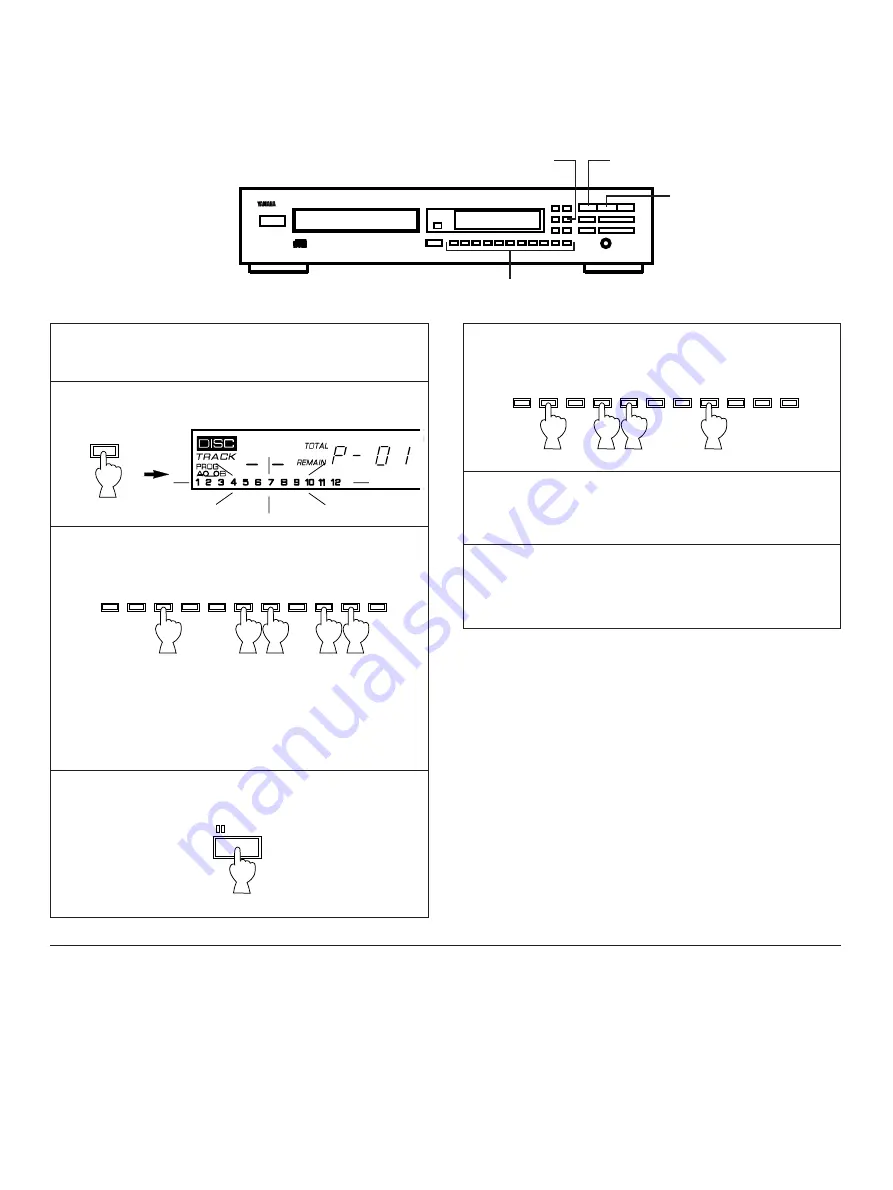
Follow steps 1 – 3 on page 12.

2

3

Select the track numbers (to be recorded on side A) in 
the desired order.

*  Programmed track numbers are illuminated on the

display. You can select a track which can be
programmed for the remaining time of (the side of) the
tape from track numbers flashing on the display, but you
cannot select any darkened track number.

4

Program the pause mode.

5

Select the track numbers (to be recorded on side B) in 
the desired order.

6

Begin recording on the tape deck and press the PLAY
button on this unit at the same time.

7

The unit will pause at the end of side A of the tape. 
Turn the tape over to side B.  Resume recording and, 
at the same time, press the PLAY button or the PAUSE
button on this unit.

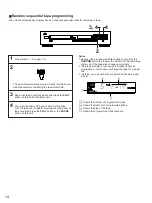
Notes

If, in step 3 or 5, “E : rr” appears in the display, the track
number just selected cannot be programmed because there
is not enough time remaining on the tape. However, at this
time, if any other track number is flashing continuously in the
display, you can program it instead of the unprogrammable
one.

In step 3 or 5, each time a selection is made, the track
number and the tape’s remaining time will be displayed, and
then the display will change to indicate the number of the
next program.

n

Manual tape-programming

This is for recording desired tracks in any desired order onto a tape.

Notes on tape programming

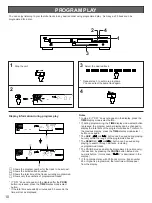
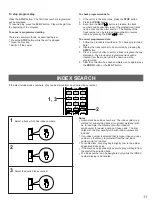
To check, cancel or correct program data, refer to page 11.
* In checking the program data, note that “Pu” appears 

between track numbers for side A and side B.

The maximum number of tracks that can be programmed is
25 (P-01 to P-25).  If, however, the PAUSE mode is inserted,
it is counted as one track.

This function can be used to program up to track number 24.
If the disc has more than 24 tracks, track number 25 and
thereafter will not be programmed.

LOGODISK

PROG

1

10

2

3

4

5

6

7

8

9

0

+

PAUSE

1

10

2

3

4

5

6

7

8

9

0

+

3, 5

4, 7

2

6, 7

Summary of Contents for CDX-470

Page 1: ...ric shock to persons The exclamation point within an equilateral triangle is intended to alert you to the presence of important operating and maintenance servicing instructions in the literature accompanying the appliance Explanation of Graphical Symbols CAUTION Natural Sound Compact Disc Player Random Access Programmable Play Random Sequence Play Single Track Entire Disc Repeat Play Automatic Tap...

Page 2: ...e unit should be cleaned only as recommended by the manufacturer 13 Nonuse Periods The power cord of the unit should be unplugged from the outlet when left unused for a long period of time 14 Object and Liquid Entry Care should be taken so that objects do not fall into and liquids are not spilled into the inside of the unit 15 Damage Requiring Service The unit should be serviced by qualified servi...

Page 3: ...led and used according to the instructions found in the users manual may cause interference harmful to the operation of other electronic devices Compliance with FCC regulations does not guarantee that interference will not occur in all installations If this product is found to be the source of interference which can be determined by turning the unit OFF and ON please try to eliminate the problem b...

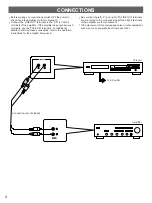
Page 4: ...dditional details concerning these connections refer to the operation instructions for the amplifier being used Be sure that the left L and right R LINE OUT terminals are connected to the corresponding left and right terminals of the amplifier or other component If the placement of this unit causes noise to other equipment such as a tuner separate them from each other 4 CONNECTIONS LINE OUT CD Thi...

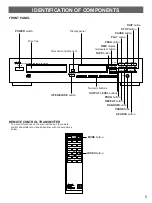
Page 5: ...E PEAK TAPE PROG OUTPUT LEVEL DOWN UP PLAY PAUSE STOP RANDOM SKIP REPEAT SEARCH PHONES POWER switch TAPE button OPEN CLOSE button MODE button INDEX button OUTPUT LEVEL buttons PROG button REPEAT button RANDOM button PHONES jak SEARCH button SKIP button STOP button PAUSE button PLAY button PEAK button Disc tray Remote control sensor Numeric buttons Display panel TIME display modeselect button DOWN ...

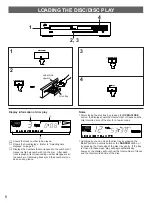
Page 6: ...ing the disc tray by pressing the OPEN CLOSE button the display shows the total number of tracks and the total recorded time of the disc for a few seconds Additionally you can close the disc tray by pressing the PLAY button a numeric button or the RANDOM button or by pressing the front edge of the disc tray gently If the tray is closed in these ways play will begin automatically however the displa...

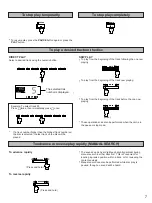
Page 7: ...g of the track now playing To play from the beginning of the track before the one now playing twice These operations can also be performed when the unit is in the pause or stop mode To advance or reverse play rapidly MANUAL SEARCH To advance rapidly Press and hold To reverse rapidly Press and hold The sound can be heard although slightly garbled during manual search in either direction This is con...

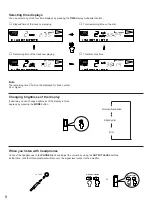
Page 8: ...rees by pressing the MODE button Normal illumination Slightly dim Dim When you listen with headphones Connect the headphones to the PHONES jack and adjust the volume by using the OUTPUT LEVEL buttons At that time note that this adjustment will also vary the signal level output to the amplifier Elapsed time of the track now playing Remaining time of the track now playing Total remaining time on the...

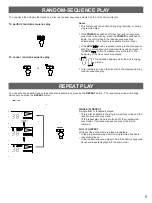
Page 9: ... the track now being played This indication appears while the unit is mixing up tracks Total remaining time on the disc will not be displayed during random sequence play REPEAT PLAY You can play any desired track or the entire disc repeatedly by pressing the REPEAT button The repeat play mode will change whenever you press the REPEAT button SINGLE S REPEAT A single track is repeatedly played This ...

Page 10: ...n step 2 if P 01 does not appear in the display press the TIME display mode select button If during programming the TIME display mode select button is pressed the program number display can be changed to display the total time of the programmed tracks To return to the previous display press the TIME display mode select button once again The SKIP and button can be used during playing but only withi...

Page 11: ...the beginning of the program To cancel a programmed setting There are several methods as described below Press the STOP button while the unit is stopped Open the disc tray Switch off the power To check programmed data 1 If the unit is in the play mode press the STOP button 2 Press the PROG button 3 Each time the SKIP button is pressed the track numbers and sequential order of the programmed tracks...

Page 12: ...not be programmed if the tape s length is not enough To program all tracks use a longer tape In step 4 you can check the program data for side A and sideB Shows the number of programmed tracks Shows the total time of programmed tracks Shows the side of the tape Shows the programmed track numbers TRACK PROGRAMMING FOR RECORDING TO TAPE 12 This convenient feature can be used to program tracks on a d...

Page 13: ... because there is not enough time remaining on the tape However at this time if any other track number is flashing continuously in the display you can program it instead of the unprogrammable one In step 3 or 5 each time a selection is made the track number and the tape s remaining time will be displayed and then the display will change to indicate the number of the next program n Manual tape prog...

Page 14: ...he programmed data changes every time the RANDOM button is pressed the amount of time remaining at the end of the tape also changes accordingly If the tape s length is not enough all tracks cannot be programmed In this case exchange the tape for a longer one In step 2 you can check the program data for side A and side B Shows the number of programmed tracks Shows the total time of programmed track...

Page 15: ... searching function Press the STOP button However some other buttons can also be used to cancel this function Notes Even if the peak level searching is performed twice or more on the same disc the same part will not be always selected because this unit will search the peak level among parts on the disc that are randomly selected by the internal microcomputer This feature will also function in the ...

Page 16: ...discs bearing the mark Never attempt to load any other type of disc into the unit The unit will also play 3 inch 8 cm compact discs To remove a disc from its storage case open the case and then press down at the center with a finger through the center hole and the outer edges held as shown in the illustration lift the disc out carefully Always handle the disc with care so that its surface is not s...

Page 17: ...with the label side up Clean the disc Check the disc carefully replace it if necessary Connect the cables properly If the problem persists the cables may be defective Set the amplifier controls to the correct input selection Relocate the player Clean the disc Securely connect the audio cables If the problem persists the cables may be defective Move the tuner and player farther apart Replace the di...

Page 18: ...IEMENSSTR 22 34 25462 RELLINGEN BEI HAMBURG F R OF GERMANY YAMAHA ELECTRONIQUE FRANCE S A RUE AMBROISE CROIZAT BP70 CROISSY BEAUBOURG 77312 MARNE LA VALLEE CEDEX02 FRANCE YAMAHA ELECTRONICS UK LTD YAMAHA HOUSE 200 RICKMANSWORTH ROAD WATFORD HERTS WD1 7JS ENGLAND YAMAHA SCANDINAVIA A B J A WETTERGRENS GATA 1 BOX 30053 400 43 VÄSTRA FRÖLUNDA SWEDEN YAMAHA MUSIC AUSTRALIA PTY LTD 17 33 MARKET ST SOUT...

Reviews: