background image

145

CVP-103

 Song Data Transform

.......................................................................................

FUNCTION [DISK 4] Display — page 7

The Song Data Transform function can-
not be used while the [SONG] lamp is lit.
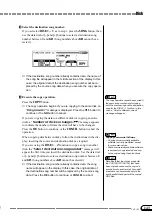
Exit the Song mode before attempting to
transform song data.

This function allows you to convert song data recorded on the CVP-

103 for playback on other Clavinova models or a Disklavier.

Z

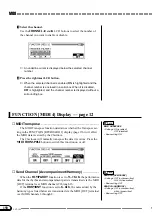
Insert the disk.

2DD Disks Only!
Only data saved on 2DD disks can be
converted. To transform song data that
has been saved on a 2HD disk or re-
corded in the Clavinova’s memory, use
the Song Copy function (page 142) to
copy the song to a 2DD disk before you
attempt to convert it.

Insert a 2DD disk containing the data to be converted in the disk
drive.

X

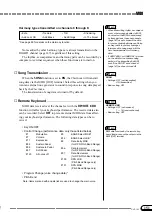
Select a data format.

Data Format Compatibility
CVP-series Clavinovas other than the
models listed in the table at left can play
back song data recorded on the CVP-103
without conversion.
If you are planning to use your song data
on other instruments and want to ensure
that they will closely reproduce the sound
you achieved on the CVP-103, however,
we recommend using XG voices (see
page 30) for all tracks other than those
that play piano voices.

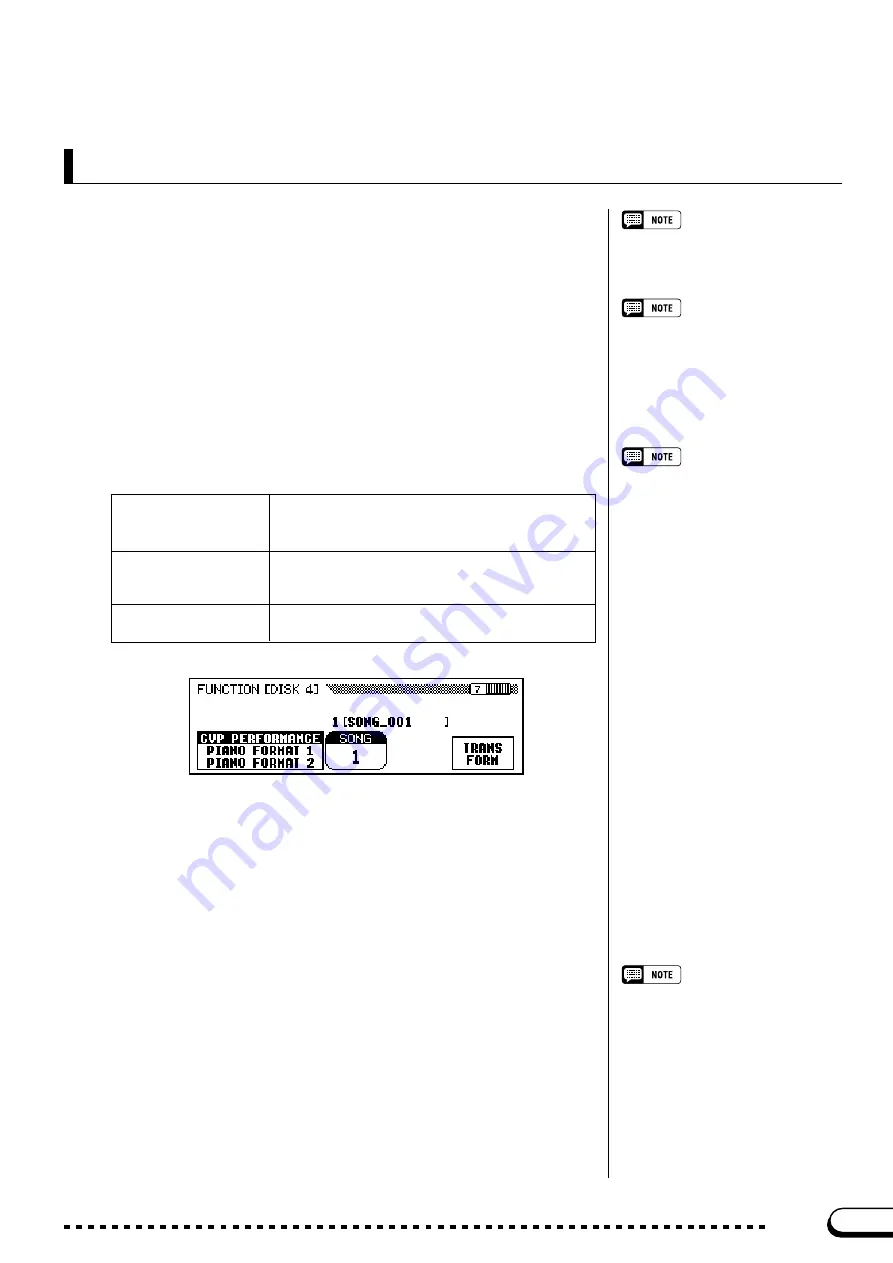
Use either of the two leftmost LCD buttons to select the target format
of the file (the type of instrument that will use the converted data).
The following three types are available:

CVP PERFORMANCE

This function converts data for playback on the
CVP-50/70/55/65/75/83S/85A/87A/89, the DOM-
30, and the DOU-10.

PIANO FORMAT 1

This function converts data for playback on all
Disklavier models except the MX100A and the
MX100B.

PIANO FORMAT 2

This type converts the data for playback on the
Disklavier MX100A or MX100B.

C

Select the song to be converted.

Use the data dial or [–] and [+] buttons to select the song number of
the song to be converted.

The number and name of the selected song are displayed above

the 

SONG

 function.

V

Press the TRANSFORM button.

• The converted data is saved to a song

number between 1 and 60. (Song
numbers above 60 are not used.)

• The original data remains intact at the

original song number even after the
conversion has been executed.

• Recording or editing cannot be per-

formed on the converted songs.

An “

Are you sure?

” message is displayed. Press the 

YES

 button

to convert the selected song, or 

NO

 to cancel the operation. When

the conversion process is finished, a “

Completed! SONG No.

**

message indicates the song number to which the data was saved.

If 

CVP PERFORMANCE

 was selected in Step 2, the characters “

C

)

are appended to the beginning of the original name. If one of the other
formats was selected, the characters “

P

)” are appended.

○ ○ ○ ○ ○ ○ ○ ○ ○ ○ ○ ○ ○ ○ ○ ○ ○ ○ ○ ○ ○ ○ ○ ○ ○ ○ ○ ○ ○ ○ ○ ○ ○ ○ ○ ○ ○ ○ ○ ○ ○ ○ ○ ○ ○ ○ ○ ○ ○ ○ ○ ○ ○ ○

Disk

143

Summary of Contents for Clavinova CVP-103M

Page 1: ...a voltage selector may be provided on the bottom panel of the main keyboard unit near the power cord Make sure that the voltage selector is set for the voltage in your area The voltage selectorissetat240Vwhentheunitisinitiallyshipped To change the setting use a minus screwdriver to rotate the selector dial so that the correct voltage appears next to the pointer on the panel ...

Page 2: ... record of your purchase CAUTION RISK OF ELECTRIC SHOCK DO NOT OPEN CAUTION TO REDUCE THE RISK OF ELECTRIC SHOCK DO NOT REMOVE COVER OR BACK NO USER SERVICEABLE PARTS INSIDE REFER SERVICING TO QUALIFIED SERVICE PERSONNEL PRODUCT SAFETY MARKINGS Yamaha electronic products may have either labels similar to the graphics shown below or molded stamped facsimiles of these graphics on the enclosure The e...

Page 3: ...f sound during use of the instrument or if any unusual smells or smoke should appear to be caused by it immediately turn off the power switch disconnect the electric plug from the outlet and have the instrument inspected by qualified Yamaha service personnel Only use the voltage specified as correct for the instrument The required voltage is printed on the name plate of the instrument Before clean...

Page 4: ... are the property of their respec tive holders The Panel Logos The logos printed on the Clavinova panel indicate standards formats it supports and special features it includes Disk Orchestra Collection The DOC voice allocation format provides data playback com patibility with a wide range of Yamaha instruments and MIDI devices Style File Format The Style File Format SFF is Yamaha s original style ...

Page 5: ...omatic Accompaniment The Auto Accompaniment of the Clavinova gives you full exciting instrumental backing in your favorite music styles according to the chords you play page 57 There s even a wide selection of Pianist styles that allow you to enjoy solo piano accompaniment page 58 Choose from 160 ac companiment styles or create your own custom styles page 73 Easy Access to a Variety of Musical Enj...

Page 6: ...rd Settings for the Second Voice 34 Exiting the Dual Mode 35 Playing Two Voices on Different Sides of the Keyboard Split Mode 36 Selecting the Left Voice 36 Changing the Main Voice in Split Mode 36 Changing the Keyboard Settings for the Left Voice 37 Using the Dual and Split Functions Simultaneously 39 Exiting the Split Mode 39 Using the Pedals 40 Damper Pedal Right 40 Sostenuto Pedal Center 40 So...

Page 7: ... Track Edit 128 Initial Edit Changing the Initial Data 130 Making Settings in the INITIAL EDIT Display 131 Recording Without a Disk 133 About the CVP MEMORY Song 133 CHAPTER 8 The Utility Functions Keyboard 136 FUNCTION KEYBOARD 1 Display page 1 136 FUNCTION KEYBOARD 2 Display page 2 137 Pedal 138 FUNCTION PEDAL Display page 3 138 Disk 139 FUNCTION DISK 1 Display page 4 139 FUNCTION DISK 2 Display...

Page 8: ...lay as well as the cor responding LCD buttons i e the buttons directly below or to the left or right of these items For example the phrase Select RIGHT1 VOICE means that you should press the button directly below the RIGHT1 VOICE label at the bottom of the display Arrows in Operation Explanations Different types of arrows are used to distinguish the steps of an operation from its results Operation...

Page 9: ... For maximum data security Yamaha recommends that you keep two copies of important data on separate floppy disks This gives you a backup if one disk is lost or damaged To make a backup disk use the Disk Copy function on page 142 Inserting Ejecting Floppy Disks To insert a floppy disk into the disk drive Hold the disk so that the label of the disk is facing upward and the sliding shutter is facing ...

Page 10: ...ot try to use the music stand in a half raised position Also when lowering the stand let the stand all the way down before releasing it To open the key cover Z Lift the cover slightly not too much X Slide the cover open To close the key cover Z Slide the cover toward you X Gently lower the cover over the keys CAUTION Hold the cover with both hands when moving it and do not release it until it is f...

Page 11: ...system is auto matically shut off Since the Clavinova has two PHONES jacks two sets of headphones can be used simultaneously allowing two people to enjoy listening to the performance Standard stereo phone jacks Your Clavinova is equipped with a variety of jacks and terminals that let you connect it to other audio and MIDI equipment These connectors are located at the left end of the unit on the re...

Page 12: ... HELP page 27 Accompaniment Style Section 5 STYLE buttons page 49 6 DISK CUSTOM page 73 7 MUSIC DATABASE page 67 8 HARMONY page 69 Auto Accompaniment Section 9 ACMP ON page 57 0 INTRO page 54 MAIN A page 51 MAIN B page 51 MAIN C page 51 MAIN D page 51 ENDING page 55 FADE IN OUT pages 55 56 Metronome Section METRONOME page 25 TEMPO page 25 Start Stop Section TAP page 53 SYNCHRO page 53 q START STOP...

Page 13: ... 158 J AUX IN L L R R page 158 K AUX OUT L L R R page 159 L PEDAL page 42 in the Reference Booklet MIDI IN OUT THRU page 160 z HOST SELECT page 160 x TO HOST page 160 Pedals c Soft pedal page 40 v Sostenuto pedal page 40 b Damper pedal page 40 F3 G3 A3 B3 C4 D4 E4 F4 G4 A4 B4 C5 D5 E5 F5 G5 A5 B5 C6 D6 E6 F6 G6 A6 B6 C7 EXIT SONG PAUSE REW FF REC PLAY STOP SONG CONTROL GUIDE CONTROL EASY PLAY NEXT...

Page 14: ... song plays back When the song is finished playback stops automatically Z Call up the Demo Play mode Press DEMO The lamps of the STYLE button and VOICE button flash continuously and the DEMO display appears C Select the song and start playback When you select a song the demo automatically starts playing in the selected play mode There are three ways to select a demo song as de scribed below You ca...

Page 15: ...ALL or RANDOM is selected as the play mode the Clavinova will play other songs when the selected song is finished To stop playback press either START STOP or PLAY STOP or the LCD button corresponding to the song that s currently playing N Exit the Demo mode To exit the Demo mode press DEMO again or press EXIT Playing Along with the Demo Songs You can play the keyboard while a demo song is playing ...

Page 16: ...n display is the dis play that appears first when you turn the power on Before you can change a function s setting however you have to select it first In the main display the RIGHT1 VOICE function is highlighted indi cating that this function is currently selected Highlighted items Selected items are highlighted i e white letters on a dark background To select a function press and quickly release ...

Page 17: ...l find that the keyboard won t produce any sound no matter how high you set the MASTER VOLUME slider Refer to page 23 for details on the KBD VOL function Using the LCD buttons You can also increase a setting by simply pressing and holding the corresponding LCD button For now since you ll want to hear your key board later on press and hold the leftmost LCD button until the value for KBD VOL is back...

Page 18: ...hat you can use the LCD buttons to select voices just like you did to select the KBD VOL and RIGHT1 VOICE functions at the beginning of this tutorial Menu displays You will use menu displays for only two purposes to select a voice as shown here or to select an accompaniment style page 49 Keep in mind that you can use the data dial or and buttons to select functions only when viewing a menu display...

Page 19: ...page you can use the LCD buttons select a voice in that page as described in the preceding step Refer to page 138 for details about the functions on the FUNCTION PEDAL display page PAGE Use the PAGE buttons to switch between pages After you have changed a function s value you may find you want to restore its basic setting To demonstrate this we ll have to look at another of the Clavinova s display...

Page 20: ...on Using Functions in Non rounded Rectangles Using the LCD Display Controls The FIXED VELOCITY function is de scribed on page 137 18 If you play a few notes you ll notice that your Clavinova is flat by quite a bit Now let s assume that you want to reset the keyboard to the standard 440 0 Hz You could use the button or the data dial or the button to return the value to its basic setting but there s...

Page 21: ...ing display instead When this happens pressing EXIT again will get you back to the main display The main display should show the name of the last piano voice that you selected in the VOICE SELECT Piano display Using the LCD Display Controls 19 For more details on the VOICE SETTING function refer to page 137 There are other sorts of functions that are displayed in non rounded rectangles like the on...

Page 22: ...KEYBOARD LEFT 37 REVERB 4 REVERB 41 REVERB DEPTH 43 EFFECT 4 EFFECT 46 EFFECT DEPTH 48 REGISTRATION REGISTRATION FREEZE 91 Saving Your Changes Now that you ve started learning how to change the Clavinova s settings you may be wondering whether it will remember the changes you ve made even after you ve turned the power off The answer is yes but you need to tell it which settings you want it to reme...

Page 23: ... KBD VOL in the main display then use the data dial or the and buttons to change the keyboard volume Setting the Keyboard Volume VOLUME MASTER VOLUME ACMP SONG VOLUME MAX MIN MAX MIN VOLUME MASTER VOLUME ACMP SONG VOLUME MAX MIN MAX MIN DEMO HELP 8BEAT SWING JAZZ BALL ROOM TRAD WALZ LATIN COUNTRY 16BEAT DANCE ROCK R B PIANIST BALLAD MUSIC DATABASE HARMONY DISK CUSTOM STYLE START STOP TAP SYNCHRO S...

Page 24: ...e previous display There are two types of mixer display as shown below Automatic Accompaniment Mixer This MIXER display appears when you re not using the Song mode See Adjusting Individual Part Levels page 65 for details Adjusting Accompaniment or Song Part Levels Song Mixer This MIXER display appears in the Song mode See Adjusting Indi vidual Track Levels page 100 for details Adjusting the Volume...

Page 25: ...T MAIN A MAIN B MAIN C MAIN D ENDING FADE IN OUT AUTO FILL INTRO METRONOME RESET TEMPO ACMP ON ONE TOUCH SETTING REGIST RATION ANCEL METRONOME The METRONOME lamp lights and the metronome starts keeping time indicated by the flashing of the BEAT lamps Tempo Range 32 280 Basic setting Depends on style The tempo indication in the main display is highlighted and the tempo changes Slower Faster Restori...

Page 26: ...ent tempo with no accented beats When BEAT is set to 2 3 4 or 5 the metronome ticks off measures with the selected number of beats playing a bell sound on the first beat of each measure Setting the Metronome Volume VOLUME Range 0 127 Basic setting 64 Use the VOLUME and buttons to change the metronome volume If the VOLUME function is highlighted you can also change its settings with the data dial o...

Page 27: ...ERB EFFECT 1 2 3 4 BANK BANK REGISTRATION ONE TOUCH SETTING AUTO ACCOMPANIMENT MAIN A MAIN B MAIN C MAIN D ENDING FADE IN OUT AUTO FILL INTRO METRONOME RESET TEMPO ACMP ON ONE TOUCH SETTING REGIST RATION ANCEL HELP While the Help mode is active no other operations can be performed Press the HELP button The Help menu display appears X Select the language if necessary The selected language is always...

Page 28: ...u want to go back and read the previous page B Exit the Help topic Press the LCD button under EXIT to return to the Help menu You can select another menu item or panel button and read through other help topics N Exit the Help mode To exit the Help mode and to go back to the main display at any time simply press HELP Using the Help Mode 26 DEMO HELP ...

Page 29: ...ZSelect the voice group Select the desired voice group by pressing the appropriate VOICE button The VOICE SELECT display appears Selecting a Voice from the VOICE SELECT Display 27 VOLUME MASTER VOLUME ACMP SONG VOLUME MAX MIN MAX MIN DEMO HELP 8BEAT SWING JAZZ BALL ROOM TRAD WALZ LATIN COUNTRY 16BEAT DANCE ROCK R B PIANIST BALLAD MUSIC DATABASE HARMONY DISK CUSTOM STYLE START STOP TAP SYNCHRO STAR...

Page 30: ... RIGHT1 VOICE function is not already highlighted press the fourth LCD button to highlight it XSelect the voice Select the voice using the data dial or and buttons You can also hold down RIGHT1 VOICE to advance the voice selection continu ously When selecting a voice in this way the voice can be selected not only from a certain voice group but from all voices CPlay the voice Adjust the volume by u...

Page 31: ...and 38 functions do not affect the drum SFX kits You can use the settings in the KEYBOARD RIGHT1 display page to change the volume octave and pan of the voice selected using the RIGHT1 VOICE function The settings you make in this page affect any voices you select using the RIGHT1 VOICE function Different settings cannot be made for each voice Displaying the Main Voice Keyboard Settings Z If you ar...

Page 32: ... button The value changes each time you press the button OCTAVE Settings 2 2 octaves lower 1 1 octave lower 0 no octave shift 1 1 octave higher 2 2 octaves higher Basic setting 0 Setting the Stereo Position of the Main Voice The PAN function in the KEYBOARD RIGHT1 display lets you adjust the stereo position of the main voice Z Press the PAN button The PAN function is highlighted PAN Settings L R B...

Page 33: ...ct the second voice in the same manner as described for the main voice page 29 To select the second voice the RIGHT2 VOICE func tion must be highlighted Changing the Main Voice in Dual Mode VOLUME MASTER VOLUME ACMP SONG VOLUME MAX MIN MAX MIN DEMO HELP 8BEAT SWING JAZZ BALL ROOM TRAD WALZ LATIN COUNTRY 16BEAT DANCE ROCK R B PIANIST BALLAD MUSIC DATABASE HARMONY DISK CUSTOM STYLE START STOP TAP SY...

Page 34: ...nstead Z Press the VOLUME button The VOLUME function is highlighted VOLUME Range 0 127 Basic setting 127 Changing the Keyboard Settings for the Second Voice X Adjust the volume of the second voice Use the data dial or and buttons to change the volume or hold down the VOLUME button to increase the volume Press the and buttons simultaneously to restore the basic setting Setting the Octave of the Sec...

Page 35: ...nge 0 10 Basic setting 5 X Adjust the stereo position Use the data dial or and buttons to change the stereo position or hold down the PAN button to move the position to the right Press the and buttons simultaneously to restore the basic setting X Adjust the detune depth Use the data dial or and buttons to change the detune depth or hold down the DETUNE button to increase the detune depth Press the...

Page 36: ...mpani ment function while playing in Split mode In this case pressing the keys in the left range will play the Automatic Accompaniment voices as well as the left voice C Select the left voice Select the left voice in the same manner as described for the main voice page 29 To select the left voice the LEFT VOICE function must be highlighted Left Voice Range All voices Basic setting Acous Bass 1 Sel...

Page 37: ...EYBOARD LEFT display appears You can switch between the KEYBOARD LEFT page and the RIGHT1 page 31 or RIGHT2 page 34 displays using the PAGE and buttons Setting the Volume of the Left Voice You can use the VOLUME function in the KEYBOARD LEFT page to change the volume of the left voice To adjust the overall keyboard volume use the KBD VOL function in the main display page 23 instead Z Z Z Z Z Press...

Page 38: ...nges of the keyboard will be affected by the damper and glide functions controlled by the left and right pedals when playing in Split mode Press the PEDAL button The value changes each time you press the button See page 138 for a list of the functions that can be controlled by the left pedal OCTAVE Settings 2 2 octaves lower 1 1 octave lower 0 no octave shift 1 1 octave higher 2 2 octaves higher B...

Page 39: ...d key position In Split mode the left voice is played by all keys to the left of and including the split point The basic setting of the Split Point is F 2 F 2 C3 C4 C5 C6 C7 C2 C1 C0 Right range Left range SPLIT POINT Settings Any key of the keyboard Basic setting F 2 Exiting the Split Mode Press the SPLIT button to exit Split mode The SPLIT button lamp turns off and the keyboard no longer plays i...

Page 40: ...to Certain voices in the PERCUSSION and XG groups may not be affected by use of the sostenuto pedal Certain voices such as STRINGS or BRASS sustain continuously when the sostenuto pedal is pressed The damper pedal performs the same function as the damper pedal on an actual acoustic piano letting you sustain the sound of the voices even after releasing the keys Damper Pedal Right Sostenuto Pedal Ce...

Page 41: ...OOM TRAD WALZ LATIN COUNTRY 16BEAT DANCE ROCK R B PIANIST BALLAD MUSIC DATABASE HARMONY DISK CUSTOM STYLE START STOP TAP SYNCHRO START STOP CONTRAST BEAT EXIT DIRECT ACCESS PAGE MIXER FUNCTION SONG PAUSE REW FF REC PLAY STOP SONG CONTROL GUIDE CONTROL EASY PLAY NEXTNOTE SOUND REPEAT PIANO E PIANO GUITAR ORGAN SYNTHE SIZER STRINGS CHOIR VOICE XG ENSEMBLE BASS BRASS SAX FLUTE PER CUSSION DUAL SPLIT ...

Page 42: ...ing the EFFECT button See the Effect Type List on page 46 for details If both the REVERB and EFFECT buttons are turned on both effects will be applied Setting the Total Depth The overall depth of the selected reverb effect can be set using the TOTAL DEPTH function in the REVERB display Z Select the TOTAL DEPTH function The TOTAL DEPTH function is highlighted TOTAL DEPTH Range 0 no effect 127 max B...

Page 43: ...neously The selected function is highlighted X Set the reverb depth RHYTHM and ACMP Range 0 no effect 127 max Basic setting 64 LEFT RIGHT1 and RIGHT2 Range 0 no effect 127 max Basic setting Depends on voice Set the reverb depth for the highlighted part by using the data dial or and buttons You can also advance a value by pressing the corresponding LCD button To reset a value to its basic setting s...

Page 44: ...Press DIRECT ACCESS then REVERB The LCD displays either the REVERB page or the REVERB DEPTH page whichever was selected most recently X Press the PAGE button once or twice as needed You can also press DIRECT AC CESS followed by EFFECT then use the PAGE button to display the CHORUS page from either the EF FECT page or the EFFECT DEPTH page Refer to the other sections of this chapter for details on ...

Page 45: ...or each part you play from the keyboard Z Select a part Press LEFT RIGHT1 or RIGHT2 to set the chorus depth for the corresponding keyboard part You can also select several parts at once and adjust their settings simultaneously The selected function is highlighted X Set the chorus depth Chorus Depth functions Range 0 no effect 127 max Basic setting Depends on voice Set the chorus depth for the high...

Page 46: ... when you select a dif ferent voice Changing the Effect Settings You can change the current effect type and depth using the EFFECT and EFFECT DEPTH display pages Displaying the Effect Settings Z Press DIRECT ACCESS then EFFECT If you press the button while the EFFECT page is showing the CHORUS page will be displayed Refer to the first two sections of this chapter for details on reverb and chorus s...

Page 47: ...priate effect type and set the effect depth page 48 for each part to an appropriate level Depending on the selected voice the depth of the effect may sound stronger or weaker even though the same effect type is selected If both the EFFECT and REVERB buttons are turned on both effects will be applied Voice Effects X Use the PAGE and buttons to switch between the EF FECT and EFFECT DEPTH pages The v...

Page 48: ...eously press the and buttons Because the basic settings of the effect depth functions depend on the voices selected an effect depth setting may change automatically when you select a different voice Setting the Effect Depth for Each Part The settings in the EFFECT DEPTH page let you set the effect depth separately for each part you play from the keyboard Z Select a part Press LEFT RIGHT1 or RIGHT2...

Page 49: ...ected style in each group can be retained in memory even after turning off the power when the Backup function page 152 is set to ON When the power is turned on the 8 Beat 1 style is automatically selected However if the Backup function page 152 is set to ON the last selected style will be selected instead Accompaniment styles cannot be selected in the Song Play mode page 93 Rhythm and Auto Accompa...

Page 50: ... tempo is main tained Adjust the tempo as de scribed on page 25 Accompaniment Volume Use the ACMP SONG VOL UME slider to adjust the play back volume as described on page 23 You can also select a style using the data dial or the and buttons Each STYLE SELECT display consists of more than one page Use the PAGE and buttons to switch between pages C Return to the main display Press EXIT to return to t...

Page 51: ...N C and MAIN D Varying the Style Use these buttons to select style variations Main A is generally the most rudimentary form of the style the other variations are more or less lavish embellishments on the same basic theme By judiciously switching between variations as you play you can add variety and make the performance more interesting Selecting a Variation You can select a style variation before...

Page 52: ...ng the Fill in It is possible to switch variations while a fill in pattern is playing The Clavinova will switch to the fill in pattern for the new variation then continue with the new main pattern as usual Repeating the Fill in If you hold down the flashing button or press it after the last eighth note of the measure while the fill in pattern is playing the fill in pat tern will be repeated Cancel...

Page 53: ...ard The style starts playing when you play the first note The SYNCHRO lamp turns off the START STOP lamp lights and the style starts Tap Start This function lets you set the tempo and start the style in one opera tion If necessary select a variation as described on page 51 then tap the TAP button at the desired tempo Tap four times for 2 and 4 beat styles three times for 3 beat styles and five tim...

Page 54: ...elect the variation to play the main pattern when the intro is fin ished If you want the style to continue playing with the same varia tion as the introduction you can skip this step The lamp for the previously selected button lights and the lamp of the selected button flashes Since the flashing light indicates the variation that will play after the intro the illustration at left indicates that th...

Page 55: ...can also use the left pedal to start and stop the style by setting the LEFT PEDAL function page 138 to START STOP The lamp turns off and the style stops instantly Adding an Ending To play an ending pattern before the style playback stops press the ENDING button If you press the ENDING button on or after the second beat of a measure the ending pattern will start at the top of the next measure Fadin...

Page 56: ...d Ending functions The Clavinova will play one of three ending patterns depending on the main pattern that is currently playing as shown below Pattern Played by Ending A MAIN A Ending B MAIN B Ending C D MAIN C or MAIN D Ending Patterns Press ENDING a second time while the ending pattern is playing to produce a ritardando gradually slowing effect Using the Pedals You can also use the left pedal to...

Page 57: ...e 60 Fingered 1 The Fingered 1 method lets you control the Auto Accompaniment by playing full chords to the left of the split point See page 60 Fingered 2 This mode accepts the same fingerings as the Fingered 1 mode with the exception that the lowest note played to the left of the split point is used as the bass root in Fingered 1 mode the root of the chord is always used as the bass root Hence yo...

Page 58: ...nt the recorded accompaniment track will be dropped in favor of the accompaniment you play on the keyboard Press the ACMP ON button Auto Accompaniment with the Synchronized Start function page 53 Also a keyboard lamp shows the current split point V Start the Auto Accompaniment You can also select style variations and play fill in patterns as described on page 51 while playing along with the Auto A...

Page 59: ...n ACMP ON Changing the Auto Accompaniment Settings Selecting an Accompaniment Mode Accompaniment Mode Settings See insert below Basic setting MULTI FINGER Use the FINGERING and buttons to select an accompaniment mode The method for indicating chords in each accompaniment mode are described in detail below The ACCOMPANIMENT MODE display appears Playing with the Auto Accompaniment The selected accom...

Page 60: ...t range along with the Auto Accompaniment The automatic accompaniment will sometimes not change when related chords are played in sequence e g some minor chords followed by the minor seventh If the Clavinova cannot recognize a chord you play an asterisk will appear instead of the chord name in the display Drums only accompaniment can be produced by pressing any three con secutive keys e g C C D si...

Page 61: ...rteenth 7 b13 Seventh sharp ninth 7 9 Suspended fourth sus4 Fingered 2 To control the Auto Accompaniment play chords in the left range of the keyboard as for Fingered 1 In this mode however the lowest note you play in the will be used as the bass root as shown at right Chords in Fingered 2 mode The Clavinova will recognize the same chord types as listed above for Fingered 1 mode Although Full Keyb...

Page 62: ... again Getting Help With Chords The CHORD ASSIST function in the ACCOMPANIMENT MODE display uses the keyboard guide lamps to show you appropriate fingerings for chords Chord Assistance The Chord Assistance feature is essen tially an electronic chord book that shows you appropriate fingerings for chords it is useful when you want to quickly learn how to play certain chords Simply specify the desire...

Page 63: ...o select a chord type The following chord types can be specified in the display Major Maj Minor m Seventh 7 Minor seventh m7 Minor seventh flatted fifth m7 b5 Sixth 6 Minor sixth m6 Major seventh M7 Suspended fourth sus4 Augmented aug Minor flatted fifth m b5 Seventh suspended fourth 7sus4 Seventh augmented 7 5 Diminished seventh dim7 Flatted fifth b5 Seventh flatted fifth 7 b5 Minor major seventh...

Page 64: ...hord Assistance press START STOP or ENDING to stop the accompaniment Turn Chord Assistance off To turn Chord Assistance off press EXIT or ACMP ON The main display appears If you press ACMP ON the Auto Ac companiment is turned off at the same time SPLIT POINT function Settings Any key of the keyboard Basic setting F 2 Use the data dial or the and buttons to change the split point Press the and butt...

Page 65: ...ONG VOLUME setting The ACMP SONG VOLUME setting is relative to the MASTER VOLUME setting Z Press the MIXER button The lamp lights and the MIXER page appears X Select a part Press the LCD button for the part whose level you want to set RHYTHM This part forms the basis of the accompaniment The Rhythm part usually plays one of the drum kits BASS The Bass part uses voices appropriate to each style inc...

Page 66: ...ng and quickly releasing its button Press and release the button a second time to restore the previous value To reset the highlighted part s volume to the basic setting of 110 simultaneously press the and buttons V Repeat steps Xand C Repeat the preceding steps to set the level for other parts You can also select several parts and adjust their volume settings simultaneously B Exit the MIXER displa...

Page 67: ...base before starting the style the Synchronized Start function page 53 is also turned on Press the MUSIC DATABASE button The lamp lights and the MUSIC DATABASE display appears The MUSIC DATABASE display contains a listing of panel setups that can be sorted either by style or alphabetically The name of the style that is used by the currently highlighted setup is shown at the upper right edge of the...

Page 68: ... SET button to recall the highlighted setup The style voice and effect settings change automatically Once you have selected a panel setup from the Music Database you can change the style voice and effect settings to suit your preferences You can also use the Registration function page 89 to save the panel setup in the Clavinova s memory V Return to the main display Press EXIT to exit the Music Dat...

Page 69: ...s X Play the keyboard Play the keyboard along with the Auto Accompaniment With some Harmony types the voice used for the Harmony will be different from the currently selected main voice When chords are played in the right hand section of the keyboard the harmony will be applied to the last note played C Turn the Harmony function off Using the Pedals If you set the LEFT PEDAL function to HARMONY pa...

Page 70: ...ve a speed setting that can be adjusted See the next topic for details Other Auto Accompaniment Functions 68 Type Speed Duet Trio Block 4 Part Country Octave 1 5 Echo Tremolo Trill Strumming Add Jazz Gtr Add Brass Add Strings In The Forest Harmony Types The selected harmony type is highlighted To restore the basic setting for the currently selected main voice press the TYPE and buttons or the and ...

Page 71: ...o change the value of the SPEED function Changing the Harmony Volume You can change the volume of the harmony notes using the VOL UME function in the HARMONY display VOLUME function Settings 0 min 127 max Basic setting Depends on main voice Z Select the VOLUME function Press the one of the LCD buttons under the VOLUME function The VOLUME function is highlighted X Change the VOLUME setting Use the ...

Page 72: ... panel setup the Auto Accompaniment turns on auto matically If you select a panel setup before starting the style the Synchro nized Start function page 53 will also turn on The Harmony function will not be turned on if the Full Keyboard mode is selected even if the selected One Touch Setting setup includes Har mony On Press one of the four numbered buttons under REGISTRATION ONE TOUCH SETTING The ...

Page 73: ...Select the DISK CUSTOM style group One temporary style named TEMP STYLE is automatically loaded into the DISK CUSTOM style memory when the power is turned on If you have loaded other style data see page 87 you can select any of the styles from the DISK CUSTOM STYLE menu to serve as the basis for your new custom style Press the DISK CUSTOM button The lamp lights and the DISK CUSTOM STYLE display ap...

Page 74: ...yle are referred to as sections A custom style includes only one intro section one fill in section and one ending section The custom style s intro fill in and ending sections are based on the corresponding patterns for the style variation MAIN A MAIN B MAIN C or MAIN D that was selected when the CUSTOM STYLE button was pressed page 73 In page 1 of the CUSTOM STYLE display press the SECT button as ...

Page 75: ...ings 1 8 Basic setting Depends on style Clear section You will have to clear all parts of the currently selected section and start recording from scratch if you change the number of measures The Clear section message will not be displayed if you have already cleared the section by changing the beat as described above Press OK to clear the section or CANCEL to abort Once the style has been cleared ...

Page 76: ... style is a preset style or a style loaded from an optional Style File disk parts other than R1 and R2 must be cleared before they can be re corded The Clear part message will not be displayed if the selected part does not contain any data Press OK to clear the part and continue or CANCEL to abort The preset voice for the part being re corded is initially selected At this point you can also select...

Page 77: ... the CLEAR LCD button to clear the selected part before beginning to record If both the R1 and R2 parts are cleared the metronome will sound to provide a timing guide The metronome sound is not re corded and will stop as soon as the custom style is stored Creating Your Own Styles 75 When recording a drum kit voice in part R1 or R2 you can clear a single drum instrument from the part by pressing th...

Page 78: ...nge to UNDO allowing you to undo the quantize operation and return to the pre quantized data if the results are not as you expected You will not be able to UNDO once another button has been pressed During custom style recording no MIXER display is available Repeat steps 4 through 9 to record other parts for the currently se lected section Repeat steps 4 through 10 to record other sections until al...

Page 79: ...urrent custom style or CANCEL to abort Creating Your Own Styles 77 Store the custom style The current tempo setting at the time the custom style is stored becomes the preset tempo for that style Press the STORE LCD button in page 3 of the CUSTOM STYLE display to store the current custom style in the Clavinova s memory The Clavinova displays a message asking you to confirm your decision to store th...

Page 80: ...on i e after time signature has been changed the Can t recall mes sage will be displayed If this happens press OK to return to the previous display Exit when done Press the EXIT button to exit the CUSTOM STYLE display and return to the main display Other Custom Style Functions STYLE CLEAR function Press the STYLE CLEAR LCD button in page 3 of the CUSTOM STYLE display to completely clear the curren...

Page 81: ... a part or select ALL for all parts X Select the parameter you want to set The third LCD button selects the parameter to be set for the current section and part Choose from VOLUME REVERB CHORUS or PAN C Select the chorus type If you selected CHORUS in step 2 the TYPE function is displayed above the fourth LCD button Use this function to select the chorus type you want to apply to the current secti...

Page 82: ...e DEPTH can be set in a range from 0 to 127 When PAN is selected the VALUE function can be set in a range from L10 full left to C center to R10 full right B Repeat as necessary Repeat the preceding steps to set other parameters for each part and section in the custom style Saving Styles to Disk Page 5 of the CUSTOM STYLE display lets you save custom styles on a disk You can save custom styles indi...

Page 83: ...ed from a disk using the DELETE func tion on page 5 of the CUSTOM STYLE display After inserting a disk that contains style files in the Clavinova disk drive press the DELETE LCD button Use the FILE and buttons to select the style file you want to delete from the disk The Are you sure message will be displayed Press YES to delete the style file or NO to cancel Exiting Custom Style Mode Press the EX...

Page 84: ...full during recording or editing Messages in Custom Style Mode Press OK to return to the CUSTOM STYLE display then simplify the style by clearing a part etc Insufficient Memory To Store This message will be displayed if there is not enough memory to per form a store operation In this case it will be necessary to either delete a style you don t need or simplify the style you are currently recording...

Page 85: ...e the Clavinova will display a message like the one shown below Select a memory number and press YES to store the style and exit press NO to exit without storing the style or press CANCEL to return to the Custom Style mode Style Change Before Store If you want to select a different source style without storing the current style exit the Custom Style mode without storing the style see Exit Before S...

Page 86: ... BANK REGISTRATION ONE TOUCH SETTING AUTO ACCOMPANIMENT MAIN A MAIN B MAIN C MAIN D ENDING FADE IN OUT AUTO FILL INTRO METRONOME RESET TEMPO ACMP ON ONE TOUCH SETTING REGIST RATION ANCEL DISK CUSTOM About the Yamaha Style File Format Style files created for Clavinova models prior to the CVP 103 may have slightly different formats If you try loading such files the data may not play back as expected...

Page 87: ...n a new style is loaded One pre pro grammed temporary style is automati cally loaded into the DISK CUSTOM memory whenever the power is turned on Use the MEMORY LCD button to select the memory number to which the selected style file is to be loaded 1 through 4 then press the LOAD LCD button to load the style file Repeat steps 2 and 3 to select and load other style files Using Style Files C Select a...

Page 88: ...emove it and return to the normal play mode display You can return to the normal play mode without removing the disk by pressing the EXIT button Loaded disk styles will be retained in memory only until the power is turned off Once loaded style files can be selected for playback by pressing the DISK CUSTOM button then using the STYLE and LCD but tons the data dial or the and buttons to select the s...

Page 89: ...LP 8BEAT SWING JAZZ BALL ROOM TRAD WALZ LATIN COUNTRY 16BEAT DANCE ROCK R B PIANIST BALLAD MUSIC DATABASE HARMONY DISK CUSTOM STYLE START STOP TAP SYNCHRO START STOP CONTRAST BEAT EXIT DIRECT ACCESS PAGE MIXER FUNCTION SONG PAUSE REW FF REC PLAY STOP SONG CONTROL GUIDE CONTROL EASY PLAY NEXTNOTE SOUND REPEAT PIANO E PIANO GUITAR ORGAN SYNTHE SIZER STRINGS CHOIR VOICE XG ENSEMBLE BASS BRASS SAX FLU...

Page 90: ... when the Clavinova s power is turned off see page 152 You 5can also save individual registra tions or complete sets of 20 registra tions to floppy disk for future recall see page 139 Recalling the Registered Panel Settings Z Press the REGISTRATION button The REGISTRATION lamp lights X Select a bank Use the BANK and BANK buttons to select the bank that contains the desired registration The selecte...

Page 91: ...her left pedal settings saved by the Regis tration function cannot be recalled in this case You can use the Registration Freeze function to prevent certain panel settings from being changed when a Registration is recalled This allows you to recall various registrations while using the Auto Accompaniment without suddenly changing the style or volume settings Z Open the REGISTRATION FREEZE display P...

Page 92: ...or off Press the FREEZE LCD button to freeze or unfreeze the categories you marked in step 2 FREEZE Settings ON highlighted OFF unhighlighted Basic setting OFF Backup of last setting ON To exit the REGISTRATION FREEZE display and return to the main display press EXIT The FREEZE function is highlighted when the marked categories are frozen When the Freeze function is off the settings in all cat ego...

Page 93: ...ion of the Clavinova Z Enter the Song Play mode Gently insert the included Music Software Collection disk or a disk containing songs you ve recorded yourself into the disk drive Make sure to insert the disk face up in correct direction as shown in the illustration until it clicks into place The Song Play mode is auto matically called up when a song disk is inserted in the disk drive Song Playback ...

Page 94: ...ncluding song numbers that contain no song data However no song names are displayed for song numbers that contain no data Select ALL if you want all songs on the disk to be played in order Select RANDOM if you want all songs on the disk to be played at random For either selection ALL or RANDOM the songs will be repeated until playback is stopped File Icons There are four icons shown below that ind...

Page 95: ...G or EXIT The lamp turns off and the previous display appears Voice Selection During Playback The voice you play from the keyboard can be changed during song playback by selecting a voice in the normal way page 29 The voices of the 1 RIGHT and 2 LEFT parts being played back can be changed in the SONG PLAY L R VOICE display page 98 Please note that the song may not start immediately after you press...

Page 96: ...range differs depending on the software The BEAT lamps page 52 may not flash during playback of free tempo software With some songs the displayed meas ure numbers may not match those marked on the score V V V V V Eject the disk When you ve finished with the currently loaded disk simply press the disk drive s EJECT button to remove it The LCD display returns to the main display CAUTION Never take o...

Page 97: ...iles the part indication does not appear for the parts without data Turning Individual Accompaniment Parts On or Off Normally pressing the ORCH accompaniment LCD button turns all orchestra parts tracks 3 through 16 or all parts other than 1 RIGHT and 2 LEFT on or off at once You can however turn these parts on or off individually in the SONG PLAY TRACK PLAY display display page 2 Z Select the SONG...

Page 98: ... 2 LEFT 2 LEFT 2 LEFT 2 LEFT 2 LEFT Specific tracks can be assigned to the 1 RIGHT and 2 LEFT func tions in the SONG PLAY MAIN display allowing you to selectively turn playback of assigned tracks on or off TRK OFF can be as signed to 2 LEFT The same track cannot be assigned to both parts 1 RIGHT Settings 1 16 Basic setting Depends on file type 2 LEFT Settings 1 16 off Basic setting Depends on file...

Page 99: ...The ACMP SONG VOLUME slider can be used to control the overall volume of song playback When you enter the Song Play mode the song volume level is auto matically set to the volume level that was last set in the Song Play mode regardless of the slider s position After that moving the slider will set the volume to the corresponding level Overall Song Playback Volume Control If the Auto Accompaniment ...

Page 100: ...ER display Adjustment of Track Settings You can use the MIXER display to set the parameters listed below See the indicated reference pages for descriptions of each parameter Parameters available in the MIXER display When track 1 16 is selected VOLUME See page 32 VOICE See page 29 PAN See page 32 REVERB DEPTH See page 43 CHORUS DEPTH See page 45 EFFECT DEPTH See page 48 When TOTAL is selected TEMPO...

Page 101: ...sed to record the song If the Auto Accompaniment is turned on during playback of an original song that was recorded on the CVP 109 107 105 103 the MIXER display will function as Auto Accompaniment Part Volume Control page 65 instead of Song Track Volume Control Parameter selected for editing Song Playback Selected track is highlighted 99 The Clavinova has convenient repeat functions that let you r...

Page 102: ...n count automatically plays before the phrase However for free tempo songs a lead in count is not available 1 Song Repeat When 1 SONG is selected by pressing the REPEAT MODE or button any song selected and played as described above will play repeat edly until stopped Lead in count is not played AB Repeat This function allows you to specify any section between point A and point B of a song letting ...

Page 103: ...A and B points within the song Song Playback 101 Pause Press the PAUSE button during song playback to temporarily stop song playback Press PAUSE again or the PLAY STOP button to resume playback from the same point Rewind and Fast Forward Use the REW and FF buttons to rewind or fast forward to the playback point of the song While playback is stopped or paused the REW and FF buttons can be used to s...

Page 104: ...wever the selected voice allocation on the panel will not change Song Data Recorded on Other Instruments Song data recorded on other Clavinovas CVP 50 70 55 65 75 83S 85A 87A 59S 69A 69 79A 89 92 94 96 98 600 109 107 105 will nor mally be played back with the correct voices even though the volume balance may be slightly different However data recorded using the Auto Accompaniment function of the C...

Page 105: ... Clavinova waits to play the accompaniment until you play the correct note you can practice at your own pace The keyboard guide lamps indicate the timing in which to play by changing from lit up to flashing If the guide lamps do not flash The guide lamps may not flash in the case of a few songs because of a special guide system In case of such songs however you can switch to the Next Note method s...

Page 106: ...the cor rect duration hold the note for as long as the bar remains in the display Piano Roll ON OFF The piano roll display can be turned on or off from the SONG PLAY GUIDE MODE display display page 5 See page 109 Z Set up the desired song for practicing Check that the disk is properly inserted in the disk drive before call ing up the Guide function Using the Guide Function Before Practicing Before...

Page 107: ...h SPECIAL is indicated in the GUIDE MODE location in SONG PLAY GUIDE MODE display page 5 The PAUSE button cannot be used in the Next Note or Sound Repeat methods V Stop your practice session The Guide function stops automatically when playback reaches the end of the song You can also stop song playback by pressing the PLAY STOP button To turn off the Guide function press the appropriate button EAS...

Page 108: ...ch was set to Part Cancel in the SONG PLAY MAIN display dis play page 1 can then be played with the regular Part Cancel function and the other part not set to Part Cancel can be played with the Easy Play function The ENSEMBLE mode is effective only for songs which have data in both the 1 RIGHT and 2 LEFT parts The ENSEMBLE mode cannot be used when Next Note or Sound Repeat is selected The GUIDE MO...

Page 109: ...by turning on one of the GUIDE CONTROL buttons When this function is set to ON the piano roll is always shown during playback when it is set to OFF the piano roll is not displayed Keyboard Guide Lamp ON OFF To turn off the keyboard guide lamps press the LAMP button to set the function to OFF Guide Control 107 The Lyric Display function cannot be used with song data recorded in SMF format 1 If a so...

Page 110: ...ompatible See page 172 for information on the XG SMF format 0 format 108 Up to 60 songs can be recorded on a single disk depending on the amount of data contained in each song Before you can record songs on a new disk the disk must be formatted for use by the Clavinova see page 111 Track Part 1 Piano right hand 2 Piano left hand 3 Bass 4 Strings 9 Rhythm 10 Rhythm 16 Organ Up to a maximum of 16 tr...

Page 111: ...a Start disk format message appears in the display To start format ting press the OK button To cancel the format operation press CANCEL Recording Setup Disk Format The same display appears when inserting blank unformatted disks or disks of differ ent formats Format Types 2DD disks are formatted to 720 KB while 2HD disks are formatted to 1 44 MB X Execute the format operation An Are you sure messag...

Page 112: ... desired data from the Style File disk page 86 then insert the recording disk X Select the song number to be recorded Select the SONG function then use the SONG button the data dial or the and buttons to select the desired song number for record ing Select a song number between 1 and 60 Write protect tab closed unlocked write enabled DISK IN USE Shutter Label side of disk Song Recording 110 If you...

Page 113: ...ny type is selected the harmony notes will be recorded in tracks 6 through 8 Recording in Dual Split Mode If you record the 1 RIGHT part in the Dual mode data is recorded to tracks 1 and 3 If you record the 1 RIGHT part in the Split mode data is recorded to tracks 1 and 5 If you record the 2 LEFT part in the Dual mode data is recorded to tracks 2 and 4 If you record the 2 LEFT part in the Split mo...

Page 114: ... soon as you play the keyboard The metronome sound is not recorded When a disk is not inserted A song can be recorded to internal memory if it is short enough A maxi mum of approximately 2500 notes 26 KB can be recorded however the amount may be less if other functions are used The internally recorded song will be deleted when the power is turned off or when another song is loaded See Recording Wi...

Page 115: ...lider position Play back the recording Press the PLAY STOP button The recorded data will be played back During playback you can use the REW FF and PAUSE but tons to control the playback and use the TEMPO and buttons to change the tempo You can also play along on the keyboard Playback will stop automatically when the end of the recording is reached or you can press the PLAY STOP button again to sto...

Page 116: ...on The Clavinova will start recording when you begin to play on the keyboard PLAY can only be selected for tracks which contain data When a track is muted the track number is displayed without a surrounding box Three separate tracks can be set to record simultaneously when re cording keyboard parts If you intend to record using the Dual or Split functions two tracks must be record enabled If you i...

Page 117: ...Effect depth Keyboard part volume main second left Fade in out converted into volume data Scale tuning data page 155 Parameters Recorded for the Entire Song Tempo Reverb type Overall reverb depth Chorus type Effect type Accompaniment style Section Intro Main A through D Fill In Ending The last recorded track effect takes priority Other Recorded Parameters Accompaniment style data which is recorded...

Page 118: ...tor the previously recorded tracks while you record By repeating this process you can assemble a complete song Adding New Tracks If you record on a track that has already been recorded the previous material will be erased and the new material will be recorded in its place With the Punch in out Recording function you can selectively re record specified sections of the song Punch in out recording al...

Page 119: ...ndicated by an underline mark Use the rightmost LCD button to set the selected track to REC re cording enabled or OFF recording playback disabled PLAY can only be selected for tracks which contain data When a track is muted the track number is displayed without a surrounding box Auto Setting of Punch in out If no other track is selected the last re corded track is automatically selected for Punch ...

Page 120: ...l be erased PCH OUT When recording is stopped all data following the punch out point will remain intact M Start playback and recording Press the PLAY STOP or PAUSE button to start playback from the current paused location To punch in i e start recording when the 1ST KEY mode is se lected simply begin playing at the point from which you want to record To punch in i e start recording when the PEDAL ...

Page 121: ...t up the instrument for recording Just as you did in steps 1 through 3 of Quick Recording insert a formatted disk select a song number then press the REC button to enter the Record mode You cannot use the Music Database page 67 or the Registration function page 89 while recording data with the Chord Se quence function X Turn on the Chord Sequence function Press the CHORD SEQ button in the RECORD E...

Page 122: ...y be entered at the beginning of a song However Auto Fill data can be entered anywhere you desire C Move the cursor to the entry point The display shows measures as a horizontal line with 8th note divi sions To move the triangular cursor along the measure indication to the point at which you want to enter a chord or style change press one of the CURSOR or buttons to highlight the function then use...

Page 123: ...AY STOP button The data recorded by the Chord Sequence function is listed below Data Recorded by the Chord Sequence Function Accompaniment style Section MAIN A B C D Intro Ending Auto fill Fade in out Break Chord name Tempo Auto accompaniment part volume MIXER settings Rhythm on off ACMP SONG volume as an initial setting only A fade out cannot be entered during a fade in Entering Rhythm only Secti...

Page 124: ...ormal track recording will be replaced by the preset accompaniment style data For example even if you ve recorded your own bass part it will be erased and replaced by the original bass pattern if you correct the data in the Chord Sequence display Page 2 of the CHORD SEQUENCE display contains a number of versatile functions that help you enter chord sequence data more effi ciently Finally press the...

Page 125: ... other normal data End Mark Unless an end mark is entered the song will end one measure after the last entered data If an Ending pattern or Fade out is input the song will end at the last measure of the Ending or Fade out RHYTHM ON OFF To turn the rhythm sound on or off press the RHYTHM ON OFF but ton followed by the SET button No rhythm sound is produced following the location to which a rhythm o...

Page 126: ...4 Other Record Edit Functions The Setup Memory function lets you save the current panel settings to disk so that they will automatically be restored whenever you play back the song being edited Z Set up the Clavinova to play the song Setup Memory For details regarding which settings are saved by the Setup Memory func tion see the Parameter Chart on page 13 of the Reference Booklet The settings sav...

Page 127: ... operation and return to the RECORD EDIT display press the CANCEL button X Register the name When the song file name is complete press the OK button to regis ter it The new name is registered as the current song file name To cancel the operation press the CANCEL button This function is used to name song files recorded with the Clavinova or to change existing names To call up the Song Name function...

Page 128: ...ks A and B after the Track Mix function is executed If the old data is not needed you should delete it See Track De lete below A bar graph indicating the progress of the Track Mix operation will appear while the data is being processed You can check whether the results are what you expected by starting and stopping playback with the PLAY STOP button You should try this before you do something that...

Page 129: ...nction then use the data dial or and buttons to select the track to be deleted Only tracks containing data can be se lected A bar graph indicating the progress of the Track Delete operation will appear while the data is being processed You can check whether the results are what you expected by starting and stop ping playback with the PLAY STOP button You should try this before you do something tha...

Page 130: ...ode The Undo feature cannot be used for data recorded to internal memory see page 133 The Initial Edit function allows you to change the volume level of each track or the initial data set for the entire song after you ve finished recording The INITIAL EDIT display appears when you press the INI TIAL EDIT button in the RECORD EDIT display All sixteen tracks are displayed simultaneously in this disp...

Page 131: ...e page 42 REVERB TYPE See page 42 CHORUS TYPE See page 44 EFFECT TYPE See page 47 The Program Change Number PRG Bank LSB BKL and Bank MSB BKM parameters which are used to select voices via MIDI are displayed when VOICE is selected Making Settings in the INITIAL EDIT Display 129 Other Record Edit Functions The current parameter value for the selected track The parameter to be changed The selected t...

Page 132: ... is displayed press the YES button to actually make the specified changes or NO to cancel When this is completed the WRITE button will change to UNDO allowing you to undo the Write operation and restore the data of the ed ited track to what it was before you made any edits All edited data for any number of tracks within a single song can be written in a one time Write operation by pressing the WRI...

Page 133: ...e letters CVP in place of a song number You can play this song back as you would any other song that was recorded to disk see page 93 If you insert a song disk and select a song number when the inter nal memory contains song data a Delete CVP MEMORY mes sage will be displayed Press YES to delete the song data from the internal memory The song data will also be erased from the internal memory by tu...

Page 134: ...board 151 BACKUP 13 Backup 152 14 Recall 153 UTILITY 15 Micro Tuning 154 16 Scale Tuning 155 The following functions are available 132 Various confirmation alert and error messages may appear in the display during operation Refer to the Messages section page 165 for information on the messages VOLUME MASTER VOLUME ACMP SONG VOLUME MAX MIN MAX MIN DEMO HELP 8BEAT SWING JAZZ BALL ROOM TRAD WALZ LATI...

Page 135: ... mode by pressing the EXIT button The FUNCTION lamp goes out The lamp lights and the most recently used page of the Function mode display appears 133 C Perform the desired operation Refer to Chapter 2 Basic Operation for instructions regarding the selection and use of the various types of functions V Press the FUNCTION button when finished X Display the desired page Use the PAGE and buttons to dis...

Page 136: ... Basic setting 0 The Transpose functions make it possible to shift the pitch of the key board or song data in semitone units allowing you to match the pitch of the Clavinova to the range of other instruments or singers The Clavinova has two transpose functions ALL and SONG The former transposes all notes played by the Clavinova whereas the latter transposes song data only When you change the setti...

Page 137: ...s you produce a relatively loud sound even when playing the keys softly FIXED This setting produces a uniform degree of loudness no matter how forcefully or softly you play the keys Use the FIXED VELOCITY function to set the loudness of notes produced by the keyboard HARD This setting requires you to play the keys quite strongly to produce maximum loudness Voice Setting VOICE SETTING Settings AUTO...

Page 138: ... playback causes the Clavinova to play a special break fill in pattern This pattern is different from the fill in patterns produced by the Auto Fill func tion See page 51 BASS HOLD While the left pedal is pressed the bass note played by the Auto Accompaniment will be held even if the chord is changed This function does not work when FULL KEYBOARD is se lected as the accompaniment mode page 61 FADE...

Page 139: ...ALL SETUP An All Setup file contains all panel setting data in the list on page 13 in the Reference Booklet If you select REGISTRATION as the file type you can also use the REGIST function to specify whether the operation will affect one memory location or a full set of twenty When saving registration data the REGIST setting specifies which memory location s will be saved to disk When loading data...

Page 140: ...rigi nal internal data will be replaced when you execute the Load operation Be sure to save all important data to disk see below before using the Load op eration 138 Disk First select the desired file to be loaded Press either of the two leftmost LCD buttons to select the file then press the OK button An Are you sure message is displayed Press the YES button to load the selected file or the NO but...

Page 141: ...operation DELETE When you select DELETE the Delete function display will appear First select the desired file to be deleted Press either of the two leftmost LCD buttons to select the file then press the OK button An Are you sure message is displayed Press the YES button to delete the selected file or the NO button to abort the Delete operation First select the desired file to be named Press either...

Page 142: ...tion song number as described in step 3 then execute the copy function as usual You can then use the Song Delete function page 144 to delete the CVP MEMORY song Once the song has been de leted you will be able to use the other copy functions First insert the disk containing the source song or the disk to be cop ied Press either of the leftmost two LCD buttons to select the copy type Three copy typ...

Page 143: ... of times the disk will have to be changed Press the OK button to continue or the CANCEL button to abort the operation When copying data between disks follow the instructions in the dis play inserting the source and destination disks as required If you are using the DISK1 2 function to copy a song to another disk the Select destination song number message will appear the first time you insert the ...

Page 144: ...sert the disk containing the song data to be deleted into the disk drive X Select the song to be deleted Use the SONG and buttons the data dial or the and but tons to select the song to be deleted The song data in the Clavinova s memory can be also deleted with this operation To do this select CVP MEMORY instead of a song number CVP MEMORY appears only when the memory contains song data C Execute ...

Page 145: ...target format of the file the type of instrument that will use the converted data The following three types are available CVP PERFORMANCE This function converts data for playback on the CVP 50 70 55 65 75 83S 85A 87A 89 the DOM 30 and the DOU 10 PIANO FORMAT 1 This function converts data for playback on all Disklavier models except the MX100A and the MX100B PIANO FORMAT 2 This type converts the da...

Page 146: ...ab is set to the write posi tion and insert the disk into the disk drive face up with the shutter for ward until it clicks into place FUNCTION DISK 5 Display page 8 CAUTION Formatting a disk erases all the data on the disk Before you format a disk make sure it doesn t contain any data that you want to keep X Execute the format operation Press the START button An Are you sure message is displayed P...

Page 147: ...avinova voices can be independently controlled on different MIDI channel numbers 1 through 16 by an external MIDI device This means that you can produce the sound of a full band or ensemble on the Clavinova by using a computer or MIDI sequencer Local Control LOCAL Settings ON OFF Basic setting ON The term local control refers to the control of the internal tone gen erator by the keyboard You will ...

Page 148: ...reception of certain types of MIDI data FUNCTION MIDI 2 Display page 10 Program Change Messages PROGRAM Settings Tx Rx transmitted received OFF Basic setting Tx Rx Normally the Clavinova will respond to MIDI program change num bers received from an external keyboard or another MIDI device For example the Clavinova can change voices in response to MIDI program change messages received from a connec...

Page 149: ...ail on page 19 in the Reference Booklet Start Stop Commands START STOP Settings Tx Rx transmitted received OFF Basic setting OFF A device that transmits the Start Stop command can start and stop the rhythm or sequence data performance of a receiving device via MIDI For example you can transmit the Start Stop command from an external MIDI sequencer to start and stop the Auto Accompaniment or song p...

Page 150: ...CD buttons to select the number of the channel you want to enable or disable An underline cursor is displayed below the selected channel number X Press the rightmost LCD button When the selected channel is enabled ON is highlighted and the channel number is enclosed in a solid box When it is disabled OFF is highlighted and the channel number is displayed without a surrounding box MIDI TRANSPOSE Se...

Page 151: ... your keyboard performance The received data also can be recorded Select OFF to prevent external MIDI data from affect ing your keyboard performance The following data types can be re ceived Key ON OFF Control Change performance data only those listed below 1 Modulation 7 Volume 11 Expression 64 Sustain Pedal 66 Sostenuto Pedal 67 Soft Pedal 123 All notes off MIDI data received by the remote key b...

Page 152: ...p is used for the following groups on the Clavinova Group Description VOICE SETTING Voice related settings REVERB EFFECT Reverb chorus and effect settings TUNE Master tuning micro tuning scale tuning PEDAL Pedal function settings ACMP SETTING Auto Accompaniment related settings SONG SETTING Settings related to the Song mode REGISTRATION Registration data Freeze function settings MIDI SETTING MIDI ...

Page 153: ... Auto Accompaniment related settings SONG SETTING Settings related to the Song mode REGISTRATION Registration data Freeze function settings MIDI SETTING MIDI function settings ALL All of the above settings Permanent Settings The factory settings of the following parameters are not recalled Help language Song volume Backup ON OFF However these and all other settings can be reset to the initial fact...

Page 154: ...and to tune the pitch of the selected key If you set the parameter at the leftmost LCD button to ON you can play the key being tuned in order to check the sound during this operation The normal tuning of 0 cents for the selected key can be instantly recalled by simultaneously pressing both the TUNE and buttons C Repeat steps 1 and 2 Repeat steps 1 and 2 until all the required keys have been tuned ...

Page 155: ... effect for the entire keyboard The created tun ing can be saved to disk for future recall Preset Scale This function lets you select from various pre programmed tunings or temperaments Until equal temperament the most commonly used tuning at present was accepted various tunings have been created over the years for use with the particular music and instruments of the era This feature lets you play...

Page 156: ... the parameter then use the data dial or and buttons to select the central key User Scale Setup This function allows you to individually tune each key within an oc tave The setting made for one key is automatically assigned to the same key in all other octaves Z Select USER with the leftmost LCD button The following display appears X Press the key to be tuned The note name and the current tuning v...

Page 157: ...k drive before executing a file operation If you want to load delete or rename a user scale file the inserted disk should contain the file in question X Select the desired file operation Use the second LCD button from the right to select the desired file operation LOAD SAVE DELETE or NAME C Press the START button After the START button is pressed the display corresponding to the selected file oper...

Page 158: ...g two pairs of headphones to the two jacks PHONES You can connect the Clavinova to a wide range of audio equipment by using the AUX IN and AUX OUT jacks which are located at the left end of the unit on the rear panel AUX IN Jacks Audio Input and Output CAUTION Never connect the Clavinova s AUX OUT jacks to its AUX IN jacks either directly or via external audio equip ment Such connections could res...

Page 159: ...nce the AUX OUT jacks provide output at a fixed level you will need to use the controls on the connected equipment to adjust the overall volume of the sound from the Clavinova Use the AUX OUT L L R jack for monophonic output For stereo output connect the AUX OUT L L R jack to the left channel input and the AUX OUT R jack to the right channel input AUX OUT R L L R Stereo System Audio Connections 15...

Page 160: ...t lets you connect it directly to an Apple Macintosh IBM PC AT or other compatible personal computer without the use of a special MIDI interface Be sure to turn off the power when connecting or disconnecting computers or MIDI equipment as failing to do so can result in damage to equipment Connecting MIDI Equipment MIDI Sequencer Tone Generator THRU OUT IN MIDI TO HOST or MIDI If you simply want to...

Page 161: ...ration manual if it requires a 31 250 bps data transfer rate set the HOST SELECT switch to PC 1 Connect the TO HOST connector of the Clavinova to the RS 232C port on your IBM computer using a standard 8 pin MINI DIN 9 pin D SUB cross cable Set the HOST SELECT switch to the PC 2 position Refer to your software owner s manual for information on any settings you might have to make on the computer sid...

Page 162: ...reverb effects HALL2 HALL3 HALL4 ROOM1 Small room reverb effects ROOM2 ROOM3 ROOM4 STAGE1 Reverb appropriate for a solo instrument STAGE2 PLATE1 Simulated steel plate reverb effects PLATE2 Chorus Type List Type Description CHORUS1 CHORUS2 CHORUS3 CHORUS4 CHORUS5 FLANGER1 FLANGER2 FLANGER3 FLANGER4 Standard chorus effects that add natural spaciousness to the sound Modulation effects reminiscent of ...

Page 163: ...Y SP4 ROTARY SP5 TREMOLO1 TREMOLO2 GTR TREMOLO Tremolo effect that is suitable for guitar sounds AUTO PAN Concert hall reverb effects Standard chorus effects that add natural spaciousness to the sound Early reflection components of the reverb effect Simulated steel plate reverb effects Reverb appropriate for a solo instrument Small room reverb effects Modulation effects reminiscent of a jet airpla...

Page 164: ...ependent feedback for L and R CROSS DELAY Two delays L and R with crossed feedback DIST HARD DIST SOFT EQ DISCO Disco oriented equalizer effect EQ TEL Equalizer effect that simulates sound heard over the phone Cyclical wah effects useful for electric guitar sounds etc Effect Type Lists Effects that add distortion with an edge to the sound useful for electric guitar sounds etc ...

Page 165: ...on again This prompt appears when there is no disk in the disk drive Put the proper disk in the drive and attempt the operation again This prompt appears when you attempt to rename or convert a song that doesn t contain any data Select a song that contains data or insert a disk with song data into the floppy disk drive This message appears when you attempt to load rename or delete a file and no fi...

Page 166: ...tor ing You can record up to 60 song files on a 2DD or 2HD disk A 2DD disk can hold about 107 files of various types and a 2HD disk can hold up to about 219 files Press the OK button then delete any unnecessary files from the disk page 144 or use a disk that has more available space A file with the same name already exists Press the OK button if you wish to overwrite the original file with new dat...

Page 167: ...ed See page 76 This confirmation prompt appears when you store a custom style page 79 It also ap pears if you try to change styles before you ve stored the custom style page 85 Select OK to store the custom style Press CANCEL to return to the previous dis play without storing data This confirmation prompt appears when you attempt to exit the Custom Style mode before storing the custom style See pa...

Page 168: ...ty is not sufficient to hold the specified file See page 87 Some Style files are too large to be handled by the LISTEN function See page 87 Load the Style file then use the normal playback methods to hear the style in question Chord Sequence This confirmation message appears if you attempt to exit the Chord Sequence function while recording Press YES to store the recorded data Press NO to exit wit...

Page 169: ...ebar page 143 Change the destination song number This message appears if you attempt to convert song data that has been saved on a 2HD disk See page 145 Press OK and copy the song data to be converted to a 2DD disk then perform the data conversion using the 2DD disk Following conversion of the song data this message displays the song number to which the data was saved This message appears when the...

Page 170: ...L UME level Raise the part or track level s in the appropriate MIXER display page 65 or 100 Raise the MASTER VOLUME level Unplug the headphones Turn the Local Control function on See page 147 Securely insert the pedal cord plug into the proper jack See page 42 in the Reference booklet Set the MIDI Sync function to INT See page 148 Since the configuration of the tone generation system is such that ...

Page 171: ...ted accompani ment mode The memory capacity is full because the playing time of one or more songs is long or many functions were used Playback of the track s is turned off Press the ACMP ON button to turn on the Auto Accompaniment Refer to the Fingering Chart page 15 of the Reference Booklet Check the accompaniment mode and play the keys according to the selected mode See page 59 Delete unnecessar...

Page 172: ...l into the future The CVP 103 is compatible with XG Song data recorded on the CVP 103 using voices in the XG category is XG compatible DOC This voice allocation format is compatible with many of Yamaha s MIDI devices including the Clavinova series instru ments This is also a common format used with various Yamaha soft ware The CVP 103 is compatible with DOC Even if the devices and data used satisf...

Page 173: ...05 109 guide lamps 109 Guide Mode 108 H Harmony 69 71 headphones 11 158 Help 27 28 host computer 160 161 highlighted items 16 I Initial Edit 130 132 introduction pattern 54 K key cover 10 Key Touch 137 keyboard guide lamps 109 keyboard percussion 31 L LCD changing a value 17 LCD selecting a function 16 Left Pedal 138 left voice 36 39 loading data files 140 loading style files 86 88 Local Control 1...

Page 174: ...equence 121 125 Song Copy 142 143 Song Data Transform 145 Song Delete 144 Song Name 127 Song Play 93 104 Song Record 110 120 Song Transmission 151 sostenuto pedal 40 Sound Repeat 106 107 109 Split 36 39 Split Point 36 39 64 stereo position see pan storing Custom Style 79 80 storing Registration 89 90 Style Clear 80 style file 86 88 styles custom 73 88 styles playback 51 56 styles selecting 49 50 S...

Page 175: ...lter s In the case of radio or TV interference relocate reorient the an tenna If the antenna lead in is 300 ohm ribbon lead change the lead in to co axial type cable If these corrective measures do not produce satisfactory results please contact the local retailer authorized to distribute this type of product If you can not locate the appropriate retailer please contact Yamaha Corporation of Ameri...

Page 176: ...gisters and other devices that produce heat should be avoided 8 This product was NOT designed for use in wet damp loca tions and should not be used near water or exposed to rain Exam ples of wet damp locations are near a swimming pool spa tub sink or wet basement 9 This product should be used only with the components supplied or a cart rack or stand that is recommended by the manufacturer If a car...

Page 177: ...g Yamaha Music Center Jalan Jend Gatot Subroto Kav 4 Jakarta 12930 Indonesia Tel 21 520 2577 KOREA Cosmos Corporation 1461 9 Seocho Dong Seocho Gu Seoul Korea Tel 02 3486 0011 MALAYSIA Yamaha Music Malaysia Sdn Bhd Lot 8 Jalan Perbandaran 47301 Kelana Jaya Petaling Jaya Selangor Malaysia Tel 3 703 0900 PHILIPPINES Yupangco Music Corporation 339 Gil J Puyat Avenue P O Box 885 MCPO Makati Metro Mani...

Page 178: ...M D G EMI Division Yamaha Corporation 1999 Yamaha Corporation V326910 908POCP6 2 03C0 Printed in Japan ...

Reviews: