INSTALLING THE INCLUDED PARTS
– 11 –
79
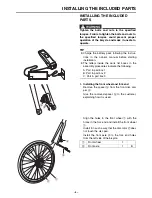
10. Installing the pedals
Install the pedal
1
to the crank
a
, then tighten
to the specified torque.
TIP
8
Right screw for the right pedal
8
Left screw for the left pedal
11. Installing the battery pack
Check that the battery pack
1
is fully charged
according to owner’s manual procedures, then
install the battery pack
1
.
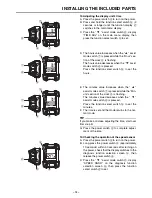
12. Installing the display unit’s button cell bat-
tery
Loosen the bolts
a
and remove the display unit
b
from the bracket
c
.
Turn the button cell battery cover
d
on the back
of the display unit
b
in direction
e
, remove it,
then install the button cell battery
1
.
Mount the button cell battery cover
d
, then turn
it in direction
f
until it locks.
After installing the button cell battery, install the
display unit onto the bracket following the
removal procedure in reverse order.
Peel off the protective film after installing.
1
a
Tightening torque 40 N·m (4.0 kgf·m, 30 lb·ft)
1
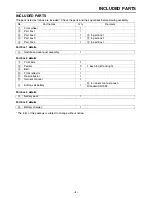
Pedals (left and right)
1
each
B
1
1
Battery pack
1
C
a
c
b
Tightening torque 2.0 N·m (0.20 kgf·m, 1.5 lb·ft)
d
e
f
1
b
g
1
Button cell battery
1
B
8
Install the button cell battery with the plus
(+) mark facing upward.
8
Check that the O-ring
g
is properly
installed.
NOTICE


