INSTALLING THE INCLUDED PARTS
– 12 –
7
9
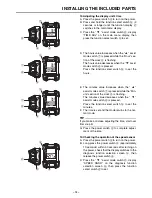
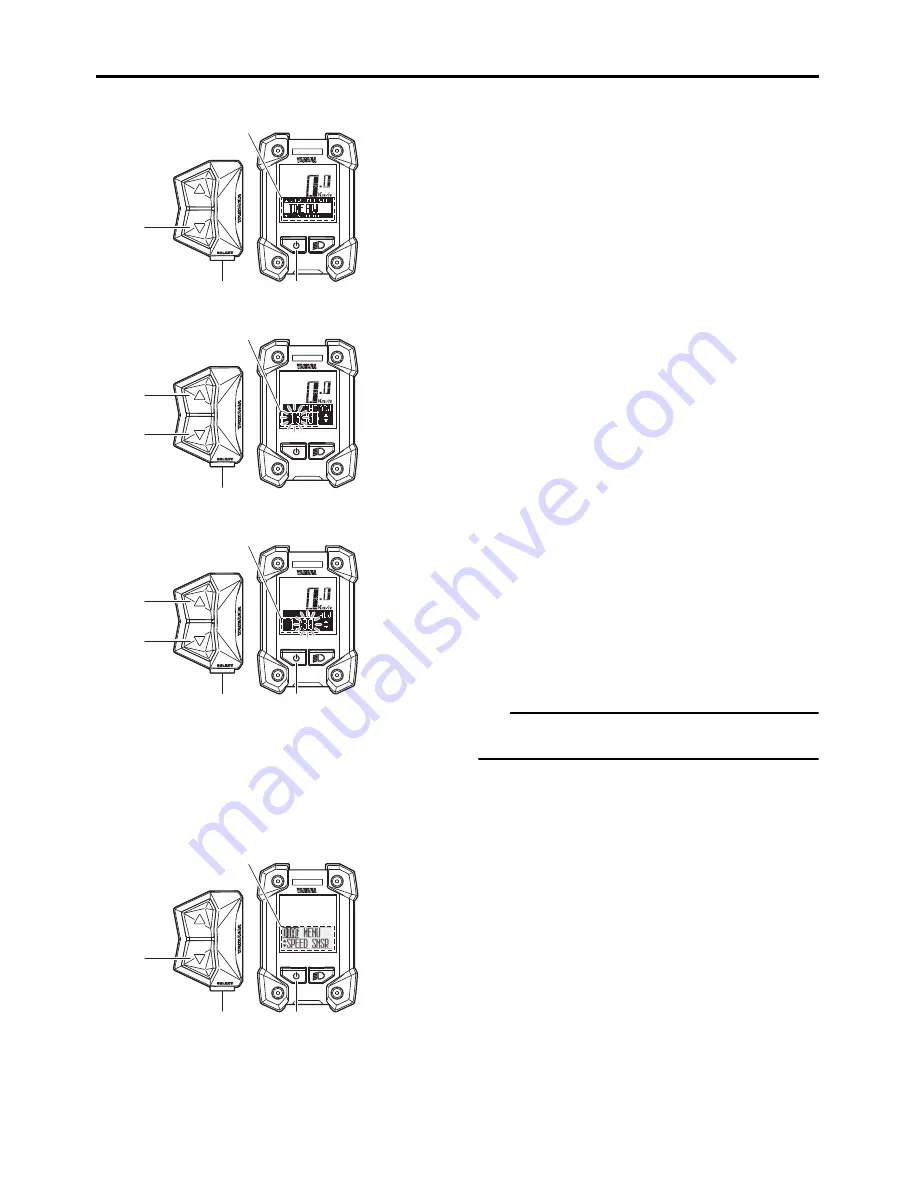
13. Adjusting the display unit’s time
A. Press the power switch
a
to turn on the power.
B. Press and hold the function select switch
b
(2
seconds or longer) until the function display
c
switches to the main menu display.
C. Press the “
▼
” assist mode switch
d
, display
“TIME ADJ” on the main menu display, then
press the function select switch
b
to set.
D. The hours value increases when the “
▲
” assist
mode switch
f
is pressed while the “Hour” sec-
tion of the clock
e
is flashing.
The hours value decreases when the “
▼
” assist
mode switch
d
is pressed.
Press the function select switch
b
to set the
hours.
E. The minutes value increases when the “
▲
”
assist mode switch
f
is pressed while the “Min-
ute” section of the clock
e
is flashing.
The minutes value decreases when the “
▼
”
assist mode switch
d
is pressed.
Press the function select switch
b
to set the
minutes.
F. The time is set and the mode returns to the nor-
mal mode.
TIP
If you make a mistake adjusting the time, start over
from step B.
G. Press the power switch
a
to complete adjust-
ment of the time.
14. Checking the operation of the speed sensor
A. Press the power switch
a
to turn on the power.
B. Long-press the power switch
a
(approximately
10 seconds) within 30 seconds after turning on
the power, check that the display switches to the
diagnosis function selection screen
b
, then
release the power switch
a
.
C. Press the “
▼
” assist mode switch
c
, display
“SPEED SNSR” on the diagnosis function
selection screen
b
, then press the function
select switch
d
to set.
d
b
a
c
d
f
b
e
f
b
a
e
d
d
a
b
c


