14
4.2.2) Setting the Jumper to Select MASTER, SLAVE or CSEL settings
Your new Yamaha CD-RW 3-in-1 drive setting is configured as
SLAVE
by default. Most
users will connect their new CD-RW drive to the secondary E-IDE controller of their comput-
er (see section 4.2 for more information) in which case there is no need to change the
default setting. However, a jumper is provided on the rear panel of your new CD-RW 3-in-1
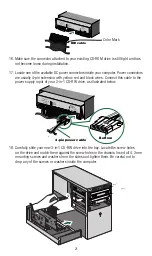
drive to configure it to work in various situations (see page 13 as well).
MASTER
- Change the jumper switch to the MASTER position if:
• You’ll be replacing your system’s existing CD-ROM drive with your new Yamaha CD-RW
drive. In this case, you need to disconnect your CD-ROM drive’s secondary IDE controller
and power cable and then plug in your new CD-RW drive using the same IDE controller
and power cable.
• This drive will be the only IDE drive installed in the computer. Bear in mind that this is
somewhat unusual unless your computer is using a SCSI hard disk drive and a SCSI
CD-ROM drive.
• The drive will be used in a specialized application with multiple Yamaha CD-RW 3-in-1
or multiple CD-RW drives. In this case, only one drive would be the MASTER. The other
drives should be selected as SLAVES.
Note:
If adding your new Yamaha CD-RW drive to a system already equipped with a DVD-ROM or high
speed CD-ROM drive, you may want to proceed with the following configuration if you encounter
problems: Turn off your computer. Remove your DVD-ROM or high speed CD-ROM drive from the secondary
IDE connector where it is most likely connected to. Install your Yamaha CD-RW drive (with its default,
MASTER jumper setting) on the secondary controller where your DVD-ROM was once installed (replacing it).
Reset the jumper switch of your DVD-ROM from MASTER (or CSEL) to SLAVE. Add your DVD-ROM drive to
your Primary IDE contoller (the controller connected to your hard disk). Use the included 3-connector
ribbon cable to replace your primary IDE connector cable if needed.


