180
A
p
p
e
n
d
ix
5
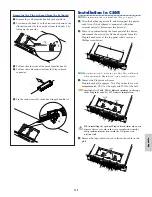
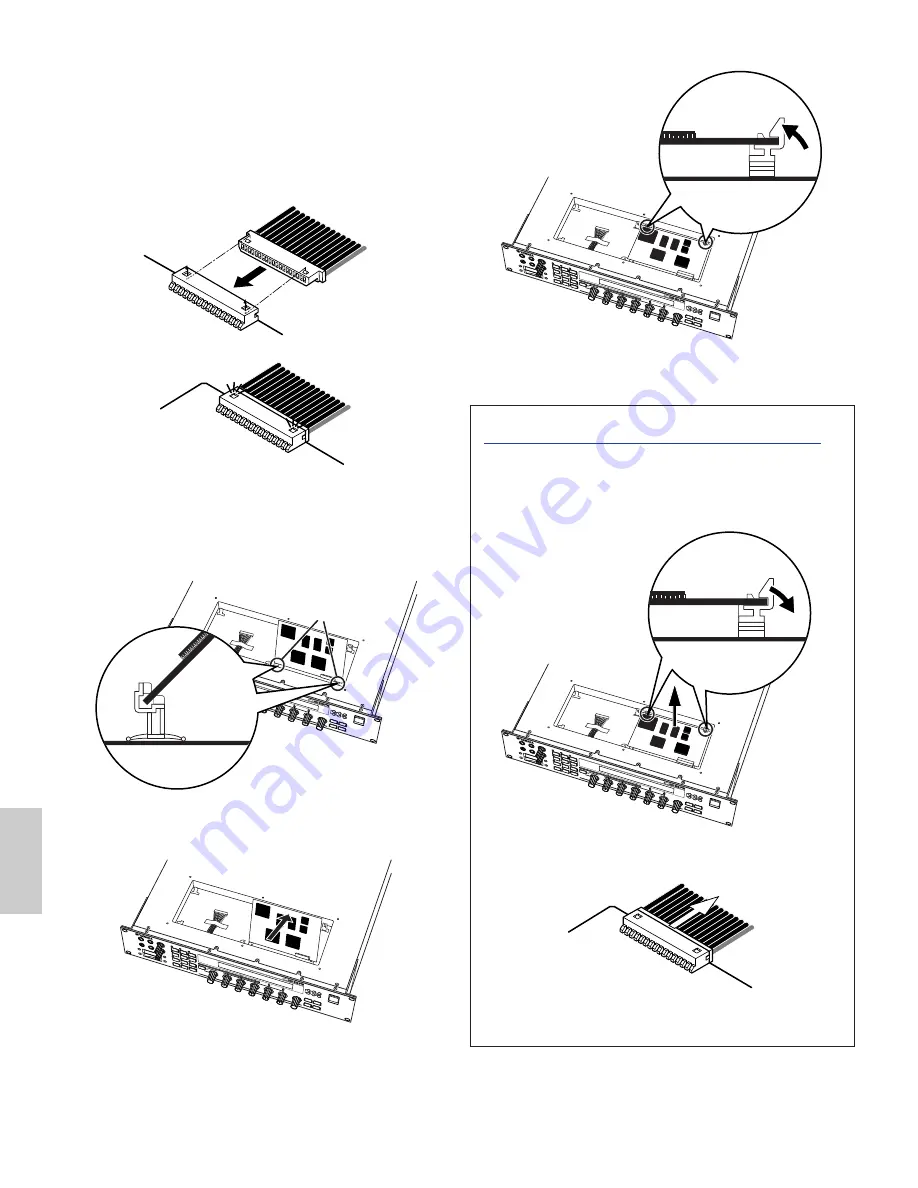
Take out the Plug-in board from the anti-static bag.
When installing the board, the side with a connector and
ICs must be on top.
6
Carefully plug the cable connector into the Plug-in board
connector until the two notches on the cable connector
lock into the sockets on the board as shown in the
illustration.
7
Mount the Plug-in board onto the plate as detailed in the
following steps.
7
-1
Insert one side of the Plug-in board (the connector
side) into the hooks 1 as shown in the illustration.
7
-2
Press down the other side until it is securely
settled on the hooks 2.
PL
G2
Hooks 1
Hooks 1
PL
G2
8
Replace the Plug-in board cover by fastening the six flat-
head screws you removed in the step
2
above.
Removing the Plug-in board from the keyboard
1
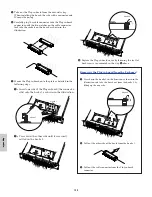
Press down the hooks 2 in the direction as shown in the
illustration and take the board out from the hooks 2 by
lifting up the one side.
2
Pull out the other side of the board from the hooks 1.
3
Pull out the cable connector from the Plug-in board
connector.
Hooks 2
PL
G2
Hooks 2
PL
G2
Summary of Contents for CS6X
Page 190: ...190 MEMO...
Page 191: ...191 MEMO...

