background image

6

BEAT

1
2
3
4

STYLE PERC.SET TEMPO DEMO

SELECTOR 

OFF
ECHO

FLAM

ROLL

VOLUME

STANDBY

ON

STYLE LIST

00-05   DANCE

06-09   HOUSE

10-13   HIP HOP    

14-16   RAP

17-19   DISCO

20-23   POP ROCK

24-26   HARD ROCK  

27-28   HEAVY METAL

29-31   CONTEMPO. ROCK

32-35   8 BEAT

36-39   16 BEAT

40-43   ROCK SHUFFLE

44        PROGRE. ROCK  

45        PUNK ROCK

46        TECHNO ROCK      

47        LATIN ROCK     

48-50   ROCK' N' ROLL

51-53   RHYTHM & BLUES      

54-56   SOUL

STYLE / PERC.SET / TEMPO

57-60   FUNK

61-65   SWING

66-67   JAZZ BALLAD

68-71   FUSION

72-73   BOSSA NOVA

74-76   SAMBA

77-79   SALSA 

80-81   REGGAE    

82        CALYPSO    

83        MERENGUE

SOUND EFFECT PADS

84        BEGUINE

85        RHUMBA 

86        MAMBO

87        CHA-CHA

88        TANGO

89-90   AFRICAN

91        COUNTRY

92-93   MARCH

94-96   WALTZ

97-99   METRONOME

SE

SELECT

PAD ASSIGN

TAP 

START

START/

STOP

AUTO
ROLL

STANDBY/ON
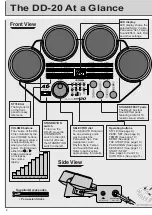
switch
To turn on the
DD-20, move the
STANDBY/ON
switch to the right;
to turn it off move
the STANDBY/ON
switch to the left.

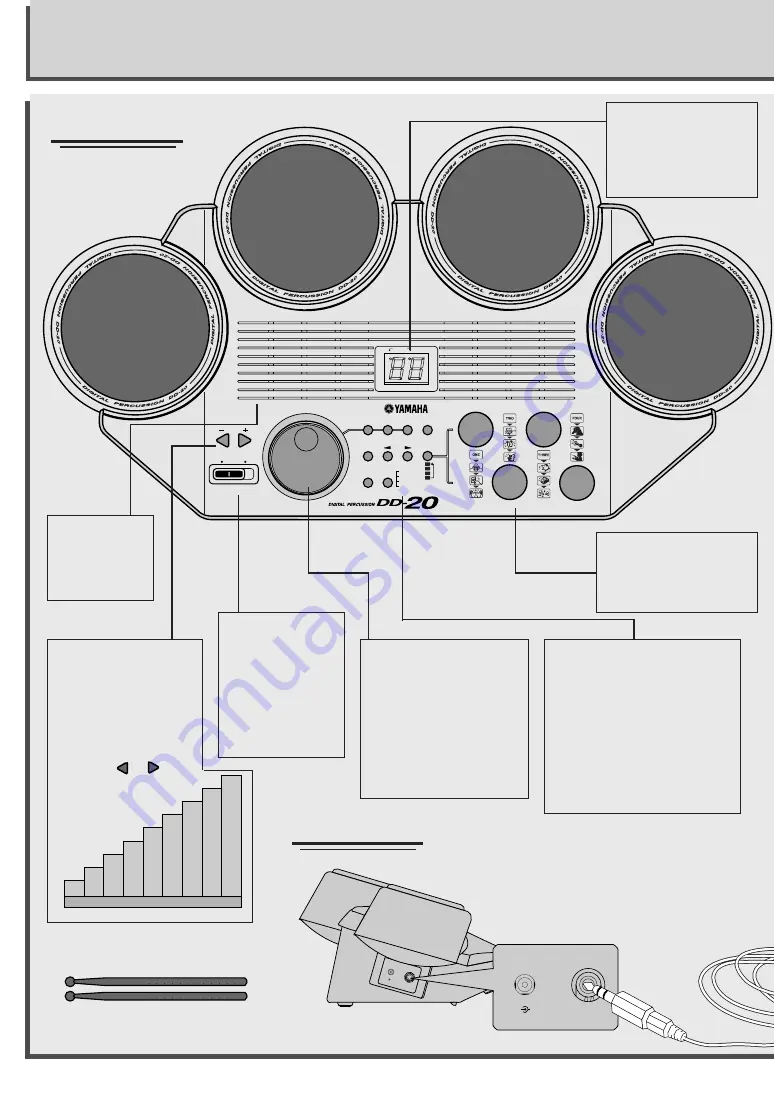
SELECTOR dial
The SELECTOR dial can
be an extremely quick
way to adjust the
Percussion Set,  Pad
Assignment, Auto
Rhythm Style, Tempo
and Sound Effect sets.
Refer to each section
appropriately, for details.

Front View

Side View

STYLE list
The Style list is
on the front
panel for easy
reference.

Supplied Accessories

•  Percussion Sticks

SOUND EFFECT pads
The DD-20 has four
Sound Effect pads
featuring a total of 16
realistic sound effects.

Operating buttons
STYLE (See page 9.)
PERC. SET (See page 8.)
TEMPO (See page 10.)
DEMO (See page 8.)
TAP START (See page 10.)
PAD ASSIGN (See page 9.)
SE SELECT (See page 11.)
START/ STOP
(See  pages 8, 9 and 10.)
AUTO ROLL (See page 11.)

VOLUME buttons
The volume of the DD-
20 is controlled by the
two VOLUME buttons.
The maximum volume
is automatically set
when you turn on the
power.  Holding down
either the   or 
button decreases
or increases
the volume
rapidly.

HEADPHONES/

AUX. OUT

DC IN 10-12V

+

_

HEAD

PHON

ES/

AUX. O

UT

DC IN

 10-12

V

+

_

LED display
LED display shows, the
selected Style, Volume,
Percussion Set, Tempo,
Sound Effect, Auto Roll,
and other settings.

The DD-20 At a Glance

-24dB

-21dB

-18dB

-15dB

-12dB

-9dB

-6dB

-3dB

L1

L2

L3

L4

L5

L6

L7

L8

L9

MAX

Summary of Contents for DD-20

Page 1: ...Owner s Manual ...

Page 2: ...apable of producing sound levels that could cause permanent hearing loss DO NOT operate for long periods of time at a high volume level or at a level that is uncomfortable If you experience any hearing loss or ringing in the ears you should consult an audiologist IMPORTANT The louder the sound the shorter the time period before damage occurs NOTICE Service charges incurred due to a lack of knowled...

Page 3: ...cord place heavy objects on it or place it in a posi tion where anyone could walk on trip over or roll anything over it When removing the electric plug from the instrument or an outlet always hold the plug itself and not the cord Do not connect the instrument to an electrical outlet using a multiple connector Doing so can result in lower sound quality or possibly cause overheating in the outlet Un...

Page 4: ...owner of a power ful new musical instrument capable of inspiring and fueling your musical creativity This is not just another digital per cussion instrument The DD 20 is the result of passion vision and commitment from people who want you to enjoy yourself every time you play it We re sure you ll agree as you discover the limitless possibilities of your new digital percus sion instrument Keep this...

Page 5: ...interference if it is placed too close to radio or television receivers If interference occurs move the DD 20 farther away from the affected receiver s Cleaning the DD 20 Use only a soft dry or slightly damp cloth to clean the DD 20 Never use solvents or thinners to clean the instrument Avoid Power Cord Damage Do not place the DD 20 where somebody is liable to step on trip over or crush the power ...

Page 6: ...tremely quick way to adjust the Percussion Set Pad Assignment Auto Rhythm Style Tempo and Sound Effect sets Refer to each section appropriately for details Front View Side View STYLE list The Style list is on the front panel for easy reference Supplied Accessories Percussion Sticks SOUND EFFECT pads The DD 20 has four Sound Effect pads featuring a total of 16 realistic sound effects Operating butt...

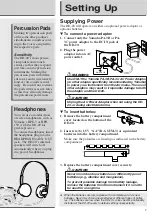
Page 7: ... may seriously damage the percussion pad sensors WARNING CAUTION HEADPHONES AUX OUT DC IN 10 12V _ DC IN 10 12V _ Use ONLY the Yamaha PA 3B PA 3C AC Power Adaptor or other adaptor specifically recommended by Yamaha to power your instrument from the AC mains The use of other adaptors may result in irreparable damage to both the adaptor and the DD 20 2 Insert six 6 1 5 V AA R 6 SUM 3 or equivalent b...

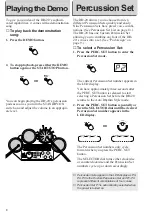
Page 8: ... different combinations of four voices Percussion Set P1 is automatically selected when the power is turned on To give you an idea of the DD 20 s sophisti cated capabilities it comes with a demonstration song To play back the demonstration song 1 Press the DEMO button 2 To stop playback press either the DEMO button again or the START STOP button You can begin playing the DD 20 s percussion pads as...

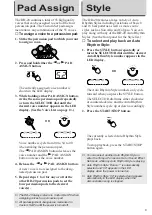
Page 9: ...ld either the Qor WPAD ASSIGN button The currently assigned voice number is shown in the LED display 3 While holding either PAD ASSIGN button strike the same percussion pad repeatedly or turn the SELECTOR dial until the desired voice number appears in the LED display See the Voice List on page 13 Voice numbers cycle from 00 to 54 to 00 when striking the percussion pad The QPAD ASSIGN button decrea...

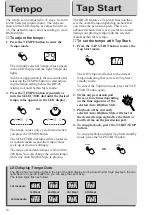
Page 10: ...he overall tempo depending on how fast you strike the percussion pads This is an advanced feature that is very useful for coordi nating your playing tempo with the selected Auto Rhythm Style tempo To set the tempo with Tap Start 1 Press the TAP START button to enter the Tap Start mode The left Tempo dot flashes at the current tempo indicating that you are in Tap Start standby mode To cancel the Ta...

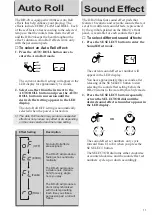
Page 11: ...urrent Auto Roll setting will appear in the LED display for approximately 3 seconds 2 Select an effect from the list next to the AUTO ROLL button and press the AUTO ROLL button in succession until the desired effect setting appears in the LED display The Auto Roll OFF setting is automatically selected when the power is turned on The Auto Roll function may produce unexpected effects or not produce ...

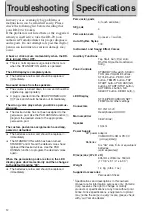
Page 12: ... default voices have replaced the desired voices Use the PAD ASSIGN function to program the desired voices again When the percussion pads are struck the LED display goes dark momentarily and then changes to the default reading 00 The batteries are low and should be replaced immediately Percussion pads 4 touch sensitive SE pads 4 Percussion sets 9 preset 1 custom Auto Rhythm Styles 100 Instrument a...

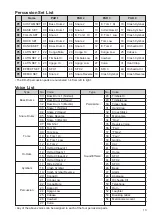
Page 13: ...right Percussion Set List Type No Voice 00 Bass Drum 1 Normal Bass Drums 01 Bass Drum 2 Heavy 02 Bass Drum 3 Electric 03 Snare 1 Normal 04 Snare 2 Heavy Snare Drums 05 Snare Reverse 06 Snare 3 Electric 07 Rim Shot 08 Tom Hi 09 Tom Low Toms 10 E Tom 1 Hi 11 E Tom 1 Low 12 E Tom 2 13 Hi Hat Closed 1 Hi Hats 14 Hi Hat Open 1 15 Hi Hat Closed 2 16 Hi Hat Open 2 17 Ride Cymbal Cymbals 18 Crash Cymbal 1...

Page 14: ... A Ctra de la Coruna km 17 200 28230 Las Rozas Madrid Spain Tel 91 639 8888 GREECE Philippos Nakas S A The Music House 147 Skiathou Street 112 55 Athens Greece Tel 01 228 2160 SWEDEN Yamaha Scandinavia AB J A Wettergrens Gata 1 Box 30053 S 400 43 Göteborg Sweden Tel 031 89 34 00 DENMARK YS Copenhagen Liaison Office Generatorvej 8B DK 2730 Herlev Denmark Tel 44 92 49 00 FINLAND F Musiikki Oy Kluuvi...

Page 15: ...ument Division Yamaha Corporation 2003 Yamaha Corporation WB43360 304PO 01A0 Printed in Malaysia Yamaha PK CLUB Portable Keyboard Home Page English only http www yamahaPKclub com Yamaha Manual Library http www2 yamaha co jp manual english ...

Reviews: