background image


3


PRECAUTIONS


PLEASE READ CAREFULLY BEFORE PROCEEDING 


* Please keep these precautions in a safe place for future reference.


WARNING


Always follow the basic precautions listed below to avoid the possibility of serious injury or even death from electrical 
shock, short-circuiting, damages, fire or other hazards. These precautions include, but are not limited to, the following:


• Do not open the instrument or attempt to disassemble the internal parts or 

modify them in any way. The instrument contains no user-serviceable 
parts. If it should appear to be malfunctioning, discontinue use immedi-
ately and have it inspected by qualified Yamaha service personnel. 

• Do not expose the instrument to rain, use it near water or in damp or wet 

conditions, or place containers on it containing liquids which might spill 
into any openings.

• If the AC adaptor cord or plug becomes frayed or damaged, or if there is a 

sudden loss of sound during use of the instrument, or if any unusual 
smells or smoke should appear to be caused by it,  immediately turn off 

the power switch, disconnect the adaptor plug from the outlet, and have 
the instrument inspected by qualified Yamaha service personnel.

• Use the specified adaptor (PA-3B or an equivalent recommended by 

Yamaha) only. Using the wrong adaptor can result in damage to the 
instrument or overheating. 

• Before cleaning the instrument, always remove the electric plug from the 

outlet. Never insert or remove an electric plug with wet hands.

• Check the electric plug periodically and remove any dirt or dust which 

may have accumulated on it. 


CAUTION


Always follow the basic precautions listed below to avoid the possibility of physical injury to you or others, or damage to 
the instrument or other property. These precautions include, but are not limited to, the following:


• Do not place the AC adaptor cord near heat sources such as heaters or 

radiators, and do not excessively bend or otherwise damage the cord, 
place heavy objects on it, or place it in a position where anyone could 
walk on, trip over, or roll anything over it. 

• When removing the electric plug from the instrument or an outlet, always 

hold the plug itself and not the cord.

• Do not connect the instrument to an electrical outlet using a multiple-con-

nector. Doing so can result in lower sound quality, or possibly cause 
overheating in the outlet. 

• Unplug the AC power adaptor when not using the instrument, or during 

electrical storms.

• Always make sure all batteries are inserted in conformity with the +/- 

polarity markings. Failure to do so might result in overheating, fire, or 
battery fluid leakage. 

• Always replace all batteries at the same time. Do not use new batteries 

together with old ones. Also, do not mix battery types, such as alkaline 
batteries with manganese batteries, or batteries from different makers, or 
different types of batteries from the same maker, since this can cause 
overheating, fire, or battery fluid leakage. 

• Do not dispose of batteries in fire.

• Do not attempt to recharge batteries that are not intended to be charged.

• When the batteries run out, or if the instrument is not to be used for a long 

time, remove the batteries from the instrument to prevent possible leakage 
of the battery fluid. 

• Keep batteries away from children.

• If the batteries do leak, avoid contact with the leaked fluid. If the battery 

fluid should come in contact with your eyes, mouth, or skin, wash imme-
diately with water and consult a doctor. Battery fluid is corrosive and may 
possibly cause loss of sight or chemical burns.

• Before connecting the instrument to other electronic components, turn off 

the power for all components. Before turning the power on or off for all 
components, set all volume levels to minimum. Also, be sure to set the 
volumes of all components at their minimum levels and gradually raise 

the volume controls while playing the instrument to set the desired listen-
ing level.

• Do not expose the instrument to excessive dust or vibrations, or extreme 

cold or heat (such as in direct sunlight, near a heater, or in a car during 
the day) to prevent the possibility of panel disfiguration or damage to the 
internal components.

• Do not use the instrument near other electrical products such as televi-

sions, radios, or speakers, since this might cause interference which can 
affect proper operation of the other products. 

• Do not place the instrument in an unstable position where it might acci-

dentally fall over.

• Before moving the instrument, remove all connected adaptor and other 

cables.

• When cleaning the instrument, use a soft, dry cloth. Do not use paint thin-

ners, solvents, cleaning fluids, or chemical-impregnated wiping cloths. 
Also, do not place vinyl, plastic or rubber objects on the instrument, since 
this might discolor the panel or keyboard. 

• Do not rest your weight on, or place heavy objects on the instrument, and 

do not use excessive force on the buttons, switches or connectors. 

• Do not operate the instrument for a long period of time at a high or 

uncomfortable volume level, since this can cause permanent hearing loss. 
If you experience any hearing loss or ringing in the ears, consult a physi-
cian.

Always turn the power off when the instrument is not in use. 

Make sure to discard used batteries according to local regulations.

Yamaha cannot be held responsible for damage caused by improper use 
or modifications to the instrument, or data that is lost or destroyed.

* The illustrations and LED displays as shown in this owner’s manual 

are for instructional purposes only, and may be different from the 
ones on your instrument. 


(4)-7

Summary of Contents for DD-35

Page 1: ......

Page 2: ...TION The name plate is located on the bottom of the product The model num ber serial number power requirements etc are located on this plate You should record the model number serial number and the date of pur chase in the spaces provided below and retain this manual as a perma nent record of your purchase Model Serial No Purchase Date SPECIAL MESSAGE SECTION 92 BP bottom 1 IMPORTANT NOTICE DO NOT...

Page 3: ...with old ones Also do not mix battery types such as alkaline batteries with manganese batteries or batteries from different makers or different types of batteries from the same maker since this can cause overheating fire or battery fluid leakage Do not dispose of batteries in fire Do not attempt to recharge batteries that are not intended to be charged When the batteries run out or if the instrume...

Page 4: ...ght ON OFF 14 Playing the Game 15 Selecting and Playing a Game Song 15 Appendix 16 Troubleshooting 16 Drum Voice List 17 Song List 19 Drum Kit List 20 Specifications 22 Contents Congratulations Thank you for purchasing the Yamaha DD 35 The DD 35 has been developed to respond and play like a drum set but with greater ease flexibility and sophisticated functions Before you use the instrument we reco...

Page 5: ...or battery operation the DD 35 requires six 1 5V AA size R6P LR6 or equivalent batteries Alkaline batteries are recommended When the batteries need to be replaced the volume may be reduced the sound may be distorted and other problems may occur When this happens turn the power off and replace the batteries as described below q Open the battery compartment cover located on the instrument s bottom p...

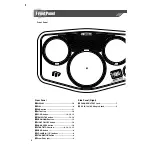
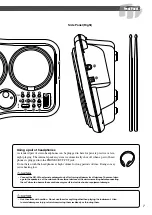
Page 6: ...12 14 15 y TEMPO TAP button 13 14 u DRUM GAME button 15 i LIGHT ON OFF button 14 o HAND PERC button 10 0 START STOP button 8 12 13 15 1 DEMO button 8 2 VOLUME buttons 8 3 STANDBY ON Switch 8 4 Drum Pads x4 9 Side Panel Right 5 PHONES OUTPUT Jack 7 6 DC IN 12V AC Adaptor Jack 5 88 q 4 Front Panel ...

Page 7: ...phones at high volume for long periods of time Doing so may cause hearing loss Connect the DD 35 to external equipment only after turning off power for all devices To prevent dam age to the speakers set the volume of the external devices at the minimum setting before connecting them Failure to observe these cautions may result in electric shock or equipment damage Use the sticks with caution Do no...

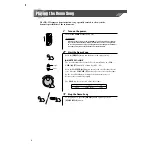
Page 8: ...adaptor from the wall AC outlet and or remove the batteries from the instrument Press the DEMO button and the demo song starts playing MASTER VOLUME The overall volume level of the DD 35 is controlled by two VOL UME buttons 9 volume levels L1 L9 Press the VOLUME button to increase the overall volume by one level Press the VOLUME button to decrease the overall volume by one level Holding down eithe...

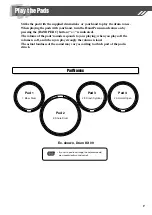
Page 9: ...d The volume of the pads sounds responds to your playing when you play soft the volume is soft and when you play strongly the volume is loud The actual loudness of the sound may vary according to which part of the pad is struck Pad Names Pad 1 1 Bass Drum Pad 2 5 Snare Drum Pad 3 23 Crash Cymbal Pad 4 20 Hi Hat Open Ex shown Drum Kit 09 If you hit a pad too strongly the adjacent pad s may inadvert...

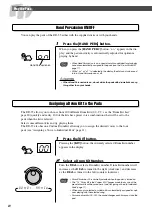
Page 10: ...ing by hand are automatically assigned to the pads see the Drum Voice List page 17 While on or oF is indicated in the display the dial can also be used to turn Hand Percussion on or off When Hand Percussion is on do not strike the pads with drumsticks or any thing other than your hands Assigning a Drum Kit to the Pads Pressing the KIT button the currently selected Drum Kit number appears in the di...

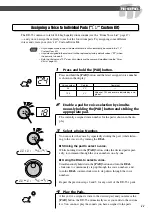
Page 11: ...ton and the latest assigned voice number is shown in the display The currently assigned voice number for the pad is shown in the dis play You can select the voice by repeatedly striking the pad while listen ing to the voice or by turning the DIAL Striking the pad to select a voice While holding down the PAD button strike the desired pad repeat edly to increment through the voice numbers one by one...

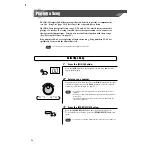
Page 12: ...otes 1 Press the SONG button 2 Select a song number 3 Press the START STOP button Selecting a Song Press the SONG button the currently selected song number will appear in the display Song numbers will increase in value as the DIAL is turned to the right clockwise and decrease as the DIAL is turned to the left counter clockwise See the Song List page 19 Song number 00 is automatically selected when...

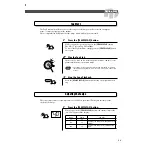
Page 13: ...P button The DD 35 is set to Tap Start standby To cancel the Tap Start mode simply press the TEMPO TAP button once again In the case of a song in 4 4 strike any pad four times and the accom paniment will start at the desired tempo The number of times needed to strike the pad will change according to the following time signatures 5 4 5 times 4 4 4 times 3 4 3 times 6 8 2 times Press the START STOP ...

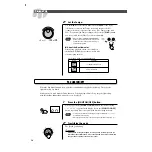
Page 14: ...y the pre set tempo of the currently selected song is automatically applied About the Beat Indicator During song playback the two beat lamps in the display will flash in a specific pattern to help you in keeping the beat Pad Light ON OFF When you press the LIGHT ON OFF button the current setting on or oF appears in the display Press the LIGHT ON OFF button repeatedly if necessary until the desired...

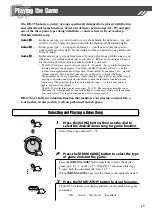
Page 15: ... an exceptionally easy and fun way to master the drums Song numbers 60 64 are for playing a single complete song This is an excellent way to develop your timing and work on your ability to keep the rhythm for the length of an entire song The pads light to guide you through the song try to hit each pad as it lights and master the rhythm The DD 35 also features special game songs 95 99 These arcade ...

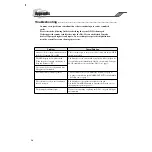
Page 16: ...etely dark When the pads are struck the display is dark and returns to 00 The batteries are low and should be replaced with a complete set of six new batteries immediately Ideally an optional AC adaptor PA 3B should be used to power the DD 35 see page 5 The custom pad voice assignments have disappeared or defaulted No sound comes from the speakers The volume is set too low Adjust the volume see pa...

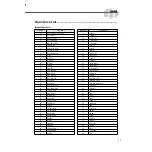
Page 17: ...8 Tambourine 29 Cowbell 30 Conga H Mute 31 Conga H Open 32 Conga Muff 33 Conga L Open 34 Bongo H 35 Bongo L 36 Timbale H 37 Timbale L 38 Samba Whistle H 39 Samba Whistle L 40 Agogo H 41 Agogo L 42 Cuica Mute 43 Cuica Open 44 Surdo Close 45 Surdo Open 46 Cabasa 47 Shaker 48 Maracas 49 Guiro Long 50 Guiro Short 51 Claves 52 Castanet 53 Wood Block H 54 Wood Block L 55 Triangle Mute 56 Triangle Open 5...

Page 18: ...ll In Water 113 Cork 114 Glass 115 Apple 116 Foot Step 117 Door Squeak 118 Clown Horn 119 Rubber Duck 120 Spring 121 Buzzer 122 Laughing Man 123 Laughing Girl 124 Screaming 125 Oops 126 Kiss 1 127 Kiss 2 Voice No Voice Name Voice No Phrase Name 128 Drum Fill 1 129 Drum Fill 2 130 Hard Drum 131 Hard Drum Fill 132 Conga Play 133 Timbales Play 134 Vinyl Groove 135 Electro Fill 136 Scratch Play 137 Yo...

Page 19: ...3 Salsa 64 Big Band Swing Song Effect 65 SFX 1 Easy Song No Song Name Difficulty 66 SFX 2 Easy 67 SFX 3 68 SFX 4 69 SFX 5 70 SFX 6 Normal 71 SFX 7 72 SFX 8 Easy 73 SFX 9 Difficult 74 SFX 10 Normal 75 SFX 11 Difficult 76 SFX 12 Easy 77 SFX 13 Normal 78 SFX 14 79 SFX 15 Easy 80 SFX 16 Difficult 81 SFX 17 Easy 82 SFX 18 Normal 83 SFX 19 Difficult 84 SFX 20 DJ 85 DJ 1 Easy 86 DJ 2 Normal 87 DJ 3 Easy ...

Page 20: ...ot 6 Snare Drum Soft 2 Bass Drum Soft 23 Crash Cymbal 18 10 Rim Shot 6 Snare Drum Soft 25 Ride Cymbal 0 Bass Drum Crash Cymbal 19 10 Rim Shot 28 Tambourine 12 Mid Tom 14 Floor Tom 20 11 High Tom 10 Rim Shot 12 Mid Tom 14 Floor Tom 21 11 High Tom 5 Snare Drum 1 Bass Drum 14 Floor Tom 22 11 High Tom 5 Snare Drum 12 Mid Tom 14 Floor Tom 23 11 High Tom 6 Snare Drum Soft 12 Mid Tom 14 Floor Tom 24 11 H...

Page 21: ...ngle Open 53 Wood Block H 54 Wood Block L 63 133 Timbales Play 36 Timbale H 37 Timbale L 132 Conga Play DJ 64 1 Bass Drum 104 Hand Clap 90 Hihfh 89 Huea 65 64 One 65 Two 66 Three 67 Four 66 71 Omen FX 76 BLJ Trill 72 FMTB2 70 FX 67 71 Omen FX 69 Explosion 29 Cowbell 70 FX 68 74 Signal 71 Omen FX 72 FMTB2 73 FMTB1 69 75 Reverse 71 Omen FX 73 FMTB1 86 Uhh 70 85 Uhh Hit 71 Omen FX 74 Signal 70 FX 71 ...

Page 22: ...ain Amplifier 5W EIAJ Speaker 10 cm Power Consumption 10 W when using PA 3B power adaptor Power Supply Adaptor DC12V Yamaha PA 3B sold separately Batteries Six AA size R6P LR6 or equivalent batteries sold separately Dimensions WxDxH 460 x 227 x 105 mm 18 1 8 x 9 x 4 1 8 Weight 1 6Kg 3 Ibs 8 oz Supplied Accessories Drum stick x 2 Owner s Manual Optional Accessories Headphones HPE 150 Specifications...

Page 23: ... You may also contact Yamaha directly at the address provided below 2 Deliver the unit to be serviced under warranty to the retailer selling the product an authorized service center or toYamaha with an explanation of the problem Please be prepared to provide proof purchase date sales receipt credit card copy etc when requesting service and or parts under warranty 3 Shipping and or insurance costs ...

Page 24: ...eece Tel 01 364 7111 SWEDEN Yamaha Scandinavia AB J A Wettergrens Gata 1 Box 30053 S 400 43 Göteborg Sweden Tel 031 89 34 00 NORWAY Norsk filial av Yamaha Scandinavia AB Grini Næringspark 1 N 1345 Østerås Norway Tel 67 16 77 70 FINLAND F Musiikki Oy Kluuvikatu 6 P O Box 260 SF 00101 Helsinki Finland Tel 09 618511 DENMARK YS Copenhagen Liaison Office Generatorvej 8B DK 2730 Herlev Denmark Tel 44 92...

Reviews: