USING IPOD™
2
En
This unit has the DOCK terminal on the rear panel that allows you to connect the Yamaha iPod universal dock (such as
YDS-10, sold separately). Station your iPod in the Yamaha iPod universal dock, and use the supplied remote control to
operate your iPod.
• Only iPod (Click and Wheel), iPod nano, and iPod mini are supported.
• Some features may not be compatible depending on the model or the software version of your iPod.
• The photos and video clips stored on your iPod are not displayed on your TV monitor.
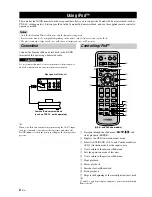
Connect the Yamaha iPod universal dock to the DOCK
terminal of this unit using a dedicated cable.
Do not connect this unit or other components to the main power
until all connections between components are complete.
y
When your iPod and external component using the AUX 3 input
jack are connected to this unit at the same time, and when the
DOCK indicator is lit in the front panel display, iPod output takes
priority.
1
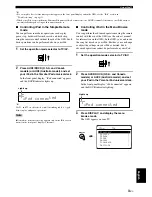
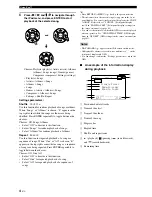
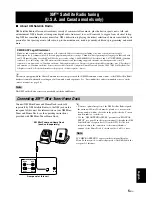
Navigate through the iPod menu (
/
/ / ) and
starts playback (ENTER).
2
Displays the OSD (on-screen menu) menu.
3
Selects AUX3/DOCK
(U.S.A. and Canada models) or
AUX3 (Australia model) as the input source.
4
Use to return to the previous iPod menu.
5
Sets the operation mode of this unit.
6
Use to return to the previous iPod menu.
7
Stops playback.
8
Pauses playback.
9
Searches forward/backward.
0
Starts playback.
A
Skips to the beginning of the current/previous/next track.
y
8
and
9
toggle between play and pause operations in the Simple
Remote mode.
Using iPod™
Notes
Connection
CAUTION
OUT
SUBWOOFER
TV/STB
AUX 1
VIDEO
DOCK
AUDIO INPUT
ANTENNA
Yamaha iPod universal dock
(such as YDS-10, sold separately)
Rear panel of this unit
Controlling iPod™
ENHANCER
TV VOL
VOLUME
MUTE
CH LEVEL
TEST
TV INPUT
TV MUTE
ENTER
SUR. DECODE
OFF
CODE SET
CH
+10
0
YSP
TV/AV
ENTRY
CAT/
A-E
MENU
RETURN
DISPLAY
MACRO
TV
INPUT1
AUX1
AUX2
STB
TV
DVD
AUX3
TV
POWER
POWER
STANDBY/ON
AV
DOCK
1
2
3
6
5
7
4
8
9
0
A
(U.S.A. and Canada models)


