


6.
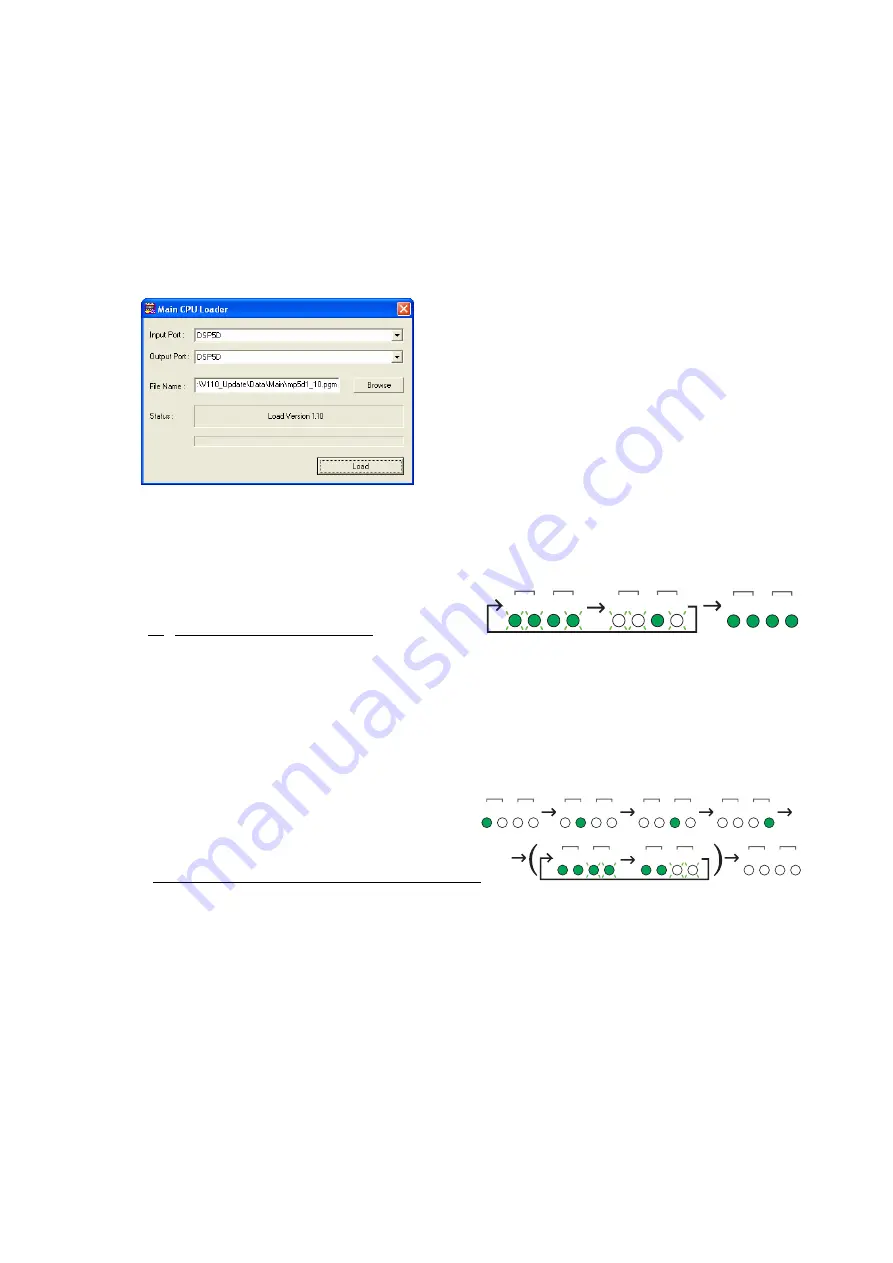
Specify the following settings, then click the [Load] button to start the Main CPU update. When the
update is complete, a “Complete" message appears. Close the dialog box by clicking the [x] (close)
button at the top right of the window.
•
Input Port/Output Port:
Make sure that the same input/output ports as step 3 are selected for
the input/output ports for communication between the DSP5D and the computer.
•
File Name:
Confirm that the “mp5d*_**.pgm” (“*_**” indicates the version number) in the
“V***_Update\Data
\
Main” folder is selected. If not, select the correct file by clicking the
[Browse] button.
7.
Press the POWER switch (A) of the DSP5D to turn it off, then turn it on again. In about 20 seconds
after the DSP5D is turned on, the four IN/OUT [TX]/[RX] LEDs (B) on the front panel light in either
one of the ways shown below. Follow the steps below until all LEDs are turned off (
②
).
①
Updating the AD firmware:
OUT
TX RX TX RX
IN
OUT
TX RX TX RX
IN
OUT
TX RX TX RX
IN
The IN [TX] LED lights and the other three LEDs flash.
Do not turn the power off since the internal AD firmware is being updated. If the update is
unnecessary, this procedure will be skipped. The update will complete in five minutes. When
the update is complete, all four LEDs light. Turn the power off, then on again. The LEDs light
in the following manner.
②
Starting the DSP5D in normal operation:
OUT
TX RX TX RX
IN
OUT
TX RX TX RX
IN
OUT
TX RX TX RX
IN
OUT
TX RX TX RX
IN
OUT
TX RX TX RX
IN
OUT
TX RX TX RX
IN
OUT
TX RX TX RX
IN
The four LEDs light only once consecutively from the left, then all the LEDs turn off after
some LEDs flash for 10 seconds. LED flashing might be skipped in some cases.
The DSP5D starts up in normal operating mode. Move on to the next step.
DSP5D Upgrade Guide
5


