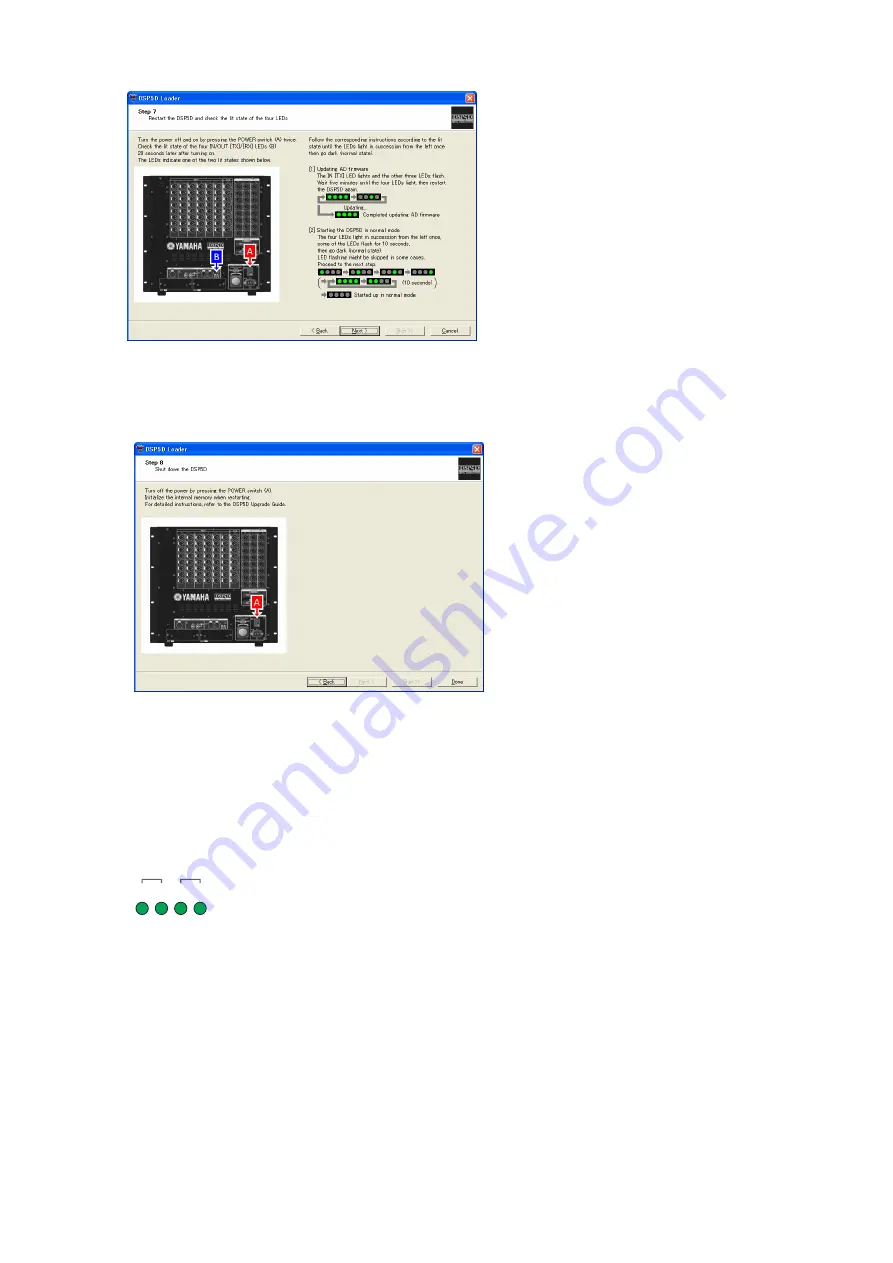
background image


8.


Click the [Done] button to finish the DSP5D Loader.


When the update is complete, make sure to initialize the memory by following the procedure in the 

“Initializing the Internal Memory” section below.


Initializing the Internal Memory 

After the firmware is updated, make sure to initialize the internal memory before using the DSP5D.


1.


While holding down the rear panel Mode switch, turn on the power.


The four front panel IN/OUT [TX]/[RX] LEDs will light. 


OUT

TX RX TX RX

IN


2.


When the four LEDs light, release the Mode switch, and then press and hold the Mode switch once 
again for about five seconds.


The four LEDs will return to their normal lit state.


3.


When the LEDs have returned to their normal lit state, release the Mode switch and wait for about 
twenty seconds to three minutes. 

The four LEDs consecutively light from the left. 


DSP5D Upgrade Guide


6


Summary of Contents for DSP5D Editor

Page 1: ...o follow these instructions properly or turn off the DSP5D or unplug the cable while the update is in progress the DSP5D may be damaged If the DSP5D does not work properly after updating and you ve tr...

Page 2: ...twork Driver Installation Guide for DSP5D If you are connecting the computer to a single DSP5D we recommend that you make the following network settings initial settings for the DSP5D DSP5D DSP5D Init...

Page 3: ...LCD CPU and update only the Main CPU click the Skip button 3 Specify the following settings then click the Start button to start the LCD CPU update When the update is complete a Complete message appea...

Page 4: ...rly on the computer and the DSP5D Are the IP address and the MAC address for the DSP5D set properly on the DME N Network Driver 4 Press the DSP5D POWER switch A to turn it off then press the POWER swi...

Page 5: ...in either one of the ways shown below Follow the steps below until all LEDs are turned off Updating the AD firmware OUT TX RX TX RX IN OUT TX RX TX RX IN OUT TX RX TX RX IN The IN TX LED lights and t...

Page 6: ...DSP5D 1 While holding down the rear panel Mode switch turn on the power The four front panel IN OUT TX RX LEDs will light OUT TX RX TX RX IN 2 When the four LEDs light release the Mode switch and then...

Page 7: ...o the DSP5D 3 Press the PM5D UTILITY key several times until the PREFERENCE 2 screen is shown 4 Confirm that the version shown in the SOFTWARE VERSION field is properly updated For details on how to c...

Reviews: