Setup
12
DTX502 O
w
ner’s Man
u
al
Setting Up for Sound
1.
Ensure that your drum module is turned off (i.e., nothing is
visible on the LCD screen).
2.
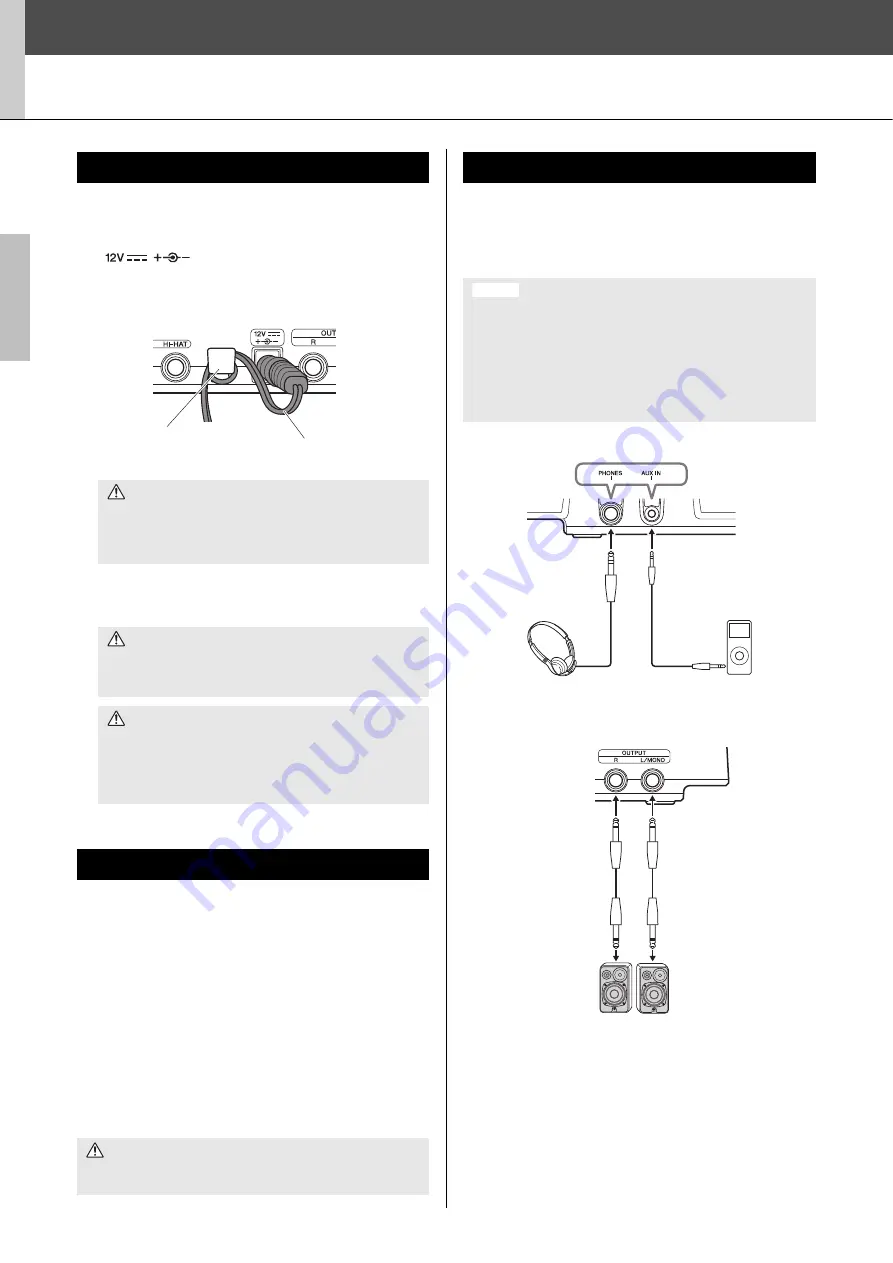
Insert the power adaptor’s DC plug into the
[
] connector on the rear panel.
3.
Hook the power adaptor’s DC cord around the cord clip to
prevent it from being accidentally pulled out.
4.
Plug the power adaptor’s AC power cord into a domestic wall
socket.
Your DTX502 does not feature built-in speakers. In order to hear
it, therefore, you will need to connect headphones or a DTX-
series monitor system, such as the MS40DR. You can adjust the
output volume using the VOLUME [+] and [–] buttons on the
control panel.
Connecting headphones
Plug your headphones into the [PHONES] jack (for standard
stereo audio).
Connecting speakers
Connect your speakers to the OUTPUT [L/MONO] and [R]
jacks (for standard mono audio).
You can connect a portable music player or another similar
source of audio to your drum module via the [AUX IN] (auxiliary
input) stereo mini-jack. This makes it possible to play along with
your favorite tunes.
Connecting the Power
CAUTION
Excessive bending can damage the power adaptor cord
and create a fire hazard. Ensure, therefore, that the power
cord is not bent at an extreme angle when wrapped around
the clip.
WARNING
Use only the specified adaptor. The use of other adaptors
may result in irreparable damage to both the adaptor and
the instrument.
CAUTION
Even when the power of this instrument is in the Standby
status, electricity is still flowing to the instrument at the
minimum level. When you are not using the instrument for
a long time, make sure you unplug the power adaptor from
the wall AC outlet.
Connecting Headphones or Speakers
CAUTION
To prevent hearing loss, avoid using headphones at a high vol-
ume for extended periods of time.
Cord clip
Po
w
er adaptor’s DC cord
Connecting a Music Player
• Whenever connecting other devices, ensure that the cables
you use have plugs that match the input or output connec-
tors on those devices.
• Before making connections, furthermore, you should also
turn the volume on the other devices fully down.
• When all connections have been made, use each device’s
volume controller to balance its output with that of the drum
module.
NOTICE
Control panel
Rear panel
1/8” stereo-mini to
stereo-mini ca
b
le
Standard 1/4”
stereo-a
u
dio jack
Standard 1/4” mono-a
u
dio
jack
Porta
b
le m
u
sic
player, etc.
Headphones
Po
w
ered speakers


