background image

Yamaha Electronic Drums web site

http://dtxdrums.yamaha.com/

Yamaha Manual Library

http://www.yamaha.co.jp/manual/

WW

02610

U.R.G., Digital Musical Instruments Di

v

ision

© 2011 Yamaha Corporation

012PO***.*-01A0

For details of products, please contact your nearest Yamaha representative or the 
authorized distributor listed below.

Pour plus de détails sur les produits, veuillez-vous adresser à Yamaha ou au 
distributeur le plus proche de vous figurant dans la liste suivante.

Die Einzelheiten zu Produkten sind bei Ihrer unten aufgeführten Niederlassung und 
bei Yamaha Vertragshändlern in den jeweiligen Bestimmungsländern erhältlich.

Para detalles sobre productos, contacte su tienda Yamaha más cercana o el 
distribuidor autorizado que se lista debajo.

CANADA

Yamaha Canada Music Ltd.

135 Milner Avenue, Scarborough, Ontario,
M1S 3R1, Canada
Tel: 416-298-1311

U.S.A.

Yamaha Corporation of America

6600 Orangethorpe Ave., Buena Park, Calif. 90620, 
U.S.A.
Tel: 714-522-9011

MEXICO

Yamaha de México S.A. de C.V.

Calz. Javier Rojo Gómez #1149,
Col. Guadalupe del Moral
C.P. 09300, México, D.F., México
Tel: 55-5804-0600

BRAZIL

Yamaha Musical do Brasil Ltda.

Rua Joaquim Floriano, 913 - 4' andar, Itaim Bibi, CEP 
04534-013 Sao Paulo, SP. BRAZIL
Tel: 011-3704-1377

ARGENTINA

Yamaha Music Latin America, S.A. 
Sucursal de Argentina

Olga Cossettini 1553, Piso 4 Norte
Madero Este-C1107CEK
Buenos Aires, Argentina
Tel: 011-4119-7000

PANAMA AND OTHER LATIN 
AMERICAN COUNTRIES/
CARIBBEAN COUNTRIES

Yamaha Music Latin America, S.A.

Torre Banco General, Piso 7, Urbanización Marbella, 
Calle 47 y Aquilino de la Guardia, 
Ciudad de Panamá, Panamá 
Tel: +507-269-5311

THE UNITED KINGDOM/IRELAND

Yamaha Music U.K. Ltd.

Sherbourne Drive, Tilbrook, Milton Keynes, 
MK7 8BL, England
Tel: 01908-366700

GERMANY

Yamaha Music Europe GmbH

Siemensstraße 22-34, 25462 Rellingen, Germany
Tel: 04101-3030

SWITZERLAND/LIECHTENSTEIN

Yamaha Music Europe GmbH 
Branch Switzerland in Zürich

Seefeldstrasse 94, 8008 Zürich, Switzerland
Tel: 01-383 3990

AUSTRIA

Yamaha Music Europe GmbH Branch Austria

Schleiergasse 20, A-1100 Wien, Austria
Tel: 01-60203900

CZECH REPUBLIC/SLOVAKIA/
HUNGARY/SLOVENIA

Yamaha Music Europe GmbH Branch Austria

Schleiergasse 20, A-1100 Wien, Austria 
Tel: 01-602039025

POLAND/LITHUANIA/LATVIA/ESTONIA

Yamaha Music Europe GmbH 
Branch Sp.z o.o. Oddzial w Polsce

ul. 17 Stycznia 56, PL-02-146 Warszawa, Poland
Tel: 022-500-2925

THE NETHERLANDS/
BELGIUM/LUXEMBOURG

Yamaha Music Europe Branch Benelux

Clarissenhof 5-b, 4133 AB Vianen, The Netherlands 
Tel: 0347-358 040 

FRANCE

Yamaha Musique France 

BP 70-77312 Marne-la-Vallée Cedex 2, France
Tel: 01-64-61-4000

ITALY

Yamaha Musica Italia S.P.A. 
Combo Division

Viale Italia 88, 20020 Lainate (Milano), Italy 
Tel: 02-935-771

SPAIN/PORTUGAL

Yamaha Música Ibérica, S.A.

Ctra. de la Coruna km. 17, 200, 28230 
Las Rozas (Madrid), Spain
Tel: 91-639-8888

GREECE

Philippos Nakas S.A. The Music House

147 Skiathou Street, 112-55 Athens, Greece
Tel: 01-228 2160

SWEDEN

Yamaha Scandinavia AB

J. A. Wettergrens Gata 1, Box 30053
S-400 43 Göteborg, Sweden
Tel: 031 89 34 00

DENMARK

YS Copenhagen Liaison Office

Generatorvej 6A, DK-2730 Herlev, Denmark
Tel: 44 92 49 00

FINLAND

F-Musiikki Oy

Kluuvikatu 6, P.O. Box 260, 
SF-00101 Helsinki, Finland
Tel: 09 618511

NORWAY

Norsk filial av Yamaha Scandinavia AB 

Grini Næringspark 1, N-1345 Østerås, Norway 
Tel: 67 16 77 70

ICELAND

Skifan HF

Skeifan 17 P.O. Box 8120, IS-128 Reykjavik, Iceland
Tel: 525 5000

RUSSIA

Yamaha Music (Russia)

Room 37, bld. 7, Kievskaya street, Moscow, 
121059, Russia
Tel: 495 626 5005

OTHER EUROPEAN COUNTRIES

Yamaha Music Europe GmbH

Siemensstraße 22-34, 25462 Rellingen, Germany
Tel: +49-4101-3030

Yamaha Corporation, 
Asia-Pacific Sales & Marketing Group

Nakazawa-cho 10-1, Naka-ku, Hamamatsu, 
Japan 430-8650
Tel: +81-53-460-2313

TURKEY/CYPRUS

Yamaha Music Europe GmbH

Siemensstraße 22-34, 25462 Rellingen, Germany
Tel: 04101-3030

OTHER COUNTRIES

Yamaha Music Gulf FZE

LOB 16-513, P.O.Box 17328, Jubel Ali, 
Dubai, United Arab Emirates
Tel: +971-4-881-5868

THE PEOPLE’S REPUBLIC OF CHINA

Yamaha Music & Electronics (China) Co.,Ltd.

2F, Yunhedasha, 1818 Xinzha-lu, Jingan-qu, 
Shanghai, China
Tel: 021-6247-2211

HONG KONG

Tom Lee Music Co., Ltd.

11/F., Silvercord Tower 1, 30 Canton Road,
Tsimshatsui, Kowloon, Hong Kong
Tel: 2737-7688

INDIA

Yamaha Music India Pvt. Ltd.

5F Ambience Corporate Tower Ambience Mall Complex
Ambience Island, NH-8, Gurgaon-122001, Haryana, India
Tel: 0124-466-5551

INDONESIA

PT. Yamaha Musik Indonesia (Distributor) 
PT. Nusantik

Gedung Yamaha Music Center, Jalan Jend. Gatot Sub-
roto Kav. 4, Jakarta 12930, Indonesia
Tel: 021-520-2577

KOREA

Yamaha Music Korea Ltd.

8F, 9F, Dongsung Bldg. 158-9 Samsung-Dong,  Kang-
nam-Gu, Seoul, Korea
Tel: 02-3467-3300

MALAYSIA

Yamaha Music (Malaysia) Sdn., Bhd.

Lot 8, Jalan Perbandaran, 47301 Kelana Jaya, 
Petaling Jaya, Selangor, Malaysia
Tel: 03-78030900

PHILIPPINES

Yupangco Music Corporation

339 Gil J. Puyat Avenue, P.O. Box 885 MCPO, 
Makati, Metro Manila, Philippines
Tel: 819-7551 

SINGAPORE

Yamaha Music (Asia) Pte., Ltd.

#03-11 A-Z Building
140 Paya Lebor Road, Singapore 409015
Tel: 6747-4374

TAIWAN

Yamaha KHS Music Co., Ltd. 

3F, #6, Sec.2, Nan Jing E. Rd. Taipei.
Taiwan 104, R.O.C.
Tel: 02-2511-8688

THAILAND

Siam Music Yamaha Co., Ltd.

4, 6, 15 and 16th floor, Siam Motors Building, 
891/1 Rama 1 Road, Wangmai, 
Pathumwan, Bangkok 10330, Thailand
Tel: 02-215-2622

OTHER ASIAN COUNTRIES 

Yamaha Corporation, 
Asia-Pacific Sales & Marketing Group

Nakazawa-cho 10-1, Naka-ku, Hamamatsu, 
Japan 430-8650
Tel: +81-53-460-2313

AUSTRALIA

Yamaha Music Australia Pty. Ltd.

Level 1, 99 Queensbridge Street, Southbank, 
Victoria 3006, Australia
Tel: 3-9693-5111

NEW ZEALAND

Music Works LTD

P.O.BOX 6246 Wellesley, Auckland 4680, 
New Zealand
Tel: 9-634-0099

COUNTRIES AND TRUST 
TERRITORIES IN PACIFIC OCEAN

Yamaha Corporation,
Asia-Pacific Sales & Marketing Group

Nakazawa-cho 10-1, Naka-ku, Hamamatsu, 
Japan 430-8650
Tel: +81-53-460-2313

NORTH AMERICA

CENTRAL & SOUTH AMERICA

EUROPE

AFRICA

MIDDLE EAST

ASIA

OCEANIA

SY55

HEAD OFFICE

Yamaha Corporation, Digital Musical Instruments Division

Nakazawa-cho 10-1, Naka-ku, Hamamatsu, Japan 430-8650
Tel: +81-53-460-2432

Summary of Contents for DTX700

Page 1: ...Setup Basic Operation This booklet Reference Manual Detailed Operation Read when necessary Read when necessary Data List Separate booklet Please download from this web page http www yamaha co jp manu...

Page 2: ...Yamaha directly NAME PLATE LOCATION The name plate is located on the bottom of the product The model num ber serial number power requirements etc are located on this plate You should record the model...

Page 3: ...hands Do not put burning items such as candles on the unit A burning item may fall over and cause a fire When one of the following problems occur immediately turn off the power switch and disconnect...

Page 4: ...expose the instrument to excessive dust or vibrations or extreme cold or heat such as in direct sunlight near a heater or in a car during the day to prevent the possibility of panel disfiguration dama...

Page 5: ...will be required in order to read it We recommend that Adobe Reader be used for this purpose as it allows you to quickly and easily search for keywords to print out specific sections and to convenient...

Page 6: ...an Instrument s Sound 31 Playing with a Double Bass Drum 32 Importing Assigning Audio Files 32 Naming an Original Kit 34 Adjusting the Snare Wire 35 Playing with Songs for Practice 36 Playing a Song...

Page 7: ...assembly manuals that came with your pad sets DTX700K DTX750K etc Connect your kit Connect your pads to the DTX700 using the correct cables m Refer to the assembly manuals that came with your pad set...

Page 8: ...to select a new song e Press the F3 button to start the song You can also assign sounds individually to each of the pads page 25 of Basic Opera tion You can press the F2 button to silence the song s...

Page 9: ...REC button w Press the button to start recording e When you have finished playing press the button once again to stop recording You can also use the button to start and stop playback of your recorded...

Page 10: ...move the cursor within dis played pages and change the currently selected parameter value t Standby On button page 14 Use this switch to turn your DTX700 on and off y F1 F2 and F3 function buttons pa...

Page 11: ...rol panel have second ary functions indicated just above the buttons them selves These functions can also be accessed by holding down the SHIFT button and pressing the cor responding button 5 button p...

Page 12: ...cks to output line level stereo mixes from your DTX700 For example you can connect each of the jacks to the left and right inputs of an external ste reo amplifier or mixer using mono audio jack cables...

Page 13: ...you use have plugs that match the input or out put connectors on those devices Before making connections furthermore you should also turn the volume on the other devices fully down When all connectio...

Page 14: ...controls are operated or no data is exchanged with external devices such as a computer or MIDI instrument for a predeter mined length of time your DTX700 will turn off automatically This function is...

Page 15: ...Furthermore you can disable the Auto Power Off function by selecting off 9 Press the dial The cursor will zoom out to select the entire row 10 Press the STORE button 11 Press the dial to store your n...

Page 16: ...he sound produced by the built in tone gen erator 1 Press the Standby On button to turn on your DTX700 Startup pages 2 Press the SONG button 3 Press the F3 button The demo song indicated on the displa...

Page 17: ...han one editable value you can press the dial to toggle between inverted text and underlined text at the cursor position Example After pressing the SONG button On the page accessed with the SONG butto...

Page 18: ...pressing the DEC button Similarly you can decrease in units of 10 by holding down the SHIFT button and pressing the DEC button or by holding down the DEC button and pressing the INC button The functio...

Page 19: ...addition the PHONES knob can be used to adjust the volume of head phones plugged into the PHONES jack on the rear panel Turn clockwise to increase the volume or counter clockwise to decrease it Using...

Page 20: ...on pages When you turn the dial on navigation type pages the cursor i e the inverted text moves in the corresponding direction By pressing the dial you can move one level further into the Menu area To...

Page 21: ...s instrument therefore please check with your Yamaha dealer or an authorized Yamaha distributor or visit this web page http dtxdrums yamaha com NOTE Other USB devices such as a computer keyboard or mo...

Page 22: ...ntly restored at any time if you have accidentally over written them or wish to delete all of your own settings To do so use the Factory Set function as follows 1 Press the MENU button 2 Turn the dial...

Page 23: ...zone pad such as the RHH135 shown below you will be able to play it in the same way as an acoustic hi hat cym bal Open close In addition to the foot close sound obtained by pressing the Hi Hat Contro...

Page 24: ...e the bow section located between the cup and edge produces a bow shot sound Edge shot Hitting the outside edge of the pad produces an edge shot sound Bell shot Hitting the cup produces a bell shot s...

Page 25: ...veniently change the entire sound of this drum trigger module 1 Press the KIT button 2 Turn the dial to choose a new kit 3 Play the connected pads NOTE When you select a new kit in Step 2 above the ST...

Page 26: ...ferent playing situations and pad sets and they can be selected as follows 1 Press the KIT button 2 Press the F2 button The Trigger Setup page will open 3 Turn the dial to choose a trigger setup Playi...

Page 27: ...ull list of DTX700 EQ presets see the Data List document 1 Press the KIT button 2 Press the F1 button The Master EQ page will open 3 Turn the dial to choose an EQ setup Playing your DTX700 s pads as y...

Page 28: ...become reversed indicating that the effect is now off NOTE You can toggle the effect on and off using the method described in Step 2 above By initializing a kit as described below you can quickly res...

Page 29: ...lay shows the name of the kit and an artist s impression of what it might look like As described below however you can change the display mode to show just the kit name 1 Press the KIT button 2 Hold d...

Page 30: ...choose the kit you wish to edit 3 Press the INST button 4 Hit the pad that you wish to assign a new sound to 5 Turn the dial to select the sound you wish to use NOTE You can use instrument categories...

Page 31: ...is function adjusts the degree to which a drum s sound is muffled Sustain This function allows the amount of sustain to be adjusted Clutch This function adjusts the height of the hi hat clutch or in o...

Page 32: ...d you will be unable to use the hi hat controller plugged into the HI HAT CON TROL trigger input jack to simulate opening and closing of the hi hat 1 Using a computer place the audio files you wish to...

Page 33: ...file will be assigned to all of its zones 7 Press the F3 button 8 Turn the dial to select the audio file you wish to import 9 Press the F3 button To cancel the importing of an audio file press the EX...

Page 34: ...list 9 Press the dial 10 Enter a new name for the selected kit A name of up to 12 characters in length can be assigned to drum kits Move the underline cursor to the character you wish to change using...

Page 35: ...r 1 Press the KIT button 2 Turn the dial to choose a kit 3 Press the INST button 4 Hit the snare pad i e the pad plugged into the qSNARE trigger input jack 5 Hold down the SHIFT button and press the F...

Page 36: ...art playing the song You can stop playback by pressing the F3 button once again 1 Press the SONG button 2 Press the F1 button 3 Turn the dial to adjust the song s playback volume 4 Press the EXIT butt...

Page 37: ...ng with a song keeping its drum part only slightly audi ble 1 Press the SONG button 2 Press the F1 button 3 Press the dial to switch to the outline cursor 4 Turn the dial to move the cursor to the DRU...

Page 38: ...ndicating that the drums are now muted You can unmute the drums and restore the icon to its original condition by pressing the F2 button once again Using the procedure described below you can convenie...

Page 39: ...u select a new song your DTX700 normally chooses the best kit for that song automatically You can however use the Kit Lock function to prevent this if you wish to keep the cur rent kit when practicing...

Page 40: ...0 DTX700 Owner s Manual Playing with Songs for Practice 5 Turn the dial to select a new song NOTE To unlock the kit repeat Steps 1 through 3 above After doing so the lock icon will disappear from besi...

Page 41: ...to change the click track sounds For full details refer to the Reference Manual PDF document To adjust the overall click track volume Move the Click slider up and down to adjust the volume To fine tu...

Page 42: ...rack element will be displayed in reverse 5 Turn the dial to adjust the selected element s volume 6 Press the dial 7 To adjust the volume of other elements of the click track repeat Steps 3 through 6...

Page 43: ...ve the cursor to the time signature 4 Press the dial The cursor will switch to reversed text 5 Turn the dial to set the click track time signa ture 6 Press the dial to set the new time signature NOTE...

Page 44: ...aches zero the click track will automati cally stop playing NOTE If you press the button a second time while the click track is playing the click track will stop and the timer will be reset to zero 1...

Page 45: ...more than once 5 Press the button to start the click track 6 Play the pads along with the click track The Groove Check page A triangle t is used to display the precise time at which you played the pa...

Page 46: ...on 4 Press the F1 button to access the Rhythm Gate page You may need to press more than once 5 Press the F2 button to select a difficulty level Three different levels are available Easy Normal and Pro...

Page 47: ...asure Break page You may need to press more than once 5 Set the number of measures you want the click track to play 5 1 Press the dial to switch to the inverted text cursor 5 2 Turn the dial to set th...

Page 48: ...SB memory device Accordingly the REC button will not light up at this time Once you have recorded a performance any subse quent recording will result in the first one being overwrit ten 1 Press the bu...

Page 49: ...will switch to 4 Press the REC button The REC button will light in red 5 Press the button to start recording When the button starts to flash on and off in blue you are ready to begin playing 6 Press...

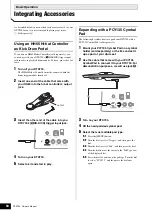
Page 50: ...Select a kit and start to play The following describes how to expand your DTX700 with a PCY135 Cymbal Pad sold separately 1 Mount your PCY135 Cymbal Pad on a cymbal holder sold separately or the like...

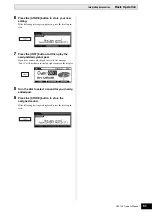
Page 51: ...l to pro ceed 7 Press the INST button and then play the newly added cymbal pad If you have connected the pad correctly the message Pad11 will be shown in the top right corner of the display 8 Turn the...

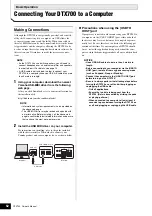
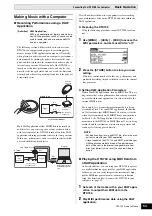
Page 52: ...e that you have the most up to date version 2 Install the USB MIDI driver on your computer For instructions on installing refer to the guide included with the driver installer When asked to connect yo...

Page 53: ...pads will not be sent to the internal tone generator Setting DAW Application Parameters Within your DAW application turn on MIDI Thru This set ting ensures that when performance data is being recorde...

Page 54: ...he above web page to confirm the latest related information and ensure that you have the most up to date version 2 Execute the expanded DTX700 Extension to carry out the required installation procedur...

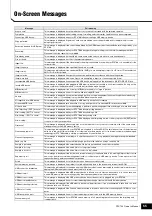
Page 55: ...ssage is displayed while your DTX700 is busy loading a file Now saving EXIT to cancel This message is displayed while your DTX700 is busy saving a file Now working This message is displayed while your...

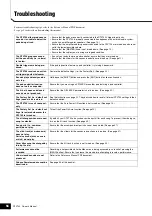
Page 56: ...that you are using an XP100SD or another pad featuring a pad controller The hi hat s open and closed sounds are not produced Ensure that the DBL BASS parameter is not turned on See page 32 The Factor...

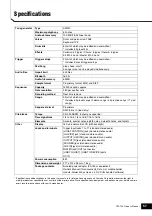
Page 57: ...etary format WAV and AIFF Sequencer Capacity 152000 sounds approx Note resolution 480 per quarter note Recording method Real time replace Songs 93 all of which may be edited and overwritten Includes 6...

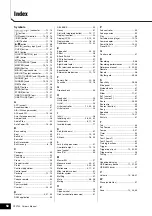
Page 58: ...ct 28 Effects Switch 18 EFX effect sounds 31 Eighth note 41 Eighth note triplet 41 ElPc electronic percussion 31 Equalization 27 External audio devices 12 13 F Factory Set 22 56 Function 10 18 G Groov...

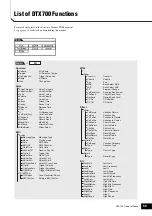
Page 59: ...Fade TrgVel Trigger Velocity TrgMonoPoly Trigger Polyphony TrgAltGrp Trigger Alternate Group TG MIDI Sw TG Switch Tone Generator Switch MIDI Switch External MIDI Switch Kit Other Transmit Transmit Vol...

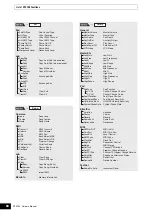
Page 60: ...otClosePos Foot Close Position FootSplashSens Foot Splash Sensitivity HH KickVelSens HH KICK Velocity Sensitivity CymbalChokeRate Cymbal Choke Rate EffectSw Variation Variation Chorus Chorus Reverb Re...

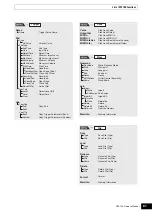
Page 61: ...ile Type File Load File File Rename Type Rename File Type File Rename File File Name Rename File Name Delete Type Delete File Type File Delete File File Format Format MemInfo Memory Information File C...

Page 62: ...62 DTX700 Owner s Manual...

Page 63: ...egis ter the software you will be unable to use it after a limited period of time expires If you are using a Macintosh computer double click the mpkg file to start installation For information about t...

Page 64: ...2160 SWEDEN Yamaha Scandinavia AB J A Wettergrens Gata 1 Box 30053 S 400 43 G teborg Sweden Tel 031 89 34 00 DENMARK YS Copenhagen Liaison Office Generatorvej 6A DK 2730 Herlev Denmark Tel 44 92 49 00...

Reviews: