background image


6


DTXPRESS 


IV


  Owner’s Manual


The DTXPRESS IV is equipped with a high-quality 32-polyphony tone generator that produces 
realistic voices, includes a high-performance, multi-function metronome, a built-in sequencer 
and a variety of songs—all combined into a compact, portable package. The DTXPRESS IV is an 
exceptionally versatile instrument that can be used in a variety of situations such as live perfor-
mance, personal practice, and much more.


Drum Triggers


• Built into the unit are twelve trigger input jacks and a hi-hat controller jack. The instrument also features jacks that are 

compatible with two-zone or three-zone pads (pads that transmit different signals depending on the area that is hit). 
Moreover, the snare drum jack is compatible with pad-controller-equipped pads. This lets you adjust the ‘virtual’ 
snares and the tuning—just as you would with an acoustic snare drum. All in all, the DTXPRESS IV has the operabil-
ity, functionality and performance that is virtually equivalent to an acoustic drum kit.

• You can connect the DTXPRESS IV to an acoustic drum kit by using drum triggers such as Yamaha DT20. The setup 

data such as the trigger input types and sensitivity can be customized to suit your playing preferences, style and partic-
ular setup.

• Also included in the unit are 50 preset drum kits which naturally contain acoustic drum kits, and cover a wide range of 

music genres, such as rock, funk, jazz, reggae, Latin, etc. Moreover, User kit memory is available for storing 20 sets. 
With this, you can set up your own original drum kits using the various drum voices.


* The word “trigger” refers to the means by which hitting a pad sends a signal to the DTXPRESS IV as to what sound to play on the 

built-in tone generator and how loud the sound should be played.


Tone Generator


• The DTXPRESS IV is equipped with a high-quality, 16-bit AWM2 (PCM) tone generator with 32-voice polyphony 

that produces dynamic voices or exceptional realism. The voices—totalling 427—cover a wide range sounds, such as 
authentic acoustic drums, unique electronic percussion, sound effects, and much more. The instrument also features a 
built-in high-quality digital reverb for enhancing the sound.


High-performance Metronome


• The DTXPRESS IV provides with a comprehensive, multi-function metronome, allowing various click settings for 

each note value. Each note value can be assigned its own separate click sound and pitch. You can also set a timer that 
will determine when the click stops and set breaks which how many measures the click will play and then be muted.

• The DTXPRESS IV also features a “Tap” function that lets you set the tempo for the song or click by tapping in tempo 

on a pad to any tempo you like. This lets you set whatever tempo you desire for playing or practicing.


Sequencer


• The built-in sequencer contains a wide variety of 63 preset songs. Two functions that make the DTXPRESS IV great 

for practice are the Drum Mute Function, which mutes a specific drum part, and the Bass Solo function, which lets you 
play along with just the song’s bass part. The DTXPRESS IV also allows you to record your performance in real 
time—and allows you to play along with your recorded performance data.

• In addition to one main song that is controlled from the panel, three pad songs can be individually controlled and 

simultaneously played by trigger input from the pads.


Groove Check


• The Groove Check function monitors your playing and provides instant feedback on your rhythmic skills, providing a 

powerful way to quickly improve your technique. It includes a Rhythm Gate function that produces sounds only if 
your timing is accurate, and also has a Challenge mode that evaluates your playing, giving you a letter grade—and 
makes mastering the drums easier and more fun than ever before.


Interface


• A MIDI OUT jack on the rear panel lets you connect other devices and play sounds from an external tone generator or 

synchronize the metronome with an external sequencer. Also provided are an AUX IN jack, which lets you plug in and 
play along with an external audio device, such as a CD player or MD player, and a headphones jack for convenient 
practice without disturbing others.


Main Features

Summary of Contents for DTXPRESS IV

Page 1: ...GmbH Siemensstraße 22 34 25462 Rellingen Germany Tel 04101 3030 OTHER COUNTRIES Yamaha Music Gulf FZE LB21 128 Jebel Ali Freezone P O Box 17328 Dubai U A E Tel 971 4 881 5868 THE PEOPLE S REPUBLIC OF CHINA Yamaha Music Electronics China Co Ltd 25 F United Plaza 1468 Nanjing Road West Jingan Shanghai China Tel 021 6247 2211 HONG KONG Tom Lee Music Co Ltd 11 F Silvercord Tower 1 30 Canton Road Tsims...

Page 2: ...g to how a function or effect works when the unit is operating as designed are not covered by the manufacturer s warranty and are therefore the owners responsibility Please study this manual care fully and consult your dealer before requesting service ENVIRONMENTAL ISSUES Yamaha strives to produce products that are both user safe and environmentally friendly We sincerely believe that our products ...

Page 3: ...out of your DTXPRESS IV please read this manual carefully After reading through the manual make sure to store it in a safe place so that you can refer back to it again as needed Accessories Yamaha AC power adaptor PA 3C Module stand Module stand fastening screws x 2 Owner s Manual this book May not be included depending on your particular area Please check with your Yamaha dealer About the Descrip...

Page 4: ...vice personnel CAUTION Always follow the basic precautions listed below to avoid the possibility of physical injury to you or others or damage to the instrument or other property These precautions include but are not limited to the following When removing the electric plug from the instrument or an outlet always hold the plug itself and not the cord Unplug the AC power adaptor when not using the i...

Page 5: ...Turning the power off in this state results in loss of all user data and may cause the system to freeze due to corruption of data in the Flash ROM This means that this instrument may not be able to start up properly even when turning the power on next time Yamaha cannot be held responsible for damage caused by improper use or modifications to the instrument or data that is lost or destroyed Always...

Page 6: ...unds such as authentic acoustic drums unique electronic percussion sound effects and much more The instrument also features a built in high quality digital reverb for enhancing the sound High performance Metronome The DTXPRESS IV provides with a comprehensive multi function metronome allowing various click settings for each note value Each note value can be assigned its own separate click sound an...

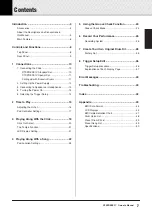
Page 7: ...djusting the Hi hat 16 Pad Controller Settings 17 3 Playing Along With the Click 18 Click Out Select 20 Tap Tempo Function 21 LED Display Setting 21 4 Playing Along With a Song 22 Pad Function Settings 23 5 Using the Groove Check Function 24 Groove Check Mode 24 6 Record Your Performance 26 Recording System 26 7 Create Your Own Original Drum Kit 28 Factory Set 35 8 Trigger Setup Edit 36 Trigger Se...

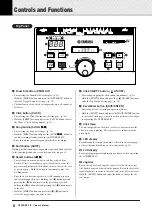
Page 8: ...through the pages Holding the button first and pressing the button moves to the previous page while holding the button first and pressing the button moves to the next Hold the SHIFT button and press the buttons to select the trigger input you want to edit y Click ON OFF button ON OFF For starting stopping the click sound metronome p 18 Hold the SHIFT button and press the ON OFF button to enter the...

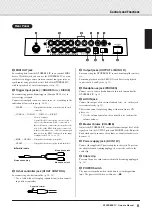
Page 9: ...onnecting a hi hat controller p 10 11 Use a cable with a stereo plug shown below when connect ing a hi hat controller 5 Output jacks OUTPUT L MONO R For connecting the DTXPRESS IV to an external amplifier mixer etc For mono playback use the L MONO jack For stereo playback connect both L and R jacks p 12 6 Headphones jack PHONES Connect a set of stereo headphones to this jack to monitor the DTXPRES...

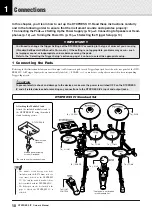
Page 10: ... appropriate problems may occur such as improper sound or inappropriate volume balance among the pads Refer to the Selecting the Trigger Setup section on page 14 on how to select the appropriate setup To prevent electric shock and damage to the devices make sure the power is switched OFF on the DTXPRESS IV and all related devices before making any connections to the DTXPRESS IV s input and output ...

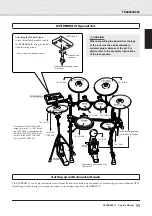
Page 11: ...use the included screws When assembling the Special Set the legs of the rack must be slid backwards to maintain proper balance of the set For details refer to the assembly instructions of the rack system CAUTION To 1SNARE To 8KICK To 2TOM1 To 3TOM2 To 4TOM3 To HI HAT CONTROL To 6CRASH To 5RIDE DTXPRESS IV Module stand included Module stand fastening screws 2 included First connect the RHH130 s PAD...

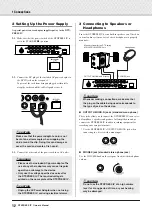
Page 12: ...performance Use the DTXPRESS IV s OUTPUT L MONO jack when connecting to a device with a mono input PHONES jack standard stereo phone jack Use the VOLUME knob on the rear panel to adjust the headphone volume Make sure that the power adaptor s cord is not bent at an extreme angle when wrapping the cord around the clip Doing this can damage or sever the cord and create a fire hazard Please use the in...

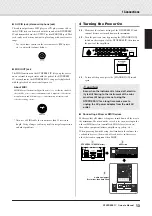
Page 13: ...sult in irregular operation and other problems 4 Turning the Power On 4 1 Make sure the volume settings of the DTXPRESS IV and external devices are turned down to the minimum 4 2 Turn the power on by pressing the STANDBY ON switch on the rear panel of the DTXPRESS IV then turn on the power of the amplifiers 4 3 To turn off the power press the STANDBY ON switch again Connecting a Mixer or MIDI Devi...

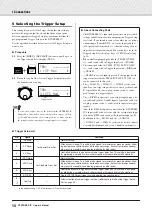
Page 14: ... connected to this jack The 2TOM1 10 3TOM2 11 4TOM3 12 jacks corre spond to a two trigger input that uses a stereo jack for L and R A parallel cable stereo plug mono jack x 2 can be used to input two trigger signals The 8KICK 9 jack accepts a two trigger input using a ste reo cable and jack for L and R signals A parallel cable ste reo plug mono jack x 2 can be used to input two trigger signals Als...

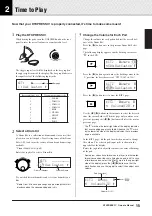
Page 15: ...rsor to the S position the first character of S01 OakCustom Press the button twice to view the KIT 3 page Use the buttons in this manner to select the desired item the cursor flashes When the page only contains a sin gle item pressing the buttons will select the next or previous page The mark on the lower right side of the display indicates that a succeeding page is available Likewise the mark on ...

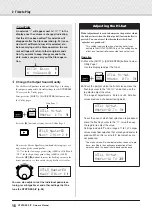
Page 16: ...ut the Store opera tion CAUTION KIT3 tom1 Volume 110 Utility Page 1 UTIL1 Hi hat HHofs 0 T 5 UTIL5 MasterEQ Lo 2 Hi 2 UTIL5 MasterEQ Lo 8 Hi 0 Adjusting the Hi hat Hi hat adjustment is used to determine the point at which the hi hat closes when the hi hat pedal foot controller is pressed You can also set the threshold at which foot splashes are produced This setting is only valid when a foot contr...

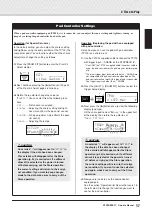
Page 17: ...ARE are not compatible with pad controller equipped pads The pad controller will not work if this type of pad is connected to a trigger input jack other than 1SNARE 2 Press the SHIFT DRUM KIT buttons to view the Trigger Setup display 3 Next press the button once to view the following display pad type Hit the snare pad to view ƒsnare in the upper half of the display then rotate the jog dial to set ...

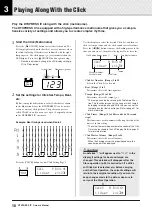
Page 18: ...g dial to set its value Click Set Number Range 1 to 30 Selects the Click Set to be used Beat Range 1 to 9 Determines the click s time signature Tempo Range 30 to 300 Determines the click s tempo q The tempo can also be set using the Tap Tempo Func tion This function lets you set the song or click s tempo by tapping in tempo on a pad With this you can set the tempo to one that feels best to you Ref...

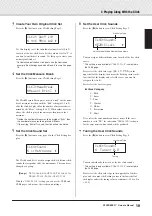
Page 19: ...e Metronome Wood Block Percussion Agogo Stick Pulse UserClick With the UserClick setting you can use the CLK5 and CLK6 pages to fine tune the click sound settings 6 Set the User Click Sounds Press the button to view Click Setting Page 5 You can assign a different drum voice to each of the five click voices This setting is only available if UserClick is selected in the CLK4 page First select the cl...

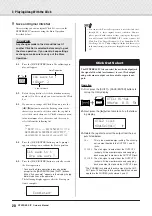
Page 20: ...e Destination space 0123456789 ABCDEFGHIJKLMNOPQRSTUVWXYZ _ abcdefghijklmnopqrstuvwxyz CLK save to 1 Are you sure Completed Click Out Select The DTXPRESS IV lets you select from which output jack the signal of the click metronome is sent Click output and performance output can be routed to separate out puts Operation 1 First press the SHIFT SAVE ENTER buttons to call up the Utility display 2 Next ...

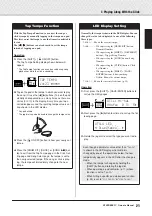
Page 21: ... If the song or click is play ing the tempo will immediately change to the new tempo TAP TEMPO 123 ªªªª LED Display Setting Generally the tempo is shown in the LED display You can change the value to be displayed to one of the following three types tempo Shows the current tempo mode When pressing the DRUM KIT button Drum kit Number When pressing the SHIFT DRUM KIT buttons Trigger Setup Number When...

Page 22: ... and Tempo Use the buttons to select the tempo value the value flashes and then use the jog dial to set the song s playback tempo q 30 300 Next press the button to move the flashing cursor to the right The speaker icon will change to a numeric value and flash This determines the volume range 0 16 for parts other than the drum Rotate the jog dial and adjust the balance between the song accompanimen...

Page 23: ...display and then select another drum kit number If a different song is selected while Drum Mute is active the drum kit will not change when a different song is selected UTIL3 Song BassSolo off Pad Function Settings The DTXPRESS IV conveniently lets you execute impor tant operations by hitting a specific pad without having to press buttons on the panel You can assign the following functions to the ...

Page 24: ...f a 16th note The deviation in timing inaccuracy is 0 0 to 9 9 Of course the smaller this value is more in the pocket your playing is Challenge Mode The DTXPRESS IV automatically evaluates the accuracy of hits over six grade levels from A to F and sets the range of Rhythm Gate according to the result The tolerance automati cally narrows if your hits are accurate and widens if your hits are inaccur...

Page 25: ... and go back to the Groove Check s main menu the GRV1 page Groove Check begins as soon as you hit the pad specified in the GRV3 page 6 Play as accurately as possible Listen to the song or click and concentrate on playing the pads accurately The jog dial can be used to adjust the tempo for the song or click If the Numeric Display mode is selected stop the song or click and check the results Change ...

Page 26: ...If a Preset Song is selected for recording and all User Songs already contain data the error message Memory full is shown Use the Song Clear function p 27 to prepare an empty User Song then set the recording conditions In this display set the click tempo beat and quantize Press the buttons to move the flashing cursor to the item you want to set then rotate the jog dial to set its value Tempo Range...

Page 27: ...E ENTER button once more to actu ally execute the Store operation To cancel the Store operation press any button except for the SAVE ENTER and SHIFT buttons When Are you sure appears in the display the jog dial will also cancel the operation When saving is complete a completed message appears and the Song Select page will reappear The song name is confirmed 7 Clearing a User Song If you want to cl...

Page 28: ...o pads TP65 KP65 PCY65 130 DT10 20 etc are used one Input Source is assigned to one input jack When stereo pads RHH130 PCY65S etc are used two Input Sources pad input and rim switch input or 2 kinds of pad inputs etc are assigned to one input jack When three zone pads TP65S TP120SD 100 PCY150S 130SC etc are used three Input Sources pad input and two rim switch inputs etc will be assigned to one in...

Page 29: ...he button to call up the page KIT5 then rotate the jog dial to set the voice s pan position The range is from L64 hard left to C center to R63 hard right As you rotate the dial notice the voice change its position within the stereo field according to the setting An asterisk will appear next to KIT in the display if data is changed This asterisk will dis appear after the Store operation p 34 is car...

Page 30: ...in the lower half of the display 9 Set the MIDI Channel This determines the MIDI Transmit Channel for the MIDI note on data that is transmitted when a signal is received from the input source This affects which particular channel will be used when playing a voice on a connected MIDI device Use the button to call up the KIT9 page then rotate the jog dial to set the MIDI Transmit Channel 1 16 10 Set...

Page 31: ...ayer input sources The indication is not shown in the upper right corner of the dis play Use the button to call up the KIT14 page then rotate the jog dial to set the Alternate Group off No cancellation HH pad For the voice ühhOp ühhOpE etc that is played when the hi hat pad is hit HH pdl For the voice ühhFtCl ühhSplsh ühhCl ühhClE etc that is played when the hi hat pedal is pressed 1 9 Alternate g...

Page 32: ...n and the setting in the UTIL7 takes priority p 23 When multiple pad songs are assigned and played back in combination the voices within the songs may change unex pectedly or sound different than intended 17 Set the Rim to Pad This function is effective only when the input source is from a rim switch When the rim is hit pad events triggered from the same pad trigger input jack can be simultaneousl...

Page 33: ...tion is assigned snares Adjusting the snares also effective for the open rim sound tuning Adjusting the tuning also effective for the open rim sound tempo Adjusting the tempo The indication is not shown in the upper right corner of the display Use the button to call up the page KIT22 then rotate the jog dial to set the Pad Controller function 23 Set the Snares This adjusts the snares effect the ch...

Page 34: ... off Does not transmit Volume 0 127 Sets the Volume Control Change data value that will be transmitted Pan 0 127 Sets the Pan Control Change data value that will be transmitted 26 Save the Original Voice To save the Drum Voice you created use the Store operation described below and save it to the DTXPRESS IV s memory Original kits can be saved as a Drum Kit to the User Drum Kit 51 70 memory locati...

Page 35: ... of the DTXPRESS IV s internal settings back to their original factory defaults Operation 1 First press the SHIFT SAVE ENTER buttons to call up the Utility pages 2 Press the button several times to call up the UTIL8 page 3 From the page shown above press the SAVE ENTER button to call up the prompt shown below asking for confirmation of the Factory Set operation To cancel the Factory Set operation ...

Page 36: ...e pages and move the flashing cursor to the parameter you want to set Refer to pages 37 to 39 for more information on individual parameters To select the Trigger Input input jack you want to edit sim ply hit the pad you want to edit or use the SHIFT buttons 3 Rotate the jog dial to change the setting An asterisk will appear next to TRG in the display if data is changed This asterisk will disappear...

Page 37: ...nimum Velocity p 38 and TRG5 RejTime Self Rejection Time p 38 will auto matically changed to the proper values for the pad type you set here Pad types are defined as follows KP KP80S 80 65 60 TP1 Snr TP100 120SD TP2 SnrA TP65S 65 mainly used as a snare pad 1 TP2 SnrB TP65S 65 mainly used as a snare pad 1 2 TP2 Tom TP65S 65 mainly used as a tom pad 1 TP3 A TP80S 80 65 60 3 TP3 B TP80S 80 65 60 3 PC...

Page 38: ...at is transmitted when the pad is hit the softest Large values will produce a high volume level even if the pad is hit softly However this will result in a narrow volume range making it difficult to adequately produce wider dynamic levels The Trigger Input Level will be displayed in percentage in the upper right hand corner of the display The maximum velocity input level 99 percent will be 127 The...

Page 39: ...he copy source input jack from which the data will be copied Rotate the jog dial and assign the copy destination input jack 2 Press the SAVE ENTER button A prompt appears ask ing confirmation of the Copy operation 3 Press the SAVE ENTER button to actually execute the Copy operation To cancel the Copy operation press any button except for the SAVE ENTER and SHIFT buttons the jog dial can also be us...

Page 40: ... knob on the rear panel may be turned down p 15 Is the input level displayed when the pad is hit p 38 TRG3 Gain MVI Minimum Velocity Is the gain set too low p 38 TRG3 Gain MVI Minimum Velocity The volume setting on the Drum Kit Select display s KIT3 Vol ume page p 29 may be set to 0 Is there a problem with the cable you are using The drum voices for both layers and may be set to 00 NoAssign p 29 S...

Page 41: ...no When two pads drums are played only one sound is heard Raise the gain setting of the pad trigger input that is not pro ducing sound p 38 TRG3 Gain MVI Minimum Velocity Lower the rejection setting of the pad trigger input that is not producing sound p 38 TRG6 RejLvlAll Rejection Level Lower the specified rejection setting of the pad trigger input that is not producing sound p 38 TRG7 RejLvl Spec...

Page 42: ...ff 30 MIDI note number 30 MIDI OUT 9 13 Minimum velocity 38 Module stand 10 11 Mute 19 22 MVI 38 N Numeric display mode 24 O OUTPUT 9 12 P Pad 28 Pad controller 9 14 17 33 Pad function 23 Pad song 15 32 Pad type 37 Pad with switch 9 14 Pan 29 34 Parallel cable 9 14 PHONES 9 12 Playback mode 32 Power supply 9 12 13 POWER switch 9 Program change 34 Q Quantize 26 R Rear panel 9 Record 26 Rejection le...

Page 43: ...Control Change 1 2 1 Bank select MSB LSB 0 32 data 0 127 1 2 2 Foot controller 4 Ch 10 only 1 2 3 Main volume 7 1 2 4 Pan 10 left 0 right 127 1 3 Program Change 2 System Exclusive Messages 2 1 Parameter Change 2 1 1 GM system ON F0 7E 7F 09 01 F7 hexadecimal Sets all messages except MIDI master tuning to their initial values 3 System Realtime Message 3 1 Timing clock Sends data 3 2 Start Stop Send...

Page 44: ...ƒsnare GateTime 0 3s KIT11 ƒsnare KeyOff disable KIT12 ƒsnare HoldMode off Page 15 Page 28 Page 15 29 Page 29 Page 29 Page 30 Page 30 Page 30 Page 30 Page 30 Page 30 Page 30 KIT14 ƒsnare AltGrp off KIT15 ƒsnare KeyAssign poly KIT13 ƒsnare VelXFade 0 KIT16 ƒsnare Song 45áéplay KIT17 ƒsnare RimToPad KIT18 ƒsnare RevSend 75 KIT23 Snares 32 KIT24 PC Ch1 on PC001 M000L001 KIT25 CC Ch1 on vol 127 Pan 64...

Page 45: ...Quant REC Meas 10 Now Recording Page 26 Page 26 GRV1 æ æ æææ 130 Gr 2œ0 0 GRV2 RhythmGate Mode challenge GRV3 Input ƒsnare GRV4 Note 4 GRV1 æ æ æææ 80Hits 16 DÀ Page 24 Page 24 Page 25 Page 25 Page 25 Challenge Mode Click Settings CLK1 B 4 1 User 130 CLK2 A 9 9 6 ßß 4 Œ 2 CLK3 MeasBreak Meas 1 Brk 3 CLK4 Sound 1 Metronome CLK5 Sound E20 Click1 CLK6 Sound Tune 0 0 Page 18 Page 19 Page 19 Page 19 Pa...

Page 46: ...y Set Page 16 Page 20 Page 23 Page 21 Page 16 Page 22 Page 23 Page 35 TAP TEMPO 123 ªªªª Page 21 Trigger Setup Edit TRG1 ååååååååå 1 SP Med TRG2 ƒsnare 0 Type TP1 Snr TRG3 ƒsnare 0 Gain 65MVl 12 TRG4 ƒsnare 0 VelCurve norm TRG5 ƒsnare 0 RejTime 1 TRG6 ƒsnare 0 RejLvlAll 2 TRG7 ƒsnare 0 RejLvl 3Frm 56 TRG8 ƒsnare CopyToInput 1 Page 14 36 Page 17 37 Page 38 Page 38 Page 38 Page 38 Page 38 Page 39 TR...

Page 47: ... o x Song Pos x x Common Song Sel x x Tune x x System Exclusive o x Prog o 0 127 x Change True x 0 32 o x Bank Select 4 7 10 o x 1 2 5 6 8 11 12 13 x x 16 19 x x Control 33 63 x x 64 84 x x Change 91 95 x x 96 101 x x Pitch Bender x x After Key s x x Touch Ch s x x Velocity Note ON o 9nH v 1 127 x Note OFF x 9nH v 0 x Note 0 127 x Number True voice x Default x x Mode Messages x x Altered x Basic D...

Page 48: ...6 Warm16Cup 7 Dark18 8 Dark18Edge 9 Dark18Cup 10 CrCustom17 11 CrLight17 12 CrFast16 13 CrFast14 14 Bright20 15 Bright20Eg 16 Bright20Cp 17 Warm20 18 Warm20Edge 19 Warm20Cup 20 Dark20 21 Dark20Edge 22 Dark20Cup 23 RideCool 24 RideCoolCp 25 RideDry 26 RideDryCup 27 SizzleRide 28 SizzRideEg 29 SizzRideCp 30 ChinaHi 31 ChinaLoCtr 32 ChinaLoEg 33 Splash 1 34 Splash 2 35 Trash 1 36 Trash 2 37 T8 Crash ...

Page 49: ...14 T8 Kit 15 T9 Kit 16 Drum Bass 17 Electro 18 Percuss Kit 19 Social Cuban 20 SE Kit 21 Funky Men 22 Power Kit 23 Resonance 24 Industry 25 Jazz Kit 26 Brush Kit No Name 27 Matsuri 28 AsianGypsy 29 LoopLoop 30 Scratch 31 VOX Kit 32 Vintage Kit 33 Room Kit 34 Afro Kit 35 Latin Club 36 Drum Corps 37 Orchestra 38 See View 39 Boyon No Name 40 WikkidPocket 41 Reggae Kit 42 BrokenFunk 43 GoGo1988 44 Re 0...

Page 50: ...Approx 16 000 notes Note Resolution 96 parts per quarter note Recording Type Real Time Replace Track 1 Songs 3 Demo Songs 41 Practice Songs 19 Pad Songs 20 User Songs Metronome Tempo 30 300 beats minute Tap Tempo function Beat 1 9 Timing Accent Quarter note Eighth note Sixteenth note Triplet Click Sound Sets Preset 6 User 1 Click Sets 30 Click Timer 0 600 seconds in 30 second steps Training Functi...

Page 51: ...e try to eliminate the problem by using one of the following measures Relocate either this product or the device that is being affected by the interference Utilize power outlets that are on different branch circuit breaker or fuse circuits or install AC line filter s In the case of radio or TV interference relocate reorient the antenna If the antenna lead in is 300 ohm ribbon lead change the lead ...

Page 52: ...GmbH Siemensstraße 22 34 25462 Rellingen Germany Tel 04101 3030 OTHER COUNTRIES Yamaha Music Gulf FZE LB21 128 Jebel Ali Freezone P O Box 17328 Dubai U A E Tel 971 4 881 5868 THE PEOPLE S REPUBLIC OF CHINA Yamaha Music Electronics China Co Ltd 25 F United Plaza 1468 Nanjing Road West Jingan Shanghai China Tel 021 6247 2211 HONG KONG Tom Lee Music Co Ltd 11 F Silvercord Tower 1 30 Canton Road Tsims...

Reviews: