background image

16

Disc Operations

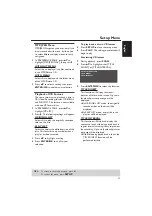
Zooming in

This function allows you to enlarge the 
picture on the TV screen and to pan 
through the enlarged picture.

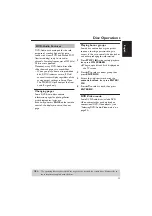
During playback, press ZOOM repeatedly 

to display the picture with different scales.

Use 

1


234

 to pan through the 

enlarged picture.

Playback will continue.

Press ZOOM repeatedly to return to the 

original size.

Resuming playback from the last 
stopped point

Resume playback of the last 10 discs is 
possible, even if the disc was ejected or the 
power switched off.

Load one of the last 10 discs.

“LOADING” appears.

Press PLAY (

 B 

while the 

“LOADING” message is displayed.

The disc will be played back from the 
last point.

To cancel resume mode
• In stop mode, press STOP ( 

9


again.

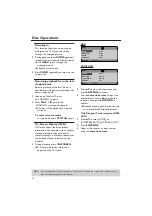
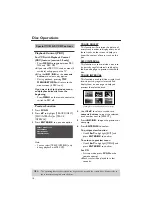
On-Screen Display (OSD)

OSD menu shows the disc playback 
information (for example, title or chapter 
number, elapsed playing time, audio/
subtitle language), a number of operations 
can be done without interrupting disc 
playback.

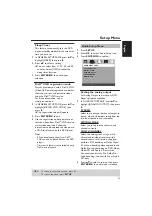
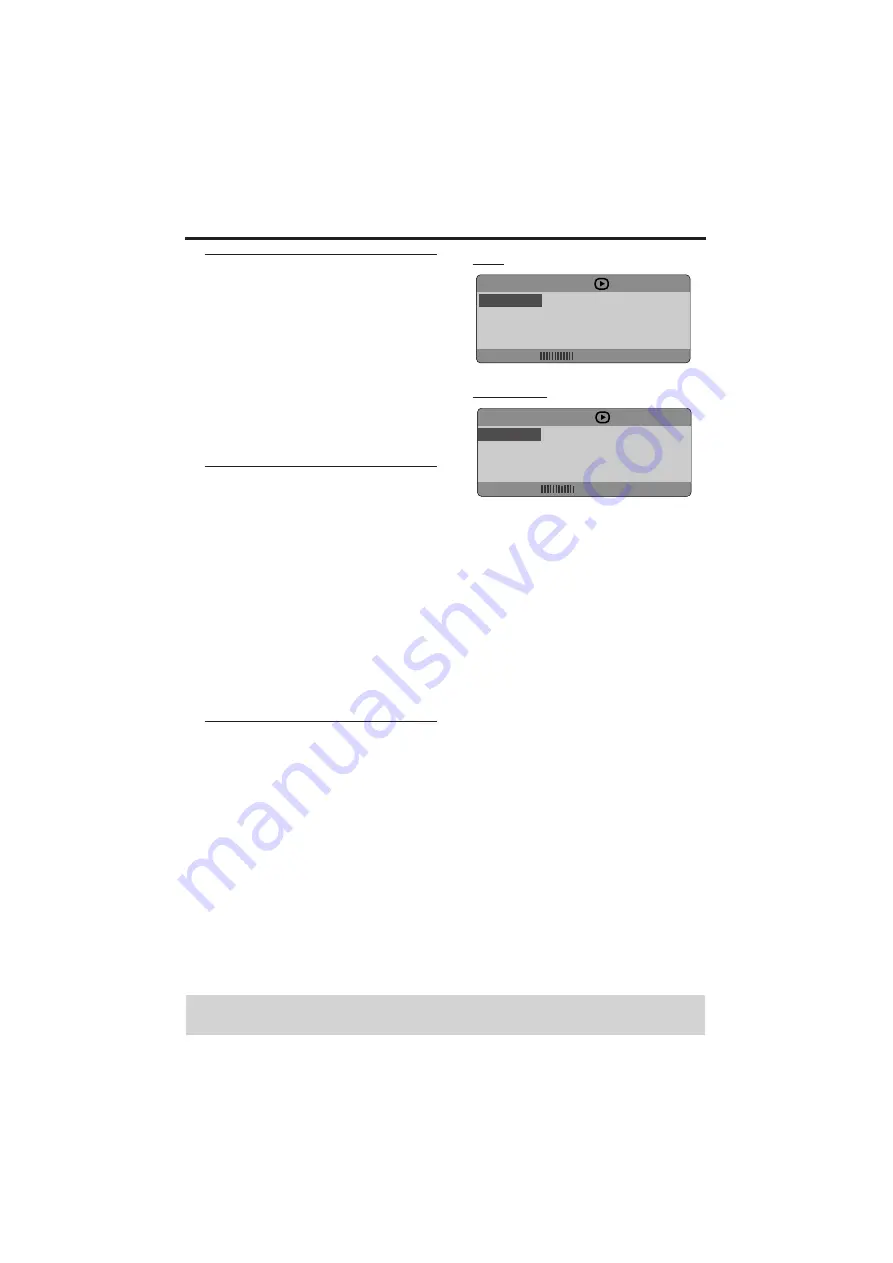
During playback, press ON SCREEN.

A list of available disc information 
appears on the TV screen.

DVD

VCD/SVCD

Press 

34

 to view the information and 

press ENTER/OK to access.

Use the numeric buttons to input the 

number/time or press 

34

 to make the 

selection, then press ENTER/OK to 
confirm.

Playback will change to the chosen time 
or to the selected title/chapter/track.

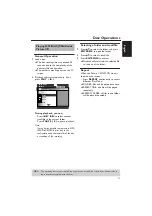
Title/Chapter/Track selection (DVD/
VCD)

Press 

34

 to select [TITLE] or 

[CHAPTER] (DVD) or [TRACK] (VCD).

Press ENTER/OK.

Select a title, chapter or track number 

using the numeric buttons.

TIPS:

The operating features described here might not be possible for certain discs. Always refer to 
the instructions supplied with the discs.

MENU

BITRATE

TITLE

02/14

CHAPTER

02/14

AUDIO

5.1CH

SUBTITLE

ENG

MENU

BITRATE

TRACK

02/14

DISC TIME

0:49:17

TRACK TIME

0:03:43

REPEAT

OFF

Summary of Contents for DV-S5860

Page 1: ...YAMAHA ELECTRONIK EUROPA G m b H SIEMENSSTR 22 34 25462 RELLINGEN BEI HAMBURG GERMANY YAMAHA ELECTRONIQUE FRANCE S A RUE AMBROISE CROIZAT BP70 CROISSY BEAUBOURG 77312 MARNE LA VALLEE CEDEX02 FRANCE YAMAHA ELECTRONICS UK LTD YAMAHA HOUSE 200 RICKMANSWORTH ROAD WATFORD HERTS WD18 7GQ ENGLAND YAMAHA SCANDINAVIA A B J A WETTERGRENS GATA 1 BOX 30053 400 43 VÄSTRA FRÖLUNDA SWEDEN YAMAHA MUSIC AUSTRALIA ...

Page 2: ... replace your obsolete outlet Do not defeat the safety purpose of the polarized plug 13 Power Cord Protection Power supply cords should be routed so that they are not likely to be walked on or pinched by items placed upon or against them paying particular at tention to cords at plugs convenience receptacles and the point where they exit from the product 14 Lightning For added protection for this p...

Page 3: ...is found to be the source of interference which can be determined by turning the product OFF and ON please try to eliminate the problem by using one of the following measures Relocate either this product or the device that is being affected by the interference Utilize power outlets that are on different branch circuit breaker or fuse circuits or install AC line filter s In the case of radio or TV ...

Page 4: ...12 Use only the voltage specified on this unit Using this unit with a higher voltage than specified is dangerous and may cause fire damage to this unit and or personal injury YAMAHA will not be held responsible for any damage resulting from use of this unit with a voltage other than as specified 13 To prevent damage by lightning disconnect the power cord from the wall outlet during an electrical s...

Page 5: ...on 14 Pausing playback 14 Selecting track chapter 14 Searching backward forward 14 Stopping playback 14 Selecting various repeat shuffle functions 15 Repeat 15 Repeating a section within a chapter track 15 Shuffle 15 Operations for video playback DVD VCD SVCD 15 Using the Disc Menu 15 Zooming in 16 Resuming playback from the last stopped point 16 On Screen Display OSD 16 Special DVD Features 17 Pl...

Page 6: ...Setting the Digital output 26 Speaker Setup 26 CD Upsampling 26 Night Mode 27 Video Setup Menu 27 TV Type 27 Setting the TV Display 27 Progressive 28 Picture Setting 28 Selecting the black level U S A model only 29 Closed Caption U S A model only 29 Preference Setup Menu 30 Audio Subtitle Disc Menu 30 Restricting playback by Parental Control 30 PBC Playback Control 30 MP3 JPEG Menu 31 Playback of ...

Page 7: ...etc Do not use disc with tape stickers or paste on it Doing so may damage the unit Do not use a disc which has been printed on its surface by a commercially available label printer When a disc becomes dirty clean it with a cleaning cloth Wipe the disc from the center out Do not wipe in a circular motion Do not use solvents such as benzine thinner commercially available cleaners or antistatic spray...

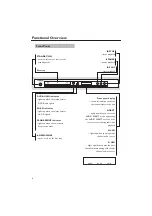
Page 8: ...SA CD indicator lights up when the player detects SA CD signals PROGRESSIVE indicator lights up when the unit enters Progressive mode Front panel display shows information about the operational status of the unit A DRCT lights up when you enter the AUDIO DIRECT mode by pressing the AUDIO DIRECT button on the remote control during audio disc playback ML CH lights up when you play multi channel audi...

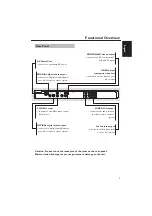
Page 9: ...al audio output connects to a digital coaxial input of your AV receiver or stereo system VIDEO output composite video out connects to a video input on your AV receiver COMPONENT video outputs connect to an AV receiver with Y PB CB PR CR inputs OPTICAL digital audio output connects to a digital optical input on your AV receiver or stereo system 6ch discrete output connect to the 6ch input jacks on ...

Page 10: ...gment SHUFFLE plays tracks in random order SCAN plays the first 6 seconds or less of each track chapter on the disc AUDIO DIRECT switches video output on and off during audio disc playback PAGE turns the pages of DVD Audio still pictures DIMMER use to select from 3 different brightness levels for the display SOUND MODE selects a sound mode Stereo Virtual Surround or Multi channel changes the SA CD...

Page 11: ...You will need to set this unit s digital output to ALL see page 26 DIGITAL OUTPUT Note If the audio format of the digital output does not match the capabilities of your receiver the receiver will produce a strong distorted sound or no sound at all Make sure to select the appropriate audio format at menu screen included on the disc Pressing AUDIO once or more may change not only audio languages but...

Page 12: ...deo cable supplied with this player to connect the L left and R right jacks to the corresponding input jacks of your audio component such as a stereo amplifier You can connect a subwoofer to the SUBWOOFER jack Analog Connections R L FRONT R L SURROUND CENTER SUBWOOFER AV receiver Leftsurround speaker Left front speaker Surround back speaker Right front speaker Right surround speaker Subwoofer Cent...

Page 13: ...ite Video terminal B Use the supplied video pin cable when connecting the player to an AV receiver Component Video terminal C Component video connection achieves high fidelity in reproducing colors better performance than S video connection separating video signal into luminance Y terminal color coded as green and color difference Pb blue Pr red Use commercially available coaxial cables Receiver a...

Page 14: ...used to connect to this unit Refer to the equipment owner s manual for details 4 Turn this unit on 5 Set the TV to the correct Video IN channel eg EXT1 EXT2 AV1 AV2 AUDIO VIDEO etc Refer to your TV owner s manual for details The front display lights up and the default screen appears on the TV This DVD Player is compatible with both NTSC and PAL Select the color system that matches your TV 1 Press ...

Page 15: ...recover You can select your own preferred language settings This DVD Player will automatically switch to the language for you whenever you load a disc If the language selected is not available on the disc the disc s default language will be used instead The OSD language in the system menu will remain once selected Setting the OSD Language 1 Press SETUP 2 Press 1 2 to select GENERAL SETUP PAGE 3 Pr...

Page 16: ...el for individual speakers These adjustments let you optimize the sound of your system to best suit your surroundings and setup IMPORTANT Speaker settings are only available for multi channel audio output 1 Press SETUP 2 Press 2 repeatedly to select AUDIO SETUP PAGE 3 Press 34 to highlight SPEAKER SETUP then press 2 4 Enter a submenu by pressing 2 5 Press 34 to highlight one of the options below t...

Page 17: ...B SPEAKERS DELAY Delay time settings in relation to the listening position distance for center and surround speakers 0 MS 15 MS 6 Press 1 2 to adjust the setting that best suits your surround sound needs 7 Press ENTER OK to confirm Notes Use a longer delay time setting when the surround speakers are closer to the listener than the front speakers A test tone will be automatically generated to help ...

Page 18: ...cally If you press PLAY B when the tray is open this unit closes the tray and starts playback Unless otherwise stated all operations described are based on Remote Control use Pausing playback 1 During playback press PAUSE Playback will pause and sound will be muted 2 Press PAUSE again to select the next picture frame 3 To resume normal playback press PLAY B Selecting track chapter Press S T or use...

Page 19: ...s A B Shuffle This function shuffles the playing order of chapters or tracks within a title group album if the title group album has more than one chapter or track in random order 1 Press SHUFFLE during playback SHUFFLE appears on the screen for about two seconds 2 To return to normal playback press SHUFFLE again Note For SA CD this function works in the currently selected area only Using the Disc...

Page 20: ...r example title or chapter number elapsed playing time audio subtitle language a number of operations can be done without interrupting disc playback 1 During playback press ON SCREEN A list of available disc information appears on the TV screen DVD VCD SVCD 2 Press 34 to view the information and press ENTER OK to access 3 Use the numeric buttons to input the number time or press 34 to make the sel...

Page 21: ...uttons Repeat Time Display DVD VCD 1 Press 34 to select REPEAT or TIME DISP 2 Press ENTER OK 3 Press 34 to highlight your selection and press ENTER OK Time display CD Each time you press ON SCREEN the time display changes as follows Playing a Title 1 Press MENU The disc title menu appears on the TV screen 2 Use 1 234 or numeric buttons to select a play option 3 Press ENTER OK to confirm Camera Ang...

Page 22: ...ent of every track on the disc DISC INTERVAL This function is used to divide a disc into six parts by regular intervals and display them on one page to preview the whole disc TRACK INTERVAL This function is used to divide a single track into six parts by regular intervals and display them on one page to help you preview the selected track 4 Use 1 234 to select a track or use numeric buttons to inp...

Page 23: ...s PAGE on the remote control the display moves to the next page Playing bonus groups Some discs contain bonus groups that require a four digit password to gain access In this case consult the disc jacket and other packaging for information 1 Press STOP 9 twice to stop playback then press ON SCREEN The group and track list is displayed on the TV screen 2 Press 34 to select a bonus group then press ...

Page 24: ...k will stop automatically at the end of the disc 2 To stop playback press STOP 9 Note You cannot change the Analog output setting during SA CD playback Changing the SA CD playback area and layer You can change the SA CD playback area at any time during playback Press SOUND MODE to switch between the multi channel and stereo areas in the HD layer OR 1 Press 1 2 Highlight the folder using 34 3 Press...

Page 25: ...ting a folder and track file 1 Press 34 to select the folder and press ENTER OK to open the folder 2 Press 34 to select a track file 3 Press ENTER OK to confirm Playback will start from the selected file to the end of the folder Repeat When the Picture CD MP3 CD menu is shown on the screen Press REPEAT continuously to access different Play Mode FOLDER files will be played back once REPEAT ONE one ...

Page 26: ...ck with multi angles During playback press 1 234 to rotate the picture on the TV screen 1 rotate the picture anti clockwise 2 rotate the picture clockwise 3 flip the picture vertically 4 flip the picture horizontally Scan Effect Press ANGLE repeatedly to choose different scan effect Various of scan effect appears on the top left hand corner on the TV screen Playing MP3 music and JPEG picture simul...

Page 27: ...isc Up to 40 discs can be locked 1 In GENERAL SETUP PAGE press 34 to highlight DISC LOCK then press 2 LOCK Select this to lock the playback of the current disc Subsequent access to a locked disc requires six digit password The default password is 000 000 see page 32 Changing the Password UNLOCK Select this to unlock the disc and allow future playback 2 Press 34 to select a setting then press ENTER...

Page 28: ...to remove 7 Press ENTER OK to remove this track from the program menu To start program playback 8 Use 1 234 to highlight START on the program menu then press ENTER OK Playback will start with the selected tracks under the programmed sequence To exit program playback 9 Use 1 234 to highlight EXIT on the program menu then press ENTER OK OSD Language This menu contains various language options for di...

Page 29: ...nly be played back on this DVD player Time search feature is not available during DivX movie playback 1 Press SETUP 2 Press 1 2 to select Audio Setup icon 3 Press ENTER OK to confirm Setting the analog output Set Analog Output to match your DVD Player s playback capability 1 In AUDIO SETUP PAGE press 34 to highlight ANALOG OUTPUT then press 2 STEREO Select this to change the channel output to ster...

Page 30: ...n disc PCM data stream will be converted to 48kHz 96KHz Playback a disc recorded at the sampling rate of 96kHz If the 96kHz disc is copy protected the digital output will be muted to comply with the standards Speaker Setup This menu contains setup options for audio output so that you can set your speakers to reproduce high quality surround sound For details see page 12 CD Upsampling This feature a...

Page 31: ...ted TV For details see page 10 Setting the TV Display Set the aspect ratio of the DVD Player according to the TV you have connected The format you select must be available on the disc If it is not the setting for TV display will not affect the picture during playback 1 In VIDEO SETUP PAGE press 34 to highlight TV DISPLAY then press 2 2 Press 34 to highlight one of the options below 4 3 PAN SCAN Se...

Page 32: ... Select this to personalize your picture color by adjusting the brightness contrast tint and color saturation 2 Press 34 to select a setting then press ENTER OK to confirm your selection 3 If you select PERSONAL then proceed to steps 4 7 The PERSONAL PICTURE SETUP menu appears 4 Press 34 to highlight one of the following options CONSUMERS SHOULD NOTE THAT NOT ALL HIGH DEFINITION TELEVISION SETS AR...

Page 33: ...LEVEL then press 2 ON Select this to enhance the black level OFF Select this for the standard black level setting 2 Press 34 to select a setting then press ENTER OK to confirm your selection Closed Caption U S A model only Closed captions are data hidden in the video signals of specific discs and are invisible without the use of a special decoder The difference between subtitles and captions is th...

Page 34: ...To disable Parental controls and have all Discs play select 8 ADULT 3 Use the numeric buttons to enter the six digit password see page 32 Changing the Password DVDs that are rated above the level you selected will not play unless you enter your six digit password Notes VCD SVCD CD and SA CD have no level indication so parental control function has no effect on these types of discs This applies to ...

Page 35: ...le when a play list has been created 3 Press 34 to highlight a setting 4 Press ENTER OK to confirm your selection To play back a disc in VR format 5 Press SETUP to close the setup menu 6 Press PLAY The setting you selected will begin to play Previewing VR format 7 During playback press SCAN 8 Press 34 to highlight either TITLE DIGEST or TITLE INTERVAL 9 Press ENTER OK to select the function TITLE ...

Page 36: ... enter your old six digit password When doing this for the first time key in 000 000 If you forget your old six digit password key in 000 000 4 Enter the new six digit password 5 Enter the new six digit password a second time to confirm 6 Press ENTER OK to confirm The new six digit password will now take effect Restoring to original settings Setting the DEFAULT function will reset all options and ...

Page 37: ...7789 Javanese 7486 Castilian Spanish 6983 Kalaallisut 7576 Catalan 6765 Kannada 7578 Chamorro 6772 Kashmiri 7583 Chechen 6769 Kazakh 7575 Chewa Chichewa Nyanja 7889 Khmer 7577 Chichewa Chewa Nyanja 7889 Kikuyu Gikuyu 7573 Chinese 9072 Kinyarwanda 8287 Chuang Zhuang 9065 Kirghiz 7589 Church Slavic Slavonic 6785 Komi 7586 Church Slavonic Church 6785 Korean 7579 Chuvash 6786 Kuanyama Kwanyama 7574 Co...

Page 38: ...78 Tonga Tonga Islands 8479 Nyanja Chichewa Chewa 7889 Tsonga 8483 Nynorsk Norwegian 7878 Tswana 8478 Occitan post 1500 Proven 7967 Turkish 8482 Old Bulgarian Old Slavonic 6785 Turkmen 8475 Old Church Slavonic Old 6785 Twi 8487 Old Slavonic Church 6785 Uighur 8571 Oriya 7982 Ukrainian 8575 Oromo 7977 Urdu 8582 Ossetian Ossetic 7983 Uzbek 8590 Ossetic Ossetian 7983 Vietnamese 8673 Pali 8073 Volapük...

Page 39: ...rogressive The DVD Player will reset itself to Component Interlaced video Distorted picture Sometimes a small amount of picture distortion may appear depending on the disc being played back This is not a malfunction Completely distorted picture or black white picture with DVD Make sure the disc is compatible with the DVD Player Ensure that the DVD Player s TV Type is set to match that of the disc ...

Page 40: ...0 seconds Player does not respond to some operating commands during playback Operations may not be permitted by the disc Refer to the instructions of the disc jacket DVD Player cannot read CDs DVDs Use a commonly available cleaning CD DVD to clean the lens before sending the DVD Player for repair Menu items cannot be selected Press STOP twice before selecting System Menu Depending on the disc avai...

Page 41: ...over the internet while maintain ing high visual quality Dolby Digital A surround sound system devel oped by Dolby Laboratories containing up to six channels of digital audio front left and right sur round left and right center and subwoofer DTS DigitalTheatre Systems This is a surround sound system but it is different from Dolby Digi tal The formats were developed by different companies JPEG A ve...

Page 42: ...use S Video only if yourTV has S video In jack Super Audio CD SA CD This audio format is based upon the current CD standards but includes a greater amount of information that provides higher quality sound There are three types of discs single layer double layer and hybrid discs The hybrid disc contains both standard audio CD and Super Audio CD information Surround A system for creating realistic t...

Page 43: ...e stereo source AUDIO PERFORMANCE DA Converter 24 bit Signal Noise 1 kHz 110 dB Dynamic range 1 kHz 100 dB DVD fs 96 kHz 2 Hz 44 kHz fs 48 kHz 2 Hz 22 kHz SVCD fs 48 kHz 2 Hz 22 kHz fs 44 1 kHz 2 Hz 20 kHz CD VCD fs 44 1 kHz 2 Hz 20 kHz Distortion and Noise 1 kHz 0 003 TV STANDARD NTSC 60 Hz PAL 50 Hz Number of lines 525 625 Playback Multistandard PAL NTSC CONNECTIONS Y Output Cinch green Pb Cb Ou...

Page 44: ...YAMAHA ELECTRONIK EUROPA G m b H SIEMENSSTR 22 34 25462 RELLINGEN BEI HAMBURG GERMANY YAMAHA ELECTRONIQUE FRANCE S A RUE AMBROISE CROIZAT BP70 CROISSY BEAUBOURG 77312 MARNE LA VALLEE CEDEX02 FRANCE YAMAHA ELECTRONICS UK LTD YAMAHA HOUSE 200 RICKMANSWORTH ROAD WATFORD HERTS WD18 7GQ ENGLAND YAMAHA SCANDINAVIA A B J A WETTERGRENS GATA 1 BOX 30053 400 43 VÄSTRA FRÖLUNDA SWEDEN YAMAHA MUSIC AUSTRALIA ...

Reviews: