background image

CAUTION: READ THIS BEFORE OPERATING YOUR UNIT.

1

To assure the finest performance, please read
this manual carefully. Keep it in a safe place for
future reference.

2

Install this unit in a well ventilated, cool, dry, clean
place — away from direct sunlight, heat sources,
vibration, dust, moisture, or cold. In a cabinet,
allow about 2.5cm (1 inch) of free space all
around this unit for adequate ventilation.

3

Locate this unit away from other electrical
appliances, motors, or transformers to avoid
humming sounds.

4

Do not expose this unit to sudden temperature
changes from cold to hot, nor locate this unit in
an environment with high humidity (i.e., a room
with a humidifier) to prevent condensation inside
this unit, which may cause an electrical shock, fire,
damage to this unit, and/or personal injury.

5

Avoid installing this unit in a location where
foreign objects may fall onto this unit or where
this unit may be exposed to liquid dripping or
splashing. On the top of this unit, do not place:

– Other components, as they may cause

damage and/or discoloration on the surface
of this unit.

– Burning objects (i.e., candles), as they may

cause fire, damage to this unit, and/or
personal injury.

– Containers with liquid in them, as they may

fall, spilling the liquid and causing an electrical
shock to the user and/or damage to this unit.

6

Do not cover this unit with a newspaper,
tablecloth, curtain, etc. in order not to obstruct
heat radiation. If the temperature inside this unit
rises, it may cause fire, damage to this unit, and/or
personal injury.

7

Do not plug in this unit to a wall outlet until all
connections are complete.

8

Do not operate this unit upside-down. It may
overheat, possibly causing damage.

9

Do not use excessive force on switches, knobs
and/or cords.

10

When disconnecting the power cord from the
wall outlet, grasp the plug; do not pull the cord.

11

Do not clean this unit with chemical solvents; this
might damage the finish. Use a clean, dry cloth.

12

Use only the voltage specified on this unit. Using
this unit with a higher voltage than specified is
dangerous and may cause fire, damage to this
unit, and/or personal injury. YAMAHA will not be
held responsible for any damage resulting from
use of this unit with a voltage other than as
specified.

13

To prevent damage by lightning, disconnect the
power cord from the wall outlet during an
electrical storm.

14

Do not attempt to modify or fix this unit.
Contact qualified YAMAHA service personnel
when any service is needed. The cabinet should
never be opened for any reason.

15

When not planning to use this unit for long
periods of time (i.e., vacation), disconnect the AC
power plug from the wall outlet.

16

Be sure to read the “Troubleshooting” section on
common operating errors before concluding
that this unit is faulty.

17

Before moving this unit, press STANDBY/ON to
set the unit in standby mode, then disconnect
the AC power plug from the wall outlet.

The unit is not disconnected from the AC power
source as long as it is connected to the wall
outlet,even if this unit itself is turned off.This state is
called the standby mode.In this state,this unit is
designed to consume a very small quantity of power.

NOTE:
Pictures shown maybe different between countries.
Never make or change connections with the power
switched on.

LASER SAFETY

This unit employs a laser. Due to possible eye injury,
only a qualified service person should remove the
cover or attempt to service this device.

CAUTION

VISIBLE AND INVISIBLE LASER RADIATION
WHEN OPEN. AVOID EXPOSURE TO BEAM

Use of controls or adjustments or performance of
procedures other than those specified herein may
result in hazardous radiation exposure.

This unit is designed for home use only. Do not use
this unit for business purposes.

Be sure to place this unit on a level surface.

If not so, this unit will fail to work normlly at the
PLAYXCHANGE operation and cause damage to
the disc(s) and this unit itself.

LASER

Type

Semiconductor laser GaAlAs

Wave length

650 nm (DVD)
780 nm (VCD/CD)

Output Power

7 mW (DVD)
10 mW (VCD/CD)

Beam divergence

60 degree

Summary of Contents for DVD-C940

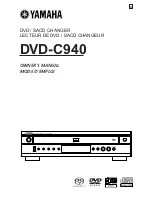
Page 1: ...STANDBY ON NATURAL SOUND DVD SACD PLAYER SACD MULTI CH REPEAT DISC PLAY CHANGE 2 3 5 4 1 DVD SACD CHANGER LECTEUR DE DVD SACD CHANGEUR DVD C940 OWNER S MANUAL MODE D EMPLOI U ...

Page 2: ...arized or grounding type plug A polarized plug has two blades with one wider than the other A grounding type plug has two blades and a third grounding prong The wide blade or the third prong are provided for your safety When the provided plug does not fit into your outlet consult an electrician for replacement of the obsolete outlet 10 Protect the power cord from being walked on or pinched particu...

Page 3: ...tive measures do not produce satisfactory results please contact the local retailer authorized to distribute this type of product If you can not locate the appropriate retailer please contact Yamaha Electronics Corp 6600 Orangethorpe Ave Buena Park CA90622 The above statements apply ONLY to those products distributed by Yamaha Corporation of America or its subsidiaries We Want You Listening For A ...

Page 4: ...se a clean dry cloth 12 Use only the voltage specified on this unit Using this unit with a higher voltage than specified is dangerous and may cause fire damage to this unit and or personal injury YAMAHA will not be held responsible for any damage resulting from use of this unit with a voltage other than as specified 13 To prevent damage by lightning disconnect the power cord from the wall outlet d...

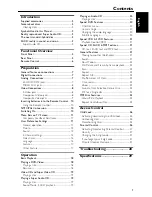
Page 5: ... title 18 Resume 18 Video CD and Super Video CD 19 Playing a disc 19 Playing a Super Audio CD 19 Playing a disc 19 Sound Mode SACD playback 19 Playing an Audio CD 20 Playing a disc 20 Special DVD Features 20 Title Disc menu 20 Camera Angle 20 Changing the audio language 20 Subtitle Language 20 Special VCD SVCD Features 21 Playback Control PBC 21 Special CD SACD MP3 Features 21 CD text SACD text an...

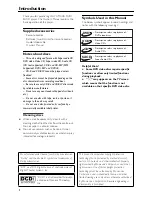
Page 6: ...records Symbols Used in this Manual The below symbols appear in some headings and notes with the following meanings Helpful Hints Some DVD video discs require specific functions or allow only limited functions during playback Ä may appears on the TV screen which means that the function is not available on that specific DVD video disc Manufactured under license from Dolby Laboratories Dolby and the...

Page 7: ...tereo CD audio information The two layers are read from the same side of the disc The HD layer is read by and DVD laser The bottom reflective layer with conventional CD sound is read by the CD laser through the second semi transmissive HD layer SACD reality in sound and vision This SACD player will not only surprise you with its superior reproduction of almost all existing audio formats Connected ...

Page 8: ...y DISPLAY shows the current status of the player DISC 1 2 3 4 5 LEDs preferred disc each LED flashes green when button is selected LEDs LED lights up when the cor to select and directly playback the responding feature is set to ON S Q search backward go to a previous chapter or track R T search forward go to the next chapter or track B PLAY PAUSE to start or interrupt playback 9 STOP to stop playb...

Page 9: ... VIDEO inputs of your AV receiver VIDEO OUT COMPONENT 480i outputs interlace signals connect to COMPONENT VIDEO inputs of your AV receiver VIDEO OUT VIDEO connect to VIDEO composite input of your AV receiver AUDIO OUT MIXED 2CH connect to AUDIO inputs of your AV receiver or stereo system AC Power Cord connect to a standard AC outlet AUDIO OUT 6CH DISCRETE connect to 6CH INPUT inputs of your AV rec...

Page 10: ...em in the menu ENTER OK acknowledge menu selection S search backward go to a previous chapter or track REPEAT A B repeat a specific segment SHUFFLE play tracks in random order SCAN play the first 10 seconds of each track chapter within a disc B I switch DVD player ON or go to standby mode 0 9 numerical keys select numbered items in a menu CD TEXT BIT RATE activate deactivate CD text if available o...

Page 11: ... the capabilities of your receiver the receiver will produce a strong distorted sound or no sound at all Make sure to select the appropriate audio format at menu screen included on the disc Pressing AUDIO once or more may change not only audio languages but also audio formats and the selected format appears for several seconds on the status window MP3 Audio is not available on the Digital Output A...

Page 12: ...essive Scan provides a flicker free image with the highest effect on film based sources DVD disc consist of film and video based content Progressive Scan conversion is capable of 3 2 pulldown for film based content It can double the vertical resolution of the picture to 525 lines every time the picture is refreshed 1 60th of a second It greatly improve the quality of moving images especially durin...

Page 13: ...reproduce better video image Composite Video jacks C Use audio video cable supplied with this player when connecting the player to a TV VIDEO 6CH DISCRETE VIDEO OUT DIGITAL OUT AUDIO OUT COAXIAL COMPONENT OPTICAL S VIDEO PCM DTS DIGITAL 480p PR PR PB PB Y Y R R R SUB WOOFER SURROUND CENTER MIXED 2CH COMPONENT 480i MAIN S VIDEO OUT S VIDEO IN COMPONENT VIDEO OUT COMPONENT VIDEO IN VIDEO OUT VIDEO I...

Page 14: ...em eg NTSC and PAL Your TV also operates according to a color system This DVD player is compatible with NTSC and PAL To play on this DVD player the color system of the DVD disc the TV and the DVD player should match If all three are not the same the DVD may play in only black and white the picture may roll continuously or the picture may appear distorted To activate the conversion refer to page 13...

Page 15: ...r TV screen User Preference Settings In the User Preference Settings menu you can customize your player to suit your own particular requirements General operation 1 Press ON SCREEN on the remote control 2 The will be highlighted in the menu bar 3 Press 4 to activate the Personal Preferences menu To select a preferred menu language 1 Press 4 until r is highlighted 2 Press 2 to enter the submenu and...

Page 16: ... dynamics to obtain richer contrasts Video shift Use this setting to personalize the position of the picture on your TV by scrolling it to the left or right Smart Picture Color settings You can select one of five predefined sets of color settings and one set Personal which you can define yourself When Personal is selected it allows you to fine tune saturation brightness and contrast Use 3 or 4 to ...

Page 17: ... quality Sound Digital output Digital output selection enables you to specify the type of digital output suitable for your receiver Select ALL default setting if you had connected your DIGITAL AUDIO OUT to a multichanel decoder receiver Select PCM only if your receiver is not capable of decoding compressed encoded input stream Select OFF to deactivate the DIGITAL AUDIO OUT Note Digital output is n...

Page 18: ...directly with SOUND MODE Night Mode When set to ON the dynamics of your sound output are optimized High volume outputs are softened enabling you to watch your favorite action movie etc without disturbing others CD Upsampling Allows you to upsample your CD from 44 1 kHz 16 bit to various higher sampling rate for superior CD reproductions The selections are 88 2kHz 24bits 176 4kHz 24bits and OFF The...

Page 19: ...ignals below 120Hz S Small When the front speakers cannot produce low frequency signals below 120Hz Center Speaker L Large When the center speaker can reproduce low frequency signals below 120Hz S Small When the center speaker cannot produce low frequency signals below 120Hz Off When the center speaker is not connected Surround speakers L Large When the surround speakers can reproduce low frequenc...

Page 20: ... Logic If the delay times for Surround Channel and Center Channel are set for Digital Surround mode the delay times for Dolby Pro Logic mode will automatically be calculated and set Language Selecting disc languages Menu Audio Subtitle language This is to select the audio language subtitle language and the language used in TV screen menus or DVD menus which will always be used for every disc to be...

Page 21: ...ned time This can be set to ENABLE or DISABLE Wake up Timer The wake up timer allows your player to turn on after a preset time Whenever the player wakes up the value of wake up timer is set to zero automatically The Wake up Timer will activate when the set is switched to standby mode IntelliPlay Intelliplay is a convenient feature for automated playback of disc content When switched to ON the pla...

Page 22: ... discs may have one or more TITLES and each TITLE may have one or more CHAPTERS Playback stops at the end of each TITLE Playing a title 1 Press DISC 1 2 3 4 5 on the front panel or DISC SKIP repeatedly on the remote control to playback a specific disc directly Playback starts automatically 2 When the MENU appears on the TV screen use 4 3 1 2 or numerical keys on the remote control to select an opt...

Page 23: ...r of tracks for selection current playing status and current playing layer 2 Playback will stop at the end of the disc 3 To stop playback press STOP Sound Mode SACD playback If the default Sound mode is set to multi channel and the inserted disc does not contain this mode the player will automatically select the stereo mode On hybrid discs with SACD and CD layers the player will always start playi...

Page 24: ...tain menus to navigate the disc and access special features Press the appropriate numerical key or use 4 3 2 1 to highlight your selection in the DVD menu and press ENTER OK to confirm Title Disc menu 1 Press MENU If the current title has a menu the menu will appear on the screen Otherwise the menu will be displayed 2 If menu is available on the disc audio language subtitle options chapters for th...

Page 25: ...ring playback 4 Press CD TEXT BIT RATE on the remote control again to switch on the text display mode General Features Note Unless stated all operations described are based on remote control use Some operations can be carried out using the menu bar on the TV screen Moving to another title chapter When a disc has more than one title track or chapter you can move to another title chapter as follows ...

Page 26: ... display changes as follows REPEAT CHPT repeat the current chapter REPEAT TITL repeat the current title REPEAT DISC repeat the entire disc RPT ALL DSC repeat all discs loaded on the tray REPEAT OFF exit repeat mode This feature may not be available with some discs Repeat track disc Each time you press REPEAT the front display changes as follows REPEAT TRK repeat the current track REPEAT DISC repea...

Page 27: ... factor 1 33 or 2 or 4 Playback will continue The selected zoom factor and Press OK to pan appears below the menu bar The zoomed picture will appear on the TV screen 3 Press ENTER OK to confirm the selection The panning icon appears on the screen 4 Use 1 2 3 4 to pan across the screen 5 When ENTER OK is pressed only the panned picture will be shown on the screen 6 To exit ZOOM mode select zoom fac...

Page 28: ...r OPEN CLOSE during playback will erase the selected Program if any With VCD 2 0 set the PBC Playback Control to Off FTS for a Single disc 1 Select FTS in the menu bar 2 Press 4 in the menu bar The FTS window menu appears 3 Select CURRENT DISC option Storing album title 1 Press 4 to select ALBUM TRACK Albums are for MP3 and Tracks for S VCD 2 Use 2 and 1 to select the require Album Track 3 Press E...

Page 29: ...not be played depending on the disc characteristics or recording conditions Album Title Playback This feature allows you to view and select the next or previous MP3 disc Album Title 1 Press 3 4 to scroll through the previous or next Album 2 Press 1 2 to scroll through the previous or next Track 3 You can also select the desired album track number directly using the numeric keys on the remote contr...

Page 30: ... titles A disc will be placed in the list when Play Always is selected Each time a child safe disc is played it will be placed on top of the list When the list is full the last disc in the list will be replaced when a new disc is added Double sided DVDs and multi volume VCDs may have a different ID for each side In order to make the disc child safe each side has to be authorized Deauthorising disc...

Page 31: ...4 6 Press ENTER OK or 1 to confirm then press 1 again to exit the menu Changing the 4 digit code 1 When disc playback is stopped select ACCESS CONTROL in the Personal Preferences menu using 3 4 2 Enter the current 4 digit code 3 Move to CHANGE CODE using 4 and press 2 4 Enter the new 4 digit code 5 Enter the code a second time and reconfirm by pressing ENTER OK 6 Press 1 to exit the menu The new 4...

Page 32: ...o format of the selected audio language matches your receiver capabilities Disc can t be played Ensure the disc label is facing up Check if the disc is defective by trying another disc Picture freezes momentarily during playback Check the disc for fingerprints scratches and clean with a soft cloth wiping from center to edge No return to start up screen when disc is removed Reset the player by swit...

Page 33: ...nnel unbalance 0 5 dB Cut off frequency 50 kHz Front 40 kHz Surround Center Subwoofer Signal Noise 1kHz 110 dB Dynamic Range 1kHz 100 dB Harmonic Distortion Noise 1kHz 0 0025 AUDIO PERFORMANCE DA Converter 24 bits DVD fs 96 kHz 2 Hz 44 kHz CD Video CD fs 44 1 kHz 2 Hz 20 kHz S Video CD fs 48 kHz 2 Hz 22 kHz fs 44 1 kHz 2 Hz 20 kHz Signal Noise 1kHz 110 dB Dynamic Range 1kHz 100 dB Harmonic Distort...

Page 34: ... m b H SIEMENSSTR 22 34 25462 RELLINGEN BEI HAMBURG F R OF GERMANY YAMAHA ELECTRONIQUE FRANCE S A RUE AMBROISE CROIZAT BP70 CROISSY BEAUBOURG 77312 MARNE LA VALLEE CEDEX02 FRANCE YAMAHA ELECTRONICS UK LTD YAMAHA HOUSE 200 RICKMANSWORTH ROAD WATFORD HERTS WD1 7JS ENGLAND YAMAHA SCANDINAVIA A B J A WETTERGRENS GATA 1 BOX 30053 400 43 VÄSTRA FRÖLUNDA SWEDEN YAMAHA MUSIC AUSTRALIA PTY LTD 17 33 MARKET...

Reviews: