background image

Summary of Contents for DVD-C961

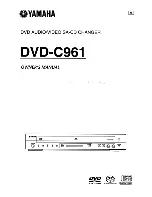
Page 1: ...1 OWNER S MANUAL r YAMlAII JL CO e 0 0 e 1 I O o I I _ _ rnJO AUDIO VIDEO SUPERAUDIOCD DIGITAL VIDEO eYAMAHA DVD AUDIONIDEO SA CD CHANGER DVD C961 OWNER S MANUAL r YAMlAII JL CO e 0 0 e 1 I O o I I _ _ rnJO AUDIO VIDEO SUPERAUDIOCD DIGITAL VIDEO ...

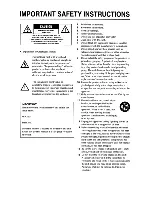
Page 2: ...ANT Please record the serial number of this unit in the space below Explanation of Graphical Symbols IMPORTANT SAFETY INSTRUCTIONS Serial No 1 Read these instructions 2 Keep these instructions 3 Heed all warnings 4 Follow all instructions 5 Do not use this apparatus near water 6 Clean only with dry cloth 7 Do not block any ventilation openings Install in accordance with the manufacturer s instruct...

Page 3: ...m DYD 780 nm YCD CD 7 mW DYDNCD CD 60 degrees Output Power Beam divergence LASER Type Wave length ii FCC INFORMATION for US customers I IMPORTANT NanCE DO NOT MODIFY THIS UNIT This product when installed as indicated in the instructions contained in this manual meets FCC requirements Modifications not expressly approved by Yamaha may void your authority granted by the FCC to use the product 2 IMPO...

Page 4: ... operation of this unit may not function correctly and may damage the disc s and or this unit itself CAUTION READ THIS BEFORE OPERATING THIS UNIT 1 To assure the finest performance please read this manual carefully Keep it in a safe place for future reference 2 Install this unit in a well ventilated cool dry clean place away from direct sunlight heat sources vibration dust moisture or cold In a ca...

Page 5: ...pecial DivXQ features 26 Using the interactive menu 26 Selecting the audio subtitle language 26 1 En Introduction 3 Region codes 3 Supplied accessories 3 Cle d anlng ISCS 3 Playable disc formats 3 Patent information 4 Functional Overview 5 Front panel 5 Remote control 6 Rear panel 8 Connections 9 General notes on connections 9 Audio connections 9 Digital connections 9 Analog connections 10 Video c...

Page 6: ...s 40 Resetting the system 40 2 En Language Codes 41 Troubleshooting 42 Glossary 44 Specifications 46 Contents Setup Menu 27 Menu overview 27 Setup menu operation 28 General setup menu 28 Selecting DVD AudiolVideo mode 28 LockinglUnlocking the disc for viewing 29 Programming tracks and discs 29 OSD language 30 Turning the screen saver on off 30 Setting the sleep timer 30 Turning the auto standby fu...

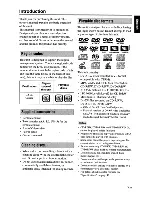
Page 7: ...cially available label printer For details about playable formats see Specifications on page 46 3 En Introduction Thank you for purchasing this unit This owner s manual explains the basic operation of this unit This manual is printed prior to production Design and specifications are subject to change in part as a result of improvements etc In case of differences between the manual and the product ...

Page 8: ...therwise authorized by Macrovision Corporation Reverse engineering or disassembly is prohibited 4 En Introduction D IDOLBYl DIGITAL PRO LOGIC n Manufactured under license from Dolby Laboratories Dolby Pro Logic and the double D symbol are trademarks of Dolby Laboratories db Digital Surround DTS and HDTS Digital Surround are registered trademarks of DTS Inc I DIVX U L R l l DivX DivX Ultra Certifie...

Page 9: ... interrupting current disc playback see page 17 Press and hold the button for about two seconds 5 En Functional Overview YAMAHA J 1 tI I f11 I I Ii I 0 e e e t e 4 1 Disc tray Loads up to 5 discs in the disc tray 2 Opens or closes the disc tray 3 STANDBY ON Turns on this unit or sets it to the standby mode 4 DISC 1 5 indicators Select and directly play back the preferred disc Each indicator lights...

Page 10: ...ays the menu of a disc DVD JPEG see pages 23 and 25 Switches PBC on or off VCD SVCD see page 23 6 En Functional Overview POWER I Turns on this unit 2 SUBTITLE Selects the subtitle language see pages 23 and 26 3 AUDIO CD Selects the audio language or format see pages 23 and 26 Changes the SA CD playback layer see page 24 4 PLAY Starts playback jj 5 STOP _ Stops playback 9 6 SHUFFLE Accesses or exit...

Page 11: ...17 h DISC SKIP Selects another disc see page 17 Press and hold the button for about two seconds 7 En q AUDIO DIRECT Turns off the video output during audio disc CD DVD Audio SA CD playback in order to improve audio quality Press again to tum on the video output This function is not available for HDMI output In the AUDIO DIRECT mode the front panel display dims to MODE 2 N Pt t fJ You can tum on or...

Page 12: ...nal is used in custom installation Do not connect any cables to this terminal during normal use 8 En Functional Overview 5 61_ _71_ _ J 1 AUDIO OUT 6CH DISCRETE jacks Connect to the 6 channel input jacks of your AV receiver see page 10 7 REMOTE CONTROL RS 232C terminal Use as an expansion terminal for commercial use Consult your dealer for details 2 3 4 5 6 AUDIO OUT MIXED 2CH jacks Connect to the...

Page 13: ...al DTS and MPEG format you must connect this unit to an AV receiver that supports these formats 9 En Be sure to tum off this unit and unplug the power cable before you make or change connections Depending on the component you want to connect there are various ways to make connections Possible connections are described below Refer to the manuals supplied with your other components as necessary to m...

Page 14: ...hibited DVD Audio NO DOWN MIX appears in the front panel display and the DOWN MIX indicator goes out Connections Analog connections This unit has two types of analog output jacks 6 channel discrete jacks If you want to reproduce multi channel Super Audio CD SA CD and DVD Audio connect AUDIO OUT 6CH DISCRETE jacks of this unit to the corresponding input jacks of your AV receiver using commercially ...

Page 15: ... different cables from shown above For details refer to the manual supplied with your receiver 11 En If your AV receiver has video output jacks connect your receiver and then your TV so that you can use one TV for several different video sources LD VCR etc by simply switching the input source selector of your receiver This unit has several types of video output jacks Use the one that corresponds t...

Page 16: ...the image may not be distinct In that case adjust the picture setting of the connected DVI component Connections HOMI jack HOMI provides high quality digital audio and video on a single connection Connect the HOMI jack of this unit to an HOMI input jack of your AV receiver and then to that of your TV using a commercially available HOMI cable If your receiver does not have an HOMI input jack you ca...

Page 17: ...M HDMI appears on the bottom of the SA CD menu Note You need to set HDMI AUDIO OUT see page 32 13 En Connections HOMI audio output HDMIAUDIO Audio format Analog output AUTO PCM OFF Dolby Digital Multi Dolby Digital 1 2 PCM Multi channel 2 Multi channel StereoN SUIT PCM 2 channel Dolby Digital Multi StereoN SUIT Dolby Digital 1 PCM 2 channel 2 channel DTS Multi DTS 1 2 PCM Multi channel 2 DVD Video...

Page 18: ...nit and then plug the power cable to an AC outlet II I I CJ ilHJ L OUT 1M flS U2C l llIlllOTf COfiCT Connections Remote control jacks This unit has remote control input output jacks If your AV receiver is a Yamaha product and has the capability to transmit of SCENE control signals you can use the SCENE function Connect the REMOTE CONTROL IN jack of this unit to a remote control output jack of your...

Page 19: ...e shape and color Dispose of the batteries correctly in accordance with your local regulations 15 En Getting Started Using the remote control Use the remote control within 6 m approximately 20 ft of this unit and point it toward the remote control sensor You can customize the various settings of this unit using the setup menu If the setting you have selected are not appropriate you can reset all s...

Page 20: ...ic buttons 0 9 to enter the 4 digit language code see Language Codes on page 41 and then press ENTER Getting Started You can customize this unit using the setup menu displayed on the TV screen Unless stated otherwise all operations described here are carried out using the supplied remote control To return to the previous menu press To exit from the menu press SETUP To change settings other than OS...

Page 21: ...discs For MP3 and WMA the search function allows you to search the track currently being played 17 En jl If the prohibited icon 9 appears on the TV screen when a button is pressed the function for that button is not available on the current disc or at the current time Unless stated otherwise all operations described here are carried out using the supplied remote control Depending on the disc some ...

Page 22: ...ont panel display and the selected section repeats continuously 3 To exit from the sequence press A B Disc Operation Repeat playback Repeating chapterltitle disc DVD Video Each time you press REPEAT the display on the TV screen changes as follows C CHAPTER TITLE REPEAT OFF ALL DISC DISC J CHAPTER repeats the current chapter TITLE repeats the current title DISC repeats the entire disc ALL DISC repe...

Page 23: ... Press ENTER Thumbnail pictures appear on the TV screen Example of 6 thumbnails in the display 19 En Shuffle playback except DVDNCD SVCD You can play back tracks in a random order Each time you press SHUFFLE the display on the TV screen changes as follows SHUFFLE DISC SHUFFLE ALL DISC SHUFFLE OFF SHUFFLE DISC shuffles all tracks on the disc currently playing SHUFFLE ALL DISC shuffles tracks from a...

Page 24: ...on and then press ENTER Playback changes to the selected time or to the selected title chapter track Disc Operation 4 Use IiJ to select a chapter track or use the numeric buttons 0 9 to input the selected chapter track number next to SELECT 5 Press SKIP 1 4 I to open the previous or next page 6 Press ENTER to play back the selected chapter track To quit the preview function Use IiJ to highlight EX...

Page 25: ...me in a group Enter hours minutes and seconds from left to right using the numeric buttons 0 9 21 En Selecting the title chapterltrack DVDNCD SVCD 1 Press to select TITLE or CHAPTER OVD or TRACK VCO SVCD 2 Press ENTER 3 Select a title chapter or track number using the numeric buttons 0 9 Searching for a time DVDNCD SVCD 1 Press to select TT TIME CH TIME OVD or TRACK TIME OISC TIME VCD SVCD TT TIME...

Page 26: ...n the TV screen RESUME PLAY appears on the TV screen and the disc is played back from the last point Disc Operation 4 To search for a time in a track Enter hours minutes and seconds from left to right using the numeric buttons 0 9 il If you enter a time outside the total time for the group track currently being played during time search 5 INPUT INVALID is displayed on the TV screen Selecting the t...

Page 27: ... the index menu and play back a disc from the beginning Press MENU to turn off the PBC function 23 En To cancel the resume mode When playback is stopped press STOP again Note For DivX resume playback is not available if the discs were ejected Using the disc menu 1 Press MENU The disc title menu appears on the TV screen Depending on the disc a menu may appear on the TV screen once you load the disc...

Page 28: ... is selected this unit always starts playing the CD layer until this unit is set to the standby mode Disc Operation Changing pages Many DVD Audio discs include slide show and page tum functions You can display infonnation pages for photo galleries artist biographies lyrics etc if these functions are available on the disc Press to move to the previous next page OR Press PAGE repeatedly to move to t...

Page 29: ... the first thumbnail on the current page For JPEG 4 Press MENU to return to the JPEG disc menu 25 En 1 Load a data disc The disc reading time may exceed 30 seconds due to the complexity of the directory file configuration The data disc menu appears on the TV screen 2 Playback starts automatically If not press PLAY 3 Press SKIP 1 11 I to select another track file in the current folder io1il For JPE...

Page 30: ...For information about external subtitle files see Displaying DivX external subtitle files on page 40 Disc Operation Zooming pictures in 1 During playback press ZOOM repeatedly to display the picture at different scales ZOOM 100 125 150 or 200 Use I to pan through the enlarged picture 2 Press ZOOM repeatedly to return to the original size Rotating pictures JPEG During playback press I to rotate the...

Page 31: ... ORIGINAL LIST PLAY LIST 39 PASSWORD CHANGE 39 DIVX SUBTITLE GROUP1 GROUP2 40 DEFAULT RESET 40 27 En Setup Menu The bold items parameters listed below are the default settings Setup page Menu item Setting Item Submenu Setting item Parameter Page GENERAL DVD AUDIO DVD AUDIO MODE DVD VIDEO MODE 28 SETUP PAGE DISC LOCK LOCK UNLOCK 29 PROGRAM FTS FDS 29 OSD LANGUAGE ENGLISH FRANC AIS ESPANOL t p3t 30 ...

Page 32: ...DVD Audio and DVD Video contents Only the DVD Audio content may be played back depending on the disc Setup Menu Setup is carried out via the TV enabling you to customize this unit to suit your own particular requirements Follow the procedures below to start the setup menu operations Cil To return to the previous menu press To exit from the menu press SETUP If the settings you have selected are not...

Page 33: ...ER to remove this track from the program menu For SA CD you can program tracks on the CD layer 29 En DVD VIDEO MODE Select this to play back only the DVD Video content ftli t This setting is only available when the DVD Audio disc is loaded and playback is stopped When a DVD Audio disc is played back in DVD AUDIO MODE the DVD AUDIO indicator lights up When you select DVD VIDEO MODE the DVD AUDIO in...

Page 34: ...0 MINS Select one to set the sleep timer function OFF Select this to cancel the sleep timer function Setup Menu Programming discs You can play back discs in the desired order by programming the discs to be played You can store up to 5 discs 1 Select PROGRAM in GENERAL SETUP PAGE 2 Press to select FDS and then press ENTER The input menu appears on the TV screen To input your favorite discs 3 Use th...

Page 35: ...et to OFF see pages 33 Dolby Pro Logic II is not available for signals output at the HOMI jack 31 En Turning the auto standby function on off This function is used to turn on or off the auto standby function Select AUTO STANDBY in GENERAL SETUP PAGE ON Select this to set this unit to the standby mode automatically when disc playback is stopped for more than 30 minutes or when the disc menu is disp...

Page 36: ...tings Select SPEAKER SETUP in AUDIO SETUP PAGE ON Select this to enable to set SPEAKERS see pages 33 Setup Menu Setting the digital output You can set the digital output and LPCM output Select DIGITAL AUDIO in AUDIO SETUP PAGE DIGITAL OUTPUT Set the digital output according to your optional audio component connections OFF Select this to tum off the digital output ALL Select this if you have connec...

Page 37: ...original Even when you select 176 4kHz X4 the digital output signals are upsampled to 88 2 kHz 33 En OFF Select this to disable to set SPEAKERS In this setting SPEAKERS is automatically set to the following options FRONT SPEAKER CENTER SPEAKER SURROUND SP LARGE SUBWOOFER ON SPEAKERS VOLUME OdB SPEAKERS DELAY 0 MS Setting the speaker channels You can set the sizes volume levels and delay times for ...

Page 38: ...OGRESSIVE is set to ON see pages 38 composite video S video output depends on the format of the disc Setup Menu Turning the night mode on off In the night mode high volume output is softened and low volume output is brought upward to an audible level It is useful when you want to watch your favorite action movie without disturbing others at night Select NIGHT MODE in AUDIO SETUP PAGE ON Select thi...

Page 39: ... the closed caption function f eftJ This function is available for interlaced video format only 35 En TVdisplay Setting the TV display Set the aspect ratio of this unit to match your TV The format you select must be available on the disc Otherwise the TV display setting will not affect the picture during playback Select TV DISPLAY in VIDEO SETUP PAGE 4 3 PAN SCAN Select this if the aspect ratio of...

Page 40: ... yield a perfectly clear picture This function is not available for HOMI output Control range 3 to 3 Setup Menu Adjusting the picture settings This unit comes with three predefined sets of picture color settings and one personal setting that you can define yourself Select PICTURE SETTING in VIDEO SETUP PAGE STANDARD Select this for the standard picture setting BRIGHT Select this to make the TV pic...

Page 41: ...not distinct STANDARD Select this if you cannot see the correct image when you select ENHANCED 37 En WIDE SCREEN FORMAT Set the aspect ratio of the projected images on the screen This function is only available for progressive scan and HDMI output NLSTRETCH Select this to display a 4 3 image on the 16 9 screen with non linear stretching center position of screen is stretched less than the sides 4 ...

Page 42: ...DVD discs that are rated the level you selected do not play unless you enter your six digit password Setup Menu Turning the progressive scan function on off This feature is only available if you have connected this unit to a progressive scan TV through the component video jacks see Component video jacks C on page 11 Select PROGRESSIVE in VIDEO SETUP PAGE OFF Select this to disable the progressive ...

Page 43: ... in PREFERENCE PAGE 2 Press to select CHANGE and then press ENTER Password change page appears 39 En Notejt VCO SVCO co and SA CD discs have no level indication so the parental control function has no effect with these types of discs This also applies to most illegal OVO discs Some OVO discs are not encoded with a rating though the movie rating may be printed on the disc cover The rating level fea...

Page 44: ... 2 Press to select RESET and then press ENTER All settings are reset to the initial factory settings Setup Menu 3 Use the numeric buttons 0 9 to enter your old six digit password When doing this for the first time enter 000 000 If you forget your old six digit password enter 000 000 4 Enter the new six digit password 5 Enter the new six digit password again to confirm the password 6 Press ENTER to...

Page 45: ...moan 8377 French 7082 Lithuanian 7684 Sango 8371 Frisian 7089 Luxembourgish 7666 Sanskrit 8365 41 En Language Codes These codes can be used to select other languages This does not affect the options in AUDIO SUBTITLE or DISC MENU Abkhazian 6566 Gaelic 7168 Macedonian 7775 Sardinian 8367 Afar 6565 Gallegan 7176 Malagasy 7771 Scottish Gaelic 7168 Afrikaans 6570 Georgian 7565 Malay 7783 Serbian 8382 ...

Page 46: ...l speaker settings in the setup menu have been changed to during stereo small instead of large 42 En Troubleshooting Refer to the chart below when this unit does not function properly If the problem you are experiencing is not listed below or if the instruction below does not help set this unit to the standby mode disconnect the power cable and contact the nearest authorized Yamaha dealer or servi...

Page 47: ...ected No sound during DivX Bl movie The audio codec may not be supported by this unit playback 43 En Troubleshooting Problem Solution No audio at digital output Check the digital connections If you are playing a DTS source check that your receiver can decode DTS and that DIGITAL OUTPUT is set to ALL see page 32 If you are playing an MPEG 2 source check that your receiver can decode MPEG 2 Otherwis...

Page 48: ...y navigate between various scenes or bonus features and select from audio track and subtitle options Glossary Analog Sound that has not been converted into numerical values Analog sound varies while digital sound has specific numerical values These jacks send audio through two channels the left and right Aspect ratio The ratio of vertical and horizontal sizes of a displayed image The horizontal vs...

Page 49: ...ording format A format which enables you to create a DVD disc that can be extensively re edited 45 En JPEG A very common digital stiIl picture format A stiIl picture data compression system proposed by the Joint Photographic Expert Group which features smaIl decrease in image quality in spite of its high compression ratio MP3 A file format with a sound data compression system MP3 is the abbreviati...

Page 50: ... Standby power consumption Less than 0 5 W Specifications are subject to change without prior notice Specifications PLAYABLE DISC FORMATS DVD Video DVD Audio DVD R DVD RW DVD R DVD RW DVD R DL Video CD SVCD SA CD multi channel and SA CD stereo CD PICTURECD CD R CD RW MP3 ISO 9660 fs 16 22 05 24 32 44 1 48 kHz 96 128 256 kbps CBR only WMA fs 44 1 kHz 62 192 kbps CBR only fs 48 kHz 128 192 kbps CBR ...

Page 51: ...RA FROLUNDA SWEDEN YAMAHA MUSIC AUSTRALIA PTY LTD 17 33 MARKET ST SOUTH MELBOURNE 3205 VIC AUSTRALIA _YAMAHA 2007 YAMPJ lA CORPORATION All rights reserved YAMAHA CORPORATION Printed in China C 313924527382 YAMAHA ELECTRONICS CORPORATION USA 6660 ORANGETHORPE AVE BUENA PARK CALIF 90620 U S A YAMAHA CANADA MUSIC LTD 135 MILNER AVE SCARBOROUGH ONTARIO MIS 3Rl CANADA YAMAHA ELECTRONIK EUROPA G m b H S...

Page 52: ...ur warranty rights in any way Product registration applies to USA customers only 313924604121 WF13680 YAMAHA Registering Your New Yamaha Product is Fast and Easy Thank you for purchasing a new product from Yamaha Electronics We d like to continue providing you with high quality products and better service So we ve made it simple to register your new product purchase online Please take a few minute...

Page 53: ...NTY GIVES YOU SPECIFIC LEGAL RIGHTS AND YOU MAY ALSO HAVE OTHER RIGHTS WHICH VARY FROM STATE TO STATE YAMAHA HOME AUDIO PRODUCTS LIMITED WARRANTY II FQR USA CUSTOMERSQNLY JI SERVICE DEPARTMENT YAMAHA Electronics Corporation USA 6660 Orangethorpe Avenue Buena Park California 90620 1345 Telephone 714 522 9105 Internet URL http www yamaha com yec To obtain warranty service for your YAMAHA DVD player ...

Page 54: ...ES YOU SPECIFIC LEGAL RIGHTS AND YOU MAY ALSO HAVE OTHER RIGHTS WHICH VARY FROM PROVINCE TO PROVINCE YAMAHA HOME AUDIO PRODUCTS LIMITED WARRANTY TQiI RS O I V6 SERVICE DEPARTMENT YAMAHA Canada Music ltd 135 Milner Avenue Scarborough Ontario M1S 3R1 Telephone 416 298 1311 Internet URL http lLwwwyamaha cal For the location of other service centres contact any Yamaha Audio Dealer in Canada or contact...

Page 55: ...DECOU LANT DE LA LOI ET VOUS POURRIEZ AUSSI AVOIR D AUTRES DROITS QUI VARIENT D UNE PROVINCE AL AUTRE YAMAHA GARANTIE L1MITEE DES PRODUITS AUDIO DOMESTIQUES II POUR CLIENTS CANADIENS SeUI EMet T II SERVICE APRES VENTE YAMAHA Canada Musique Itee 135 avenue Milner Scarborough Ontario M1 S 3R1 Telephone 416 298 1311 Adresse Web http www yamaha caJ Pour les autres centres de service veuillez contacter...

Page 56: ...313924604131 WF12960 1 Printed in China 313924604131 WF12960 1 Printed in China ...

Reviews: