6-19
E
LOWR
SHIMMING (FOR USA AND CANADA)
SHIMMING
NOTE:
●
There is no need to select shims when
reassembling with the original case and
inner parts.
●
Shim calculations are required when reas-
sembling with the original inner parts and
a new case (the difference between the
original inner parts and the new case).
●
Measurements and adjustments are
required when replacing any inner parts.
SHIM SELECTION
(FOR USA AND CANADA)
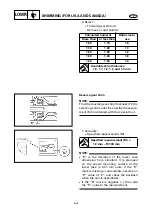
Pinion gear shim
NOTE:
Find the pinion gear shim thickness (T3) by
selecting shims until the specified measure-
ment (M) is obtained with the special tool.
1. Calculate:
●
Specified measurement (M)
NOTE:
●
“P” is the deviation of the lower case
dimension from standard. It is stamped
on the anode mounting surface of the
lower case in 0.01 mm units. If the “P”
mark is missing or unreadable, assume a
“P” value of “0”, and check the backlash
when the unit is assembled.
●
If the “P” mark is negative (–), then sub-
tract the “P” value from the measure-
ment.
Example:
If “P” is “+5”, then:
M = 0.5 + (+5)/100 mm
= 0.5 + 0.05 mm
= 0.55 mm (0.022 in)
If “P” is “–3”, then:
M = 0.5 + (–3)/100 mm
= 0.5 – 0.03 mm
= 0.47 mm (0.019 in)
Specified measurement (M) =
0.5 mm + P/100 mm
Summary of Contents for F25A
Page 422: ...E TRBL ANLS CHAPTER 9 TROUBLE ANALYSIS TROUBLE ANALYSIS 9 1 TROUBLE ANALYSIS CHART 9 1 ...
Page 442: ......
Page 443: ......


