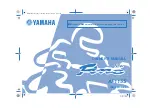
background image

DIC183

Read this manual carefully before operating this vehicle.

EAU10023

20B-F8199-E2

AF115S

OWNER’S MANUAL

20BF8199E2.book  Page 1  Monday, February 28, 2011  10:46 AM

Summary of Contents for Fino

Page 1: ...DIC183 Read this manual carefully before operating this vehicle EAU10023 20B F8199 E2 AF115S OWNER S MANUAL 20BF8199E2 book Page 1 Monday February 28 2011 10 46 AM...

Page 2: ...Read this manual carefully before operating this vehicle This manual should stay with this vehicle if it is sold EAU46090 20BF8199E2 book Page 1 Monday February 28 2011 10 46 AM...

Page 3: ...n the many tips given in this manual will help keep your motorcycle in the best possible condition If you have any further questions do not hesitate to contact your Yamaha dealer The Yamaha team wishe...

Page 4: ...safety messages that follow this symbol to avoid possible injury or death A WARNING indicates a hazardous situation which if not avoided could result in death or serious injury A NOTICE indicates spec...

Page 5: ...y Thai Yamaha Motor Co Ltd 1st edition February 2011 All rights reserved Any reprinting or unauthorized use without the written permission of Thai Yamaha Motor Co Ltd is expressly prohibited Printed i...

Page 6: ...Periodic maintenance chart for the emission control system 7 2 General maintenance and lubrication chart 7 3 Removing and installing cowlings and panels 7 6 Checking the spark plug 7 8 Engine oil and...

Page 7: ...ing the tail brake light bulb or a rear turn signal light bulb 7 30 Troubleshooting 7 31 Troubleshooting chart 7 33 MOTORCYCLE CARE AND STORAGE 8 1 Care 8 1 Storage 8 3 SPECIFICATIONS 9 1 CONSUMER INF...

Page 8: ...ontain important information for safe and proper operation of your vehicle Never remove any labels from your vehicle If a label becomes difficult to read or comes off a replacement label is available...

Page 9: ...ch 3 Start the engine by pushing the start switch Do not pushing Do not pushing one atttempt one atttempt 5 After finished warming the engine turn the starter choke 5 After finished warming the engine...

Page 10: ...cle is designed to carry the operator and a passen ger TIP Although this motorcycle is designed to carry a passenger always comply with the local regulations The failure of motorists to detect and rec...

Page 11: ...It is not suitable for off road use Protective Apparel The majority of fatalities from motorcy cle accidents are the result of head in juries The use of a safety helmet is the single most critical fac...

Page 12: ...with the information about accessories below are some general guidelines to follow if loading cargo to your motorcycle The total weight of the operator passenger accessories and cargo must not exceed...

Page 13: ...vehicle Keep the following guidelines in mind as well as those provided under Load ing when mounting accessories Never install accessories or carry cargo that would impair the perfor mance of your mo...

Page 14: ...nted handlebars or turn signals or parts that could break Choose the lo cation for the straps carefully so the straps will not rub against painted surfaces during transport The suspension should be co...

Page 15: ...n accident The majority of fatalities from motorcycle or scooter accidents are the result of head injuries The use of a safety helmet is the single most critical factor in the pre vention or reduction...

Page 16: ...r usage Half type use only for riding at low speeds Full type use only for riding at low to mid range speeds Full face type use for riding at mid range to high speeds ZAUU0004 ZAUU0005 ZAUU0006 20BF81...

Page 17: ...4 Throttle stop screw page 7 16 5 Owner s tool kit page 7 1 6 Seat lock page 4 9 7 Rear turn signal lights page 7 30 8 Tail brake light page 7 30 9 Kickstarter page 4 8 10 Engine oil drain bolt A pag...

Page 18: ...ge 4 5 2 Air filter element page 7 13 3 Dry battery page 7 26 4 Fuse page 7 28 5 Helmet holder page 4 9 6 Front brake fluid reservoir page 7 21 7 Engine oil filler cap page 7 10 7 1 2 3 4 5 6 ZAUU0746...

Page 19: ...lever page 4 8 3 Left handlebar switches page 4 4 4 Fuel gauge page 4 4 5 Speedometer unit page 4 3 6 Right handlebar switches page 4 4 7 Throttle grip page 7 17 8 Front brake lever page 4 5 9 Main sw...

Page 20: ...mati cally when the engine is started _ EAU10661 OFF All electrical systems are off The key can be removed EWA10061 WARNING _ Never turn the key to OFF or LOCK while the vehicle is moving Otherwise th...

Page 21: ...ad into the keyhole cover receptacle as shown and then turn the key to the left to open the cov er To close the keyhole cover Insert the key head into the keyhole cover receptacle as shown and then tu...

Page 22: ...e on for a few seconds and then go off If the warning light does not come on initially when the key is turned to ON or if the warning light remains on have a Yamaha dealer check the electrical circuit...

Page 23: ...ignal a right hand turn push this switch to To signal a left hand turn push this switch to When re leased the switch returns to the center position To cancel the turn signal lights push the switch in...

Page 24: ...r The rear brake lever is located on the left handlebar grip To apply the rear brake pull this lever toward the handle bar grip EAU37471 Fuel tank cap To remove the fuel tank cap 1 Open the seat See p...

Page 25: ...sparks open flames or other sources of ignition such as the pilot lights of water heaters and clothes dryers 2 Do not overfill the fuel tank Stop filling when the fuel reaches the bottom of the filler...

Page 26: ...ohol may cause engine trouble depending on the engine If gasohol is used and engine trouble occurs contact your Yamaha dealer as soon as possible _ EAU13445 Catalytic converters This vehicle is equipp...

Page 27: ...the lever in direction a to turn on the starter choke Move the lever in direction b to turn off the starter choke EAU37650 Kickstarter If the engine fails to start by pushing the start switch try to...

Page 28: ...ocated under the seat To secure a helmet to a helmet holder 1 Open the seat See page 4 9 2 Attach a helmet to a helmet hold er and then securely close the seat WARNING Never ride with a helmet attache...

Page 29: ...mmable items inside it To avoid humidity from spread ing through the storage com partment wrap wet articles in a plastic bag before storing them in the compartment Since the storage compartment may ge...

Page 30: ...ing this vehicle check the following points ITEM CHECKS PAGE Fuel Check fuel level in fuel tank Refuel if necessary Check fuel line for leakage 4 6 Engine oil Check oil level in engine If necessary ad...

Page 31: ...damage Check tire condition and tread depth Check air pressure Correct if necessary 7 18 7 19 Brake levers Make sure that operation is smooth Lubricate lever pivoting points if necessary 7 23 Centerst...

Page 32: ...ve hicle for the first time _ 1 Turn the key to ON 2 Turn on the starter choke and completely close the throttle grip See page 4 8 3 Start the engine by pushing the start switch while applying the fro...

Page 33: ...r with your right hand push the scooter off the centerstand 2 Sit astride the seat and then ad just the rear view mirrors 3 Switch the turn signals on 4 Check for oncoming traffic and then slowly turn...

Page 34: ...more difficult Ride slowly down a hill as brak ing downhill can be very diffi cult _ 1 Close the throttle completely 2 Apply both front and rear brakes simultaneously while gradually in creasing the p...

Page 35: ...ation above 1 2 throttle Rev the engine freely through the gears but do not use full throttle at any time 500 1000 km 300 600 mi Avoid prolonged operation above 3 4 throttle 1000 km 600 mi and beyond...

Page 36: ...OTENTIAL OF YAMAHA MOTORCYCLES 2 A MOTORCYCLE CAN KEEP ITS PERFORMANCE CAPABILITY FOR A LONGER TIME Comparison of wear on engine parts piston piston ring cylinder etc 100 Perfect operative condition W...

Page 37: ...HEN IT IS TRADED IN AS A USED PRODUCT Fuel consumption 100 Without maintenance Distance covered km With maintenance Customer s running cost fuel cost plus maintenance and repair expenses Without maint...

Page 38: ...performing maintenance unless otherwise specified A running engine has moving parts that can catch on body parts or clothing and electrical parts that can cause shocks or fires Running the engine whi...

Page 39: ...em NO ITEM CHECK OR MAINTENANCE JOB ODOMETER READING km ANNUAL CHECK 1000 or 2 months 4000 or 6 months 8000 or 10 months 12000 or 14 months 16000 or 18 months 1 Fuel line Check fuel and vacuum hoses f...

Page 40: ...and vehicle for fluid leakage Replace brake pads Whenever worn to the limit 6 Rear brake Check operation and adjust brake lever free play Replace brake shoes Whenever worn to the limit 7 Brake hose Ch...

Page 41: ...age Every 4000 km 2400 mi 18 Engine oil strainer Clean 19 Final transmission oil Check vehicle for oil leakage Every 8000 km 5000 mi Replace Every 12000 km 7500 mi 20 V belt Check for damage and wear...

Page 42: ...should be checked at the initial 8000 km 5000 mi and every 4000 km 2500 mi thereafter Replace the V belt if any damage or excessive wear is found The V belt needs to be replaced every 25000 km 16000 m...

Page 43: ...e seat See page 4 9 2 Remove the screws and then pull the panel off as shown To install the panel Place the panel in the original position and then install the screws EAU19281 Panel B To remove the pa...

Page 44: ...ce the panel in the original po sition and then install the screws 2 Place the grab bar in the original position and then install the bolts EAUU0272 Cowling A To remove the cowling 1 Remove the screws...

Page 45: ...Checking the spark plug The spark plug is an important engine component which is easy to check Since heat and deposits will cause any spark plug to slowly erode the spark plug should be removed and c...

Page 46: ...asure the spark plug gap with a wire thickness gauge and if nec essary adjust the gap to specifica tion 2 Clean the surface of the spark plug gasket and its mating sur face and then wipe off any grime...

Page 47: ...t again to check the oil level EWAU0030 WARNING _ The muffler and muffler protector become very hot during use To avoid possible burns let the muffler and protector cool before removing the oil filler...

Page 48: ...gine oil strainer com pression spring O ring and engine oil drain bolt and then tighten the drain bolt to the specified torque TIP _ Make sure that the O ring is properly seated _ 7 Refill with the sp...

Page 49: ...ore each ride If any leakage is found have a Yamaha dealer check and repair the scooter In addition the final transmis sion oil must be changed as follows at the intervals specified in the periodic ma...

Page 50: ...tion chart Service the air fil ter elements more frequently if you are riding in unusually wet or dusty areas Replacing the air filter element 1 Place the vehicle on the center stand 2 Remove the air...

Page 51: ...10431 NOTICE To avoid damaging the air filter element handle it gently and carefully and do not twist it ECA10521 TIP _ The element should be wet but not dripping _ 8 Install the element into the filt...

Page 52: ...ase of overturn If the check hose or caps are clogged have a Yamaha dealer service the vehicle _ EAU21280 Adjusting the carburetor The carburetor is an important part of the engine and requires very s...

Page 53: ...nd if necessary adjust it to spec ification as follows 5 Remove the rubber cap and insert a Phillips screwdriver into the throttle stop screw hole 6 To increase the engine idling speed turn the screw...

Page 54: ...grip free play turn the throttle grip free play adjusting nut in direction a To decrease the throttle grip free play turn the adjusting nut in direction b 3 Tighten the locknut EAU21401 Valve clearan...

Page 55: ...ING _ Never overload your vehicle Opera tion of an overloaded vehicle could cause an accident _ Tire inspection The tires must be checked before each ride If the tire shows crosswise lines B minimum t...

Page 56: ...fter changing a tire since the tire surface must first be broken in for it to develop its optimal characteristics _ EAU21943 Spoke wheels EWA10610 WARNING _ The wheels on this model are not de signed...

Page 57: ...ay re sult in loss of control and an acci dent _ EAU22170 Adjusting the rear brake lever free play The brake lever free play should mea sure 10 0 20 0 mm 0 39 0 79 in as shown Periodically check the b...

Page 58: ...the brake shoe wear check the position of the wear indicator while applying the brake If a brake shoe has worn to the point that the wear indicator reaches the wear limit line have a Yamaha dealer rep...

Page 59: ...d level to gradually go down However if the brake fluid level goes down sud denly have a Yamaha dealer check the cause EAU22721 Changing the brake fluid Have a Yamaha dealer change the brake fluid at...

Page 60: ...and cable The operation of the throttle grip should be checked before each ride In addi tion the cable should be lubricated by a Yamaha dealer at the intervals spec ified in the periodic maintenance...

Page 61: ...ivots and metal to metal contact surfaces should be lubri cated if necessary EWA10741 WARNING _ If the centerstand or sidestand does not move up and down smoothly have a Yamaha dealer check or re pair...

Page 62: ...ke push down hard on the handlebars several times to check if the front fork compresses and rebounds smoothly ECA10590 NOTICE _ If any damage is found or the front fork does not operate smoothly have...

Page 63: ...l does not turn smoothly have a Yamaha dealer check the wheel bearings EAUU0921 Battery This model is equipped with a VRLA Valve Regulated Lead Acid battery There is no need to check the electro lyte...

Page 64: ...stant voltage battery charger is re quired Using a conventional battery charger will damage the battery _ To store the battery 1 If the vehicle will not be used for more than one month remove the bat...

Page 65: ...to check if the devices operate 4 If the fuse immediately blows again have a Yamaha dealer check the electrical system EAUU0930 Replacing a headlight bulb If a headlight bulb burns out replace it as...

Page 66: ...adlight lighting _ 4 Install the cowling 5 Have a Yamaha dealer adjust the headlight beam if necessary EAUU0940 Replacing a front turn signal light bulb or an auxiliary light bulb If a front turn sign...

Page 67: ...panel removing and installing procedures 3 Remove the tail brake light bulb socket by turning it counterclock wise 4 Remove the burnt out bulb from the socket by pushing it in and turning it counterc...

Page 68: ...Yamaha motorcycles receive a thorough inspection before shipment from the factory trouble may occur dur ing operation Any problem in the fuel compression or ignition systems for example can cause poo...

Page 69: ...ystem do not smoke and make sure there are no open flames or sparks in the ar ea including pilot lights from water heaters or furnaces Gasoline or gasoline vapors can ignite or ex plode causing severe...

Page 70: ...ug and check the electrodes 3 Ignition Wipe off with a dry cloth and correct the spark plug gap or replace the spark plug Have a Yamaha dealer check the vehicle The engine does not start Have a Yamaha...

Page 71: ...wheels If such products are used on hard to remove dirt do not leave the cleaner on the af fected area any longer than in structed Also thoroughly rinse the area off with water immedi ately dry it an...

Page 72: ...Do not use warm wa ter since it increases the corro sive action of the salt ECA10791 2 Apply a corrosion protection spray on all metal including chrome and nickel plated surfaces to pre vent corrosio...

Page 73: ...it with a tarp while it is still wet will allow water and humidity to seep in and cause rust To prevent corrosion avoid damp cellars stables because of the presence of ammonia and areas where strong...

Page 74: ...nd then lift the scooter so that both of its wheels are off the ground Alterna tively turn the wheels a little every month in order to prevent the tires from becoming degraded in one spot 7 Cover the...

Page 75: ...0 80 L 0 85 US qt 0 70 Imp qt Final transmission oil Type YAMALUBE 4 or SAE 10W 40 SE type motor oil Quantity periodic oil change 0 10 L 0 11 US qt 0 09 Imp qt Air filter Air filter element Oil coate...

Page 76: ...el travel 90 0 mm 3 54 in Rear suspension Type Unit swing Spring shock absorber type Coil spring Oil damper Wheel travel 80 0 mm 3 15 in Electrical system Ignition system DC C D I Charging system AC m...

Page 77: ...MBER EAU26410 Vehicle identification number The vehicle identification number is stamped into the frame TIP _ The vehicle identification number is used to identify your motorcycle and may be used to r...

Page 78: ...20BF8199E2 book Page 1 Monday February 28 2011 10 46 AM...

Page 79: ...20BF8199E2 book Page 2 Monday February 28 2011 10 46 AM...

Page 80: ...PRINTED IN THAILAND 20BF8199E2 book Page 1 Monday February 28 2011 10 46 AM...

Reviews: